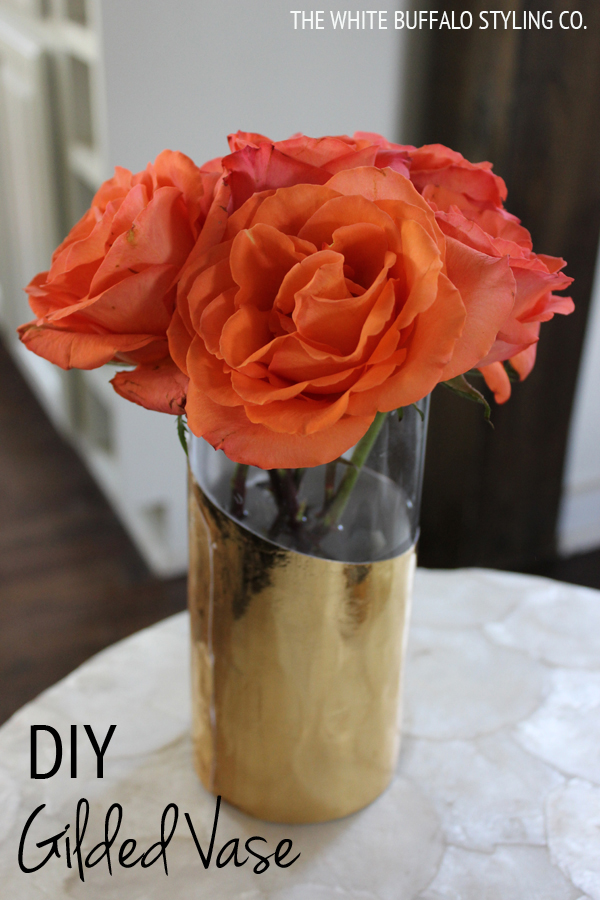
Hi y’all! It’s Lindsay from The White Buffalo Styling Co. again! I am so excited to be back sharing an easy DIY to update any vase you have. If you have five minutes and $3, you can do this project!
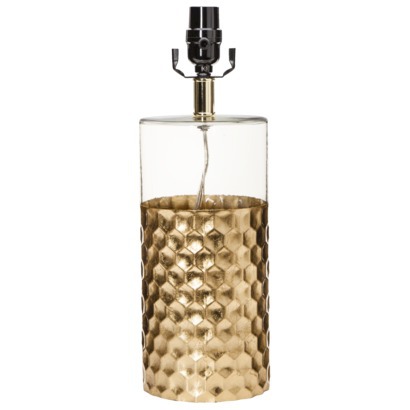
I love all things gold, gilded, and brass. Target has been killing this trend lately.
{via}
I fell in love with this lamp. I loved the mix of the clear with the hammered gold.
Recently, a dear friend gave me some beautiful flowers and I grabbed that standard clear vase we all have in our cabinet.

I stuffed my roses in it and even though the flowers are beautiful, I thought the vase was a little lack-luster. It needed something. And then it hit me…it needed some gilding! I immediately thought of the lamp above and inspiration struck.
Here’s what you’ll need:
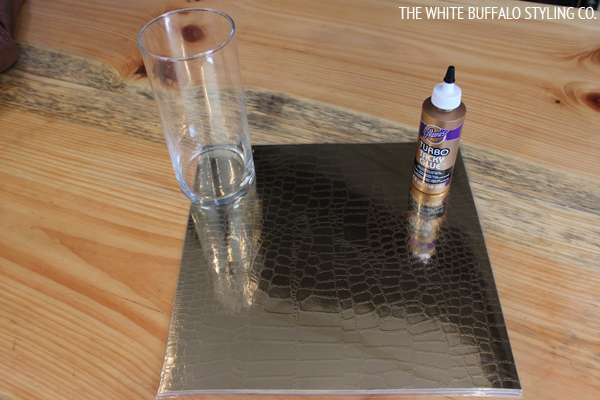
Materials:
Clear vase
Scrapbook Paper
Tacky Glue
Depending on the scrapbook paper that you choose, this project should cost you around $3 for the glue and paper.
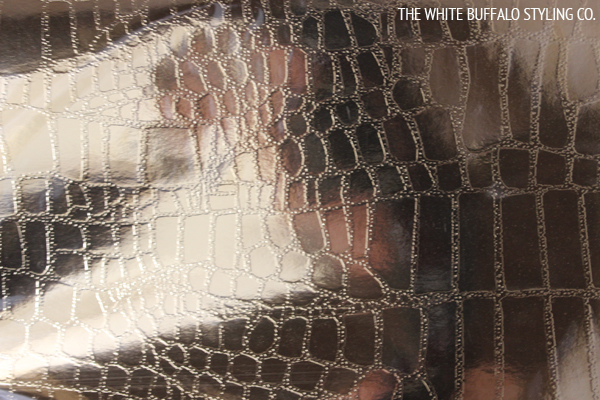
I love this gold snakeskin scrapbook paper from Michael’s. It has so much sheen to it in person.
Step 1 – Wrap the scrapbook paper around the vase and decide how high up the vase you want the paper to go.
I loved how the inspiration lamp has clear and gold, so I left several inches.
Step 2 – Open up the paper and mark where the vase ends.
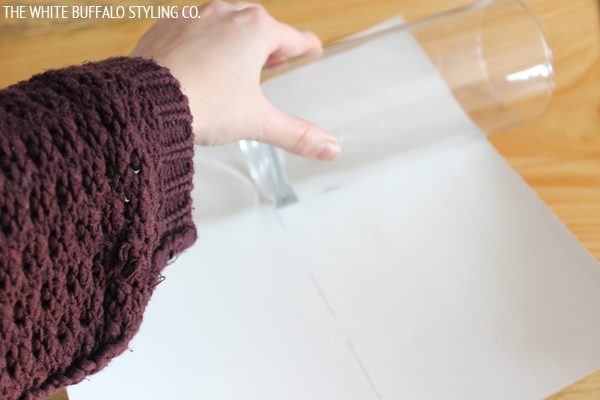
Roll the vase and mark the line to cut by.
Step 3 – Cut on the line.
Step 4 – I wanted my gold to be asymmetrical. I thought it added an artsy touch.
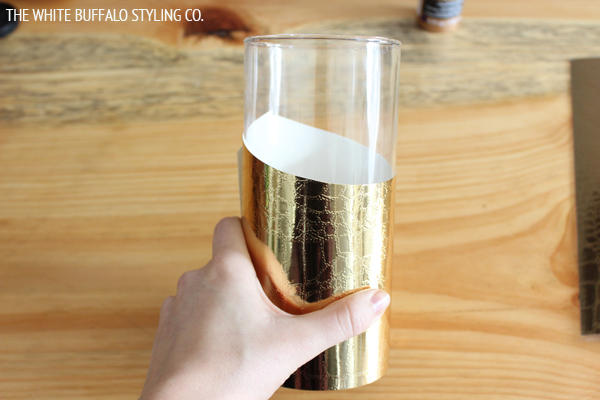
So, after cutting the strip to the right size, I cut an arc from one end to the other so that when I wrapped it around the vase, it would be asymmetrical.
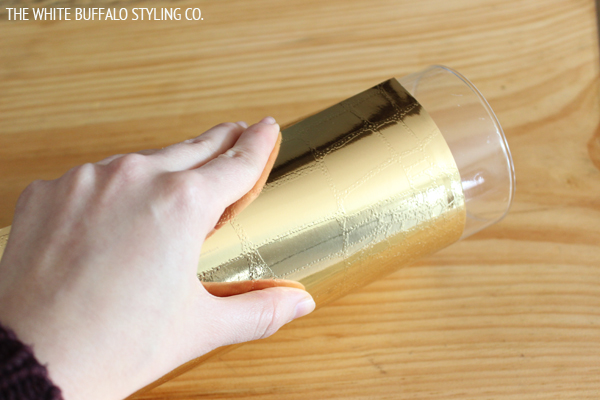
Step 5 – Unroll the paper and line the edges with tacky glue. Fill in the middle with some as well.
Step 6 – Carefully lay your vase down in the center of the scrapbook paper, making sure that the bottom of each line up. Then, take each end and wrap it around the vase making sure that the edges all line up before the glue sets.
Step 7 – Wrap your hands around the vase and hold the paper in place for a minute while the glue sets.
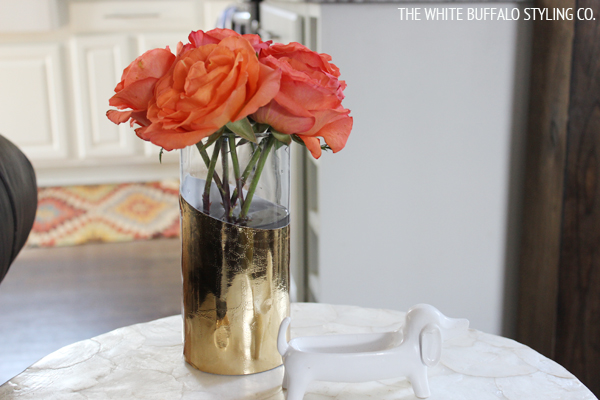
Then, add some flowers and you’re ready to go!
I love how five minutes, a little scrapbook paper, and some tacky glue totally transformed this blah, clear vase into a beautiful DIY gilded vase.


Now, I just need to keep some live flowers in the house to make use of it!
Hint: Tacky glue dries clear, but if you see any places where it ran past your paper, a wet paper towel gets rid of it really easily and doesn’t affect the paper.
Thanks for having me, Lindsay!
I love the use of paper, it’s even easier than painting on a color. And gold snakeskin, mmmm, yes 🙂
Thanks for having me, Lindsay!!! Loved sharing this super easy project 🙂
Lindsay, we were on the same page! I has some leftover scrapbook paper from my DIY Mondrian art and I used it on a vase. So, of course I love this 🙂 xo K
What a terrific post! I spend a couple of moments on reading, and I’m so excited by the information I received, by the manner of
writing it reminded me this webpage https://officialmorganparker.com/. It’s actually hard
to find something valuable on that topic. But this author seems to be a genuine professional because
there is a unique style in his writings. I will subscribe to his new publications, just not to skip anything.
This post worths its reading.
This post seem really wonderful.