I know it’s been a little quiet around here lately as far as my projects are concerned. I have been working diligently on decorating my soon-to-be daughter’s nursery. I must stay that it is coming along beautifully.
And, I’m going to be a tease and not reveal it to you until it is entirely completed. I’m such a big ‘ole meanie.
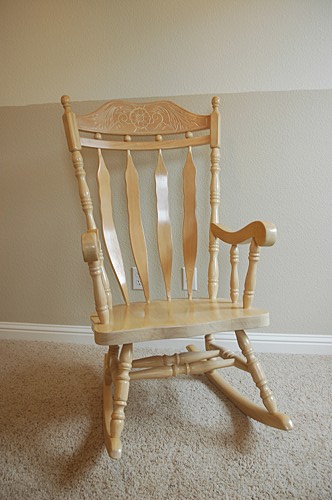
There are, however, a few projects here and there that I want to share with you. One such project is the comfy-fying of my wooden rocking chair. We bought this chair off of CraigsList back before my son, Zack, was born. At the time, I just put a blue rocking chair pad on it and called it a day. It was never soft enough to ease the burden of 3 am feedings on my sore body, so this time I vowed it would be different.
I decided to add some foam cushioning and a slipcover to this old chair. I could have just gotten another chair for Emma’s nursery, but this was the chair I rocked Zack in, so this will be the chair I will rock her in. I’m very sentimental in that way.
Because this tutorial is a bit lengthy, I have divided it into two parts.
Adding Comfort to a Wooding Rocking Chair – Part One: Adding Padding
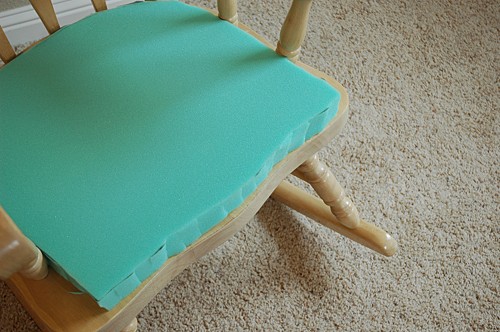
I began with a 2 1/2 yard sheet of 2 inch foam from the fabric store. Using a large sheet of craft paper (a sheet of newspaper would work, too), I traced the outline of the chair’s seat. I then used that as a pattern to cut the foam padding for the seat. The foam is squishy enough that I was able to cut it with my scissors. Remember, it doesn’t have to be perfect, since I will be slipcovering the chair.
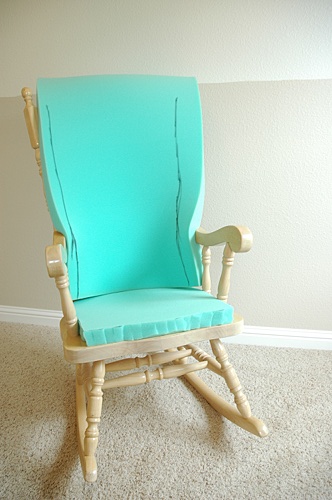
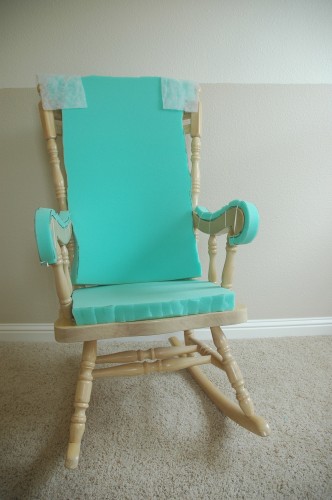
Then, I shoved the remaining of the foam into the back of the chair so that I could measure it for the back cushion. Using a marker, I drew lines roughly along the edges.
I trimmed the foam on the lines. Then, I turned the chair around and marked the height of the foam on the back. I wanted my foam to be a little higher than the actual back of the chair. I marked that the same way I did on the sides of the foam.
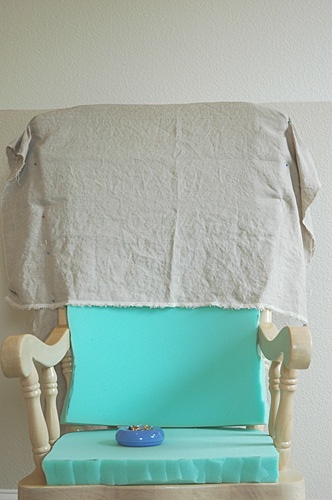
I cut the top part of the foam in an arch so that it was similar to the natural line of the chair. Once it was cut, I draped it in some fabric to see how it would look once it was slipcovered.
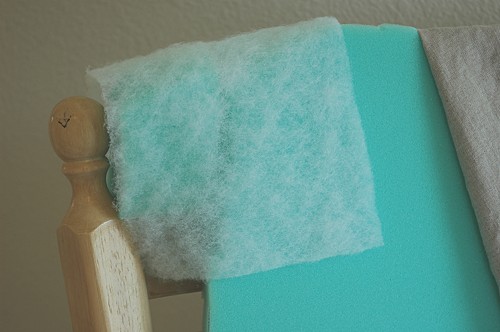
I decided I wanted to round the arch a little bit, so I cut a view wedges of foam to add to the arch and covered those pieces in batting. Why? I don’t know. I just thought it was a smart thing to do to help keep the little wedges in place. Heh.
Then, it was time to move on to the arms. I cut a length of foam long enough to cover the arms, and then I cut that piece in half lengthwise, making it only about an inch thick instead of 2 inches. To hold it in place, I tied little bits of ribbon around the foam and the arm.
Hilarious, huh? Well, it works. 🙂
I finally had a comfy rocking chair. Just adding 2 inches of foam made all the difference in the way this chair feels.
It’s not pretty right now, but we’ll fix that next week with a custom slipcover. I’m looking forward to showing you the finished project!


Wow! I’m def. coming back to see it all finished. Love the side tables,too! Lezlee
Just bought a new rocking chair but it is ‘hard’ and your idea is amazing and helpful. Need to look for a happy cotton fabric for a Caribbean veranda. Thank You.
It is the same rocking chair I recently bought.
What is the name brand and year off this chair I am currently redoing one thanks
Crazy!!! i have this exact rocking chair in my living room!! what are the odds?
Can’t wait to see how it turns out! Looks like it’ll be a lot more comfy, that’s for sure. 🙂
You’re such a tease… 😉 I can’t wait to see the finished product!
You are such a smarty…can’t wait to see it all done!
That is a great idea with the arms — ha ha!
Oh, and I love the name Emma. Can’t wait to see her lovely room!!!
Love it! You cracked me up with the batting and the ribbon – but hey – if it works, it works!! Can’t wait to see the finished project!
Awesome! What a great way to repurpose a sentimental piece.
I would never have thought of that! Can’t wait to see the finished product!!
I have this same chair in a darker wood in my living room. I can’t wait to see the finished project! I may just have to try this!
My rocking chair better watch its back… I am coming after it once I see your finished project!
I can’t wait to see the finished product! I have a rocking chair that I adore but is a bit hard on the bum!
I’m excited to see the end result!
Can’t wait to see the finished project! What a great idea!
CAN’T WAIT TO SEE IT! Emma is one lucky girl!
So it’s been two years…. did you finish the chair? I hope so, because I want to add padding to the arms of a rocking chair that I’m hoping to purchase soon from a resale shop, but want to see if it worked for you first!
Hi Terri-
Here’s Part II: http://livingwithlindsay.com/2010/04/adding-comfort-to-a-wooden-rocking-chair-%E2%80%93-part-two.html
Here is the updated link for the second half.
http://makelyhome.com/adding-comfort-to-a-wooden-rocking-chair-part-two/
Love this idea. Might try this with my rocking chair
My dog chewed the arm on my new wooden rocker. Have a lovely chair pad so want to somehow cover the arms to match. Any ideas
Waoo!!! It would be nice for new generation to have these at home. Thanks for sharing.
Hello
Waoo!!! what a great idea. Thanks for sharing such informative information. I love your article.
Sunshine is one of the best IELTS Institutes in Bathinda, providing individuals with tutoring to help them pass their IELTS exam with a decent Band score.
Welcome to https://deltaguncenter.com online store trading company. Based on our many years in the market, we have become one of the most successful online retailers selling over-the-counter firearms, ammunition, accessories and defense equipment.
Thank you for sharing this information