When our 3 1/2 year old decided that he didn’t need to take a nap any more, the evenings in our house got considerably harder. Just about the time my husband got home from work, Zack took a trip to Meltdown City. It was all we could do to eat dinner as a family and get Zack bathed and in bed without multiple timeouts. Needless to say, we were all jonesing to get nap time back.
It wasn’t that I didn’t encourage Zack to take a nap every day. In fact, we had a 1 1/2 hour “quiet time” every day where he was supposed to stay in his room and play with his quiet time boxes, but it was very bright in his room in the middle of the day. Zack’s one of those kids who needs it to be completely dark to sleep, so this just wasn’t working for us. The faux wood blinds in his room were letting in too much light, even when they were closed.
I checked out the blackout panels in the stores, but it would have cost me $40 for a cheap set, and I didn’t particularly like the way they looked. So, naturally, I decided to make my own.
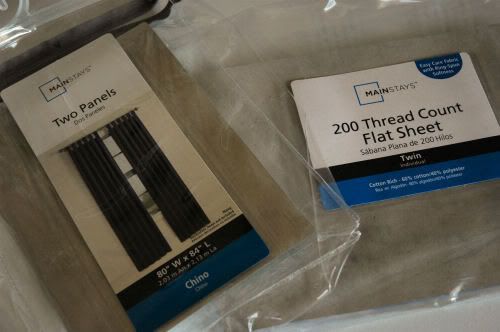
I started with a set of cheap navy blue curtain panels and an even cheaper black twin flat sheet. The pair of curtains was about $18 and the flat sheet was around $4. I definitely wanted to use darker colors, as I figured that would help with the light situation.
My curtain panels were each about 40 inches wide, so I cut the sheet to have 2 pieces that were about 41 inches wide. That made the sheet pieces about 66 inches long (because the dimensions of a twin flat sheet are about 66×96). It was okay that my sheet wasn’t as long as my 84 inch panels because the window doesn’t go all the way down to the floor and light doesn’t come through the wall. Did you follow that?
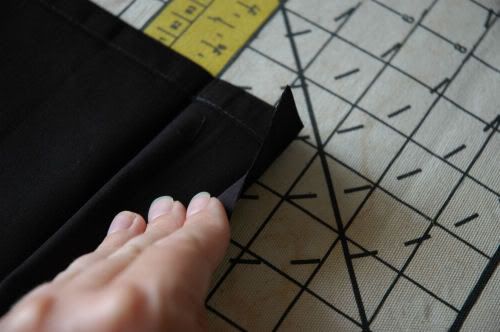
Because the sheet had four finished (hemmed) sides, I only had to hem one side of the sheet for one panel and two sides for the second panel. The sheet was longer than I needed it to be after my two 41 inch wide panels, so I had to make two cuts for the second sheet piece. I pressed a double hem into the raw edges and ran it through my sewing machine. You could definitely use no-sew hemming tape to do that, too. The most important thing is that the finished size of each sheet should be slightly smaller than the finished size of each curtain panel.
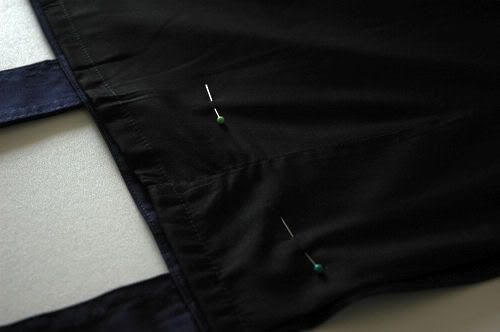
I seamed them together on my machine, following the original hem lines on the panel as best I could. Again, you could use hemming tape. And as always, I’m making this seem way more difficult than it actually is.
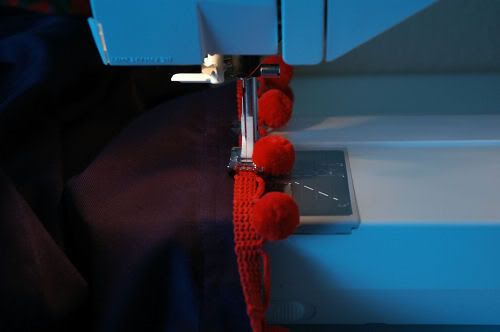
Lastly, I bought some cheap trim at Hobby Lobby and stitched it onto the inside edge of each finished panel. I wanted to make the cheap panels look a little more custom and fun. I think the trim was around $1 a yard.
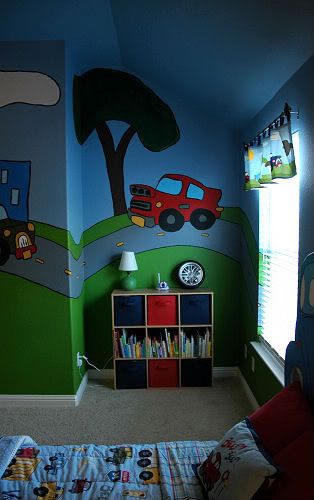
Now, for the true test. Here’s the non-nap inducing light with the curtains and blinds open.

And here’s what you see now in the middle of the day when the curtains and blinds are closed. This picture was taken around noon.

People, I kid you not. If his curtains and blinds are shut, you literally have to turn on a lamp in there to see anything! It’s like a little “Zack cave!” He has a lamp on his nightstand that he uses to read, so please don’t think I stick my child in the pitch black room all alone. He reads his books, turns off his light, and takes a restful nap.
And Mama does a little happy dance.
The evenings in our home are definitely easier because Zack has gotten some mid-day rest and isn’t Mr. Crabby Pants. Okay, he doesn’t nap every day, so he is still Mr. Crabby Pants sometimes, but not nearly as much as he used to be. Hooray!
Black out curtains are the best. They are the only thing that allows me to actually sleep!
I Love this My husband works swing shifts and this is perfect. LOVE its CHEAP, EASY & looks good but best of all DARK!!!!!!!!!!.
Thank you
Great idea! But I was almost too busy gushing over Zack's room to really pay attention to the how-to! His room is absolutely adorable! I bet he loves it! I do!
Grins!
Pamm
Wow! I would never have thought it would make THAT much difference! Also, it would have never occured to me that it needed to be dark for some kids. My kids napped anyway. Wow. My husband would like these blackout panels for our room but I don't think we'd ever wake up in the morning!
I work rotateing shift work. I need total darkness to sleep during the day. I am going to make myself some of these. Right now I have curtains, quilt, and blinds over my window. Light still gets in. Thanks for posting this.
His room is so cute, Lindsay!
Kelly
http://tearinguphouses.blogspot.com
Must.Have.Blackout.Shade.For.Sleeping.Toddler.
Must.Have.Blackout.Shade.For.Sleeping.Toddler.
How many times can I repeat the importance of a blackout shade for a sleeping toddler?
A true mommy essential. Great tutorial ! Love the "cave" pic.
Smiles,
Kate
Love this tutorial…My hubby is always complaining that I made the room light and airy so he can't sleep on shift work so he puts up tons of blankets on the rods and it becomes a cave…I'd much rather do this!!! Thanks for the idea!
All right,so that looks a lot better than the blackout lining I got for FREE that I PINNED to the wall around my daughter's window. Ha ha.
Good for you. I remember once resorting to tacking heavy-duty garbage bags over the windows (under the curtains) in order to get the room dark for my little man to take a nap. Your way is much nicer, and it really works!
I am totally with you on this one! I installed black-out roller shades behind my son's wood blind and in my bedroom, I bought black-out fabric from Jo-Anns and lined sheets (walmart king sheets) to create room darkening panels.
It's ALL about cheap sleep in my house!
XOXO
This is such a good idea! I'm going to share this post with a friend who is having the same problem with her little boy. It's so necessary to create little caves for them to sleep in!! 😀
Great project…I can't believe how dark it made that room (and by the way…the room is adorable!)
This is great, I need to try it.
love your solution!! I was thinking of making some sort of shade that I could hide under a valance and pull down during nap time. my kid likes to climb curtains so I can't have another long in her room.
nice work!
I just love pom-pom fringe!
Maybe this is why my boy NEVER napped, never! Too late…but so happy for YOU!
Janell
I pink puffy {heart} your son's room! That's a very clever and money saving trick. We ran into the same thing when my daughter was 2. She went from a nice long 3 hour nap every afternoon to NOTHING. It just about killed me to say the least – hope this works for you guys! Nothing worked for us, by the way, we just ended up putting her to bed earlier. 🙂
The last shot is priceless. Yup, they work!
My stepdaughter wanted black out curtains when she lived with us. (What is it with young adults and their need to sleep until noon?) I used denim and they worked like a charm, but they were VERY heavy. I like your solution much better:)
What a great solution!! I am glad to hear that things are working out better.
Ruth
LOVE it!!! We have blackout shades in both of our girls. I only use them at night so they don't wake at first light (learned that EARLY on!), but they really do work!!!
N doesn't always sleep during "nap time." In fact, I often hear her singing, playing, or "reading." I really don't care, so long as she stays in her room. 😉
Great post … I need black out curtains in my bedroom to keep out the west sun out. Haven't bought any because of the price, but I think I'll try your idea! Thanks for sharing!
What a cool idea! My kids windows have an assortment of blinds covered with sheets to keep the light out. It looks horrible but works. This idea is great and I bet even I could do this. I may just have to give this a try!!
I think I definitely need to follow this step by step. I have looked at blackout drapes, but they are too expensive -but my crabby pants would be much more delightful if they could get a few more zzz's during the day! Thanks for sharing.
Chelsea
WOW! Thanks for this post! I am new to your blog (and loving it by the way). I was just telling my hubby that we needed to do something to save my sanity from my precious 2 year old daughter. I will be doing this tomorrow!! Thanks!
What you all really need to know is sleeping in complete darkness is the absolute best way to fight cancer. Our bodies' need to produce Melatonin to fight off disease, etc. and it can't do it unless we sleep in complete darkness. That includes night lights, tv's etc. So good work. For more google Melatonin and darkness while you sleep. You will be surprised. IT's HUGE!
Lindsay, love the step by step instructions and the pictures. Blackout nursery panels have been a lifesaver for me. Very nice article.
BTW, I want to echo the anon. poster’s comments about melatonin. I’m not sure that I’m buying that it prevents cancer or anything, but sleeping in total darkness is really key to having a good day. Thanks again for a great article.
Nice one. It was helpful specially to those people who don’t want sunlight.
It was good to avoid light. Nice post. Thanks sharing it.
Since I don’t like drilling I typically use shower curtain rods. They are not only cheap, but you can adjust them to any size and they hold with pressure. This makes installing it a snap with any fabric. 🙂
How did you prevent light coming in from the top?
Hi Amy! I guess I have the rod high enough up on the wall that the light doesn’t come through. That’s a good question, but we don’t have any light that comes through the top at all when the blinds are closed.
We just installed drapes in my son’s room. Some of the light gets through the drapes, but even if they were blackout likes yours light would still come in through the top and sides of the drapes. How did you manage to lock out so much light?
Hi Kay! I hang my drapes high and wide, so they actually cover a bit of the wall as well. I hope that helps!
This is a great idea but wonder if anyone has a solution to my problem added to this issue. I have done all this and the room is black, until my boys rip them down. Does anyone have a solution for something that can not be removed from the wall. I am currantly trying to do califonia shutters screwed right to the wall but no one makes them in the size of my window and it would cost a small fortune to get some made.
Thanks for this solution. I am looking to reduce my electric bills in the summer and keeping the boiling sunlight out is my main goal. @Dawn, I felt a pang of compassion for you when reading your question about solutions that cannot be ripped down. I mean this with the absolute best of intentions, but if your boys are ripping curtains and rods off the wall, I think you have bigger problems to solve than room blackening.
How about stapling the black- out fabric to a roller blind,(the older plastic kind) and hiding it up under the valance and pulling it down when needed. I haven’t tried this yet, but it is on my list to try!! JoAnns sells the fabric. Not sure where to get the roller blind.
Hi Clara,
Great idea! I know you can buy roller blinds at Home Depot and Lowe’s. If your windows are a standard size, you may be able to find them at a place like Walmart or Big Lots, too.
Awesome tutorial. Definitely going to do this in my twins’ room. They are almost 2 and have shortened their nap but hopefully this will restore it. Please oh please oh please!!!!! My son likes to stretch his arm to the window and tug on the curtain and roller shade. I removed the curtain, he broke the roller shade (in his defense, it was 8 years old). So I moved his crib away from the window which puts him closer to his twin sister. Now they trade toys back and forth from crib to crib. It’s cute but non-conducive to a nappy time environment. Super dark bedroom, here I come!!!
@Dawn: I understand how easily children can pull curtain and rods off/out of the wall. Hide n seek, secret cave, ghostie time, let’s pretend we’re monkeys…… I get it. And boys play rough. I plan on using large toggle bolts or molly bolts. They stand up to a tremendous amount of weight and abuse. I have used them for shelving (the kids try to scale them) the cabinet of DVDs over my sleeping 8 year old (Ikea Besta Burs – its heavy!!!) and the floating cabinet over my TV that DID fall down, apparently we weren’t deep enough into the studs…. But togglebolts are holding strong!
For anyone else with a child who likes to yank on vertical fabric…. I found this page with info on wall anchors and their weight limitations. http://www.dannylipford.com/testing-wall-anchors-and-picture-hangers/
I need to do the same for my little girl’s room! I originally made these for my son, but when my daughter came along she was a great sleeper. She just turned two and we are on Day 6 of no nap. She’s not sleeping well at night, either. I need to get to work making a second set of these!
Thank you for this! I plan on picking up the supplies and making them hopefully this weekend or this coming week! My daughter has dark purple curtains and I think I may pick up a sheet for hers and add it to the back!
Great, Tricia! Let me know if you run into any questions!
This sounds like something I need too bad the pictures aren’t showing ?