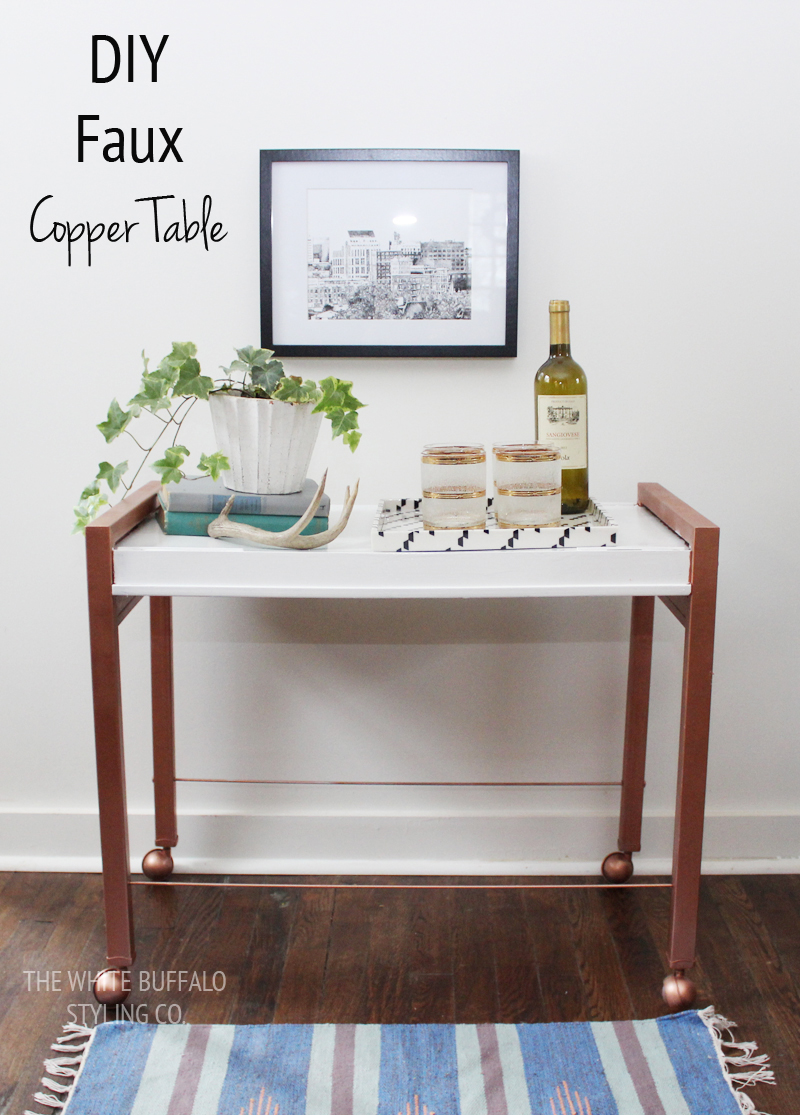
Hi y’all! I’m Lindsay from The White Buffalo Styling Co. and I’m so excited to be back here sharing my five steps to creating a faux copper table…that looks real!
I don’t know about you, but I’m loving this new copper trend. I suddenly have the urge to turn everything copper. I’ve been craving some copper furniture, but ran into a couple of problems.
First I thought of using copper pipe to make some furniture. This is such a great idea and so many bloggers have created some amazing things from copper pipe. But it was a little pricier than I was hoping.
I like things cheap. Like, really cheap.
I tried some different copper spray paints, but they felt like painted copper. I was hoping for a real look from paint. I know, that’s not really how it works. But I was hopeful, nonetheless.
Step 1 – Use some legit copper paint
And then I found it. The miracle to create faux copper: Krylon’s Premium Metallic Spray Paint in Copper Brilliance. I know it’s twice the money of normal spray paint, but y’all, it’s so worth it. Trust me. You’ll spend money trying the others like I did and then decide that this one’s it.
I tried it first on my jack stands turned pendant lights and knew it was a winner.
Then, I was dying to try it on some furniture.
Step 2 – Find the right piece based on shape and size
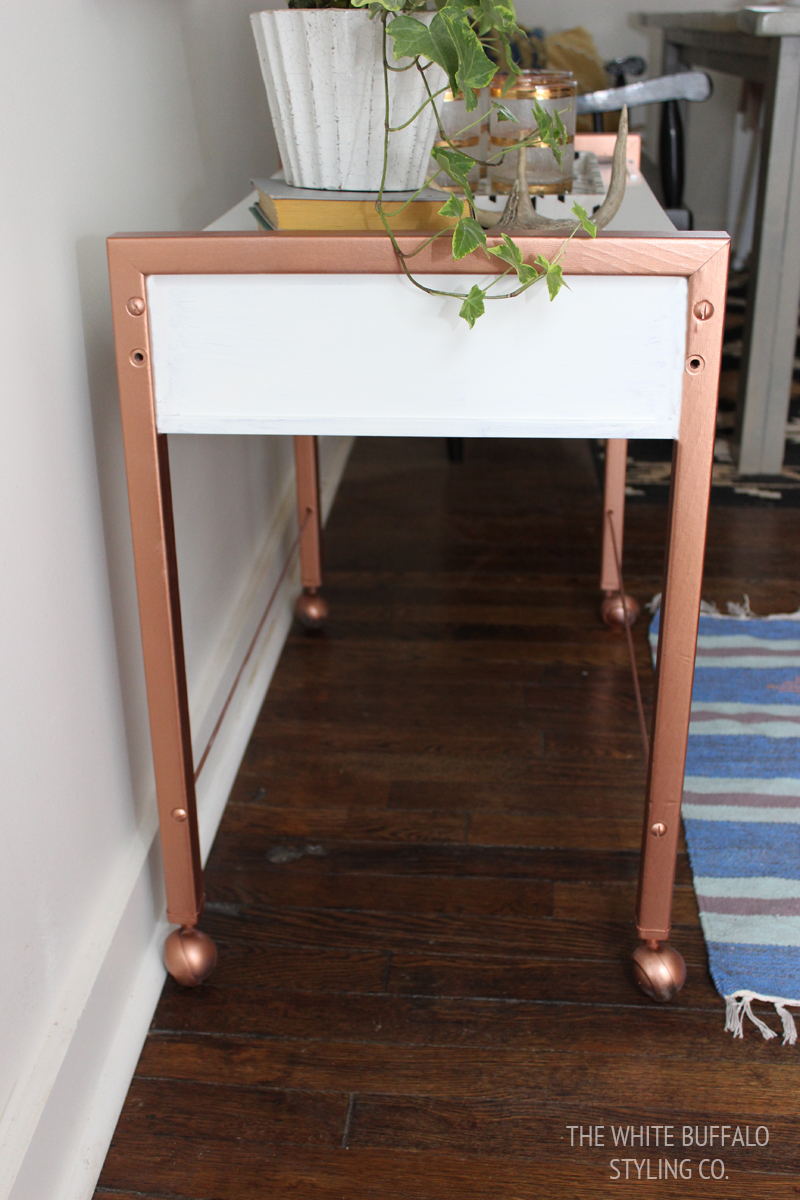
I searched high and low for the right piece and came across this $10 vintage-style bar cart.
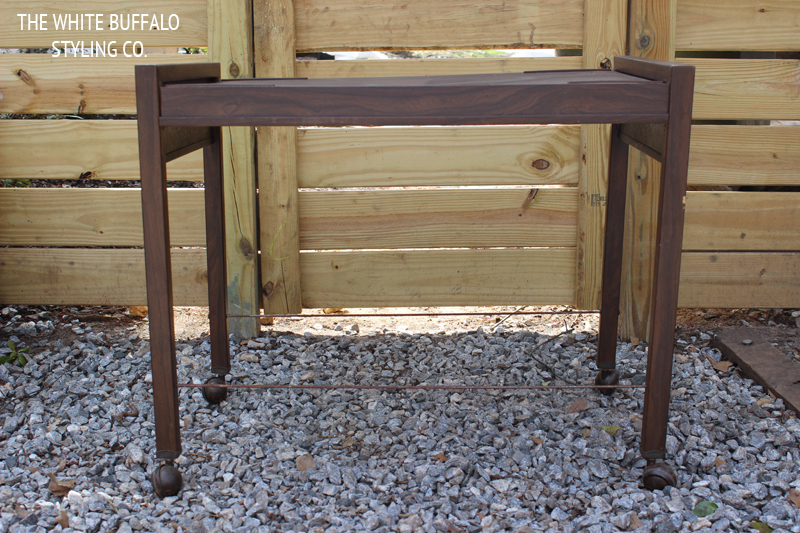
I immediately knew this was the right piece for one big reason. I had seen so many chunky wood pieces that I knew would look unnatural as metal. I was looking for a piece that had slim legs that after being painted copper, could look like they were actually metal and not a spray-painted wood table.
The size and shape of this piece was perfect for my project.
Step 3 – Prime lightly
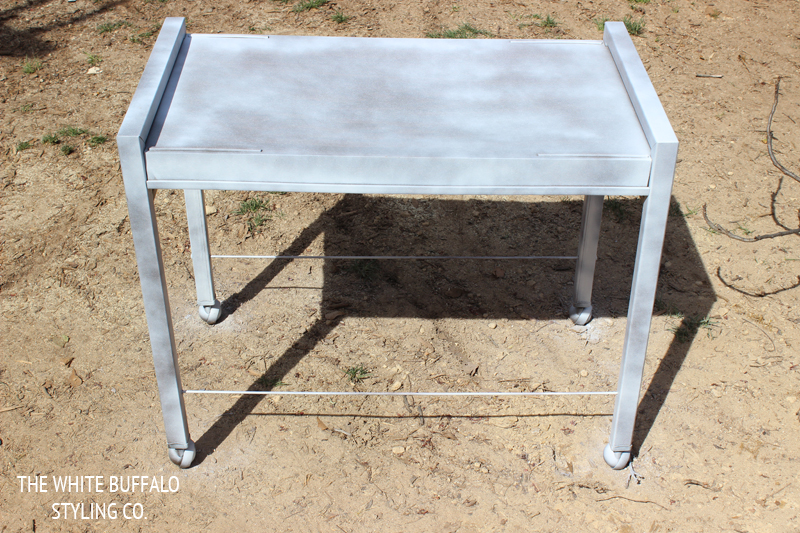
I gave the whole piece a light coat of primer. I say go really light on this as you can see in the picture above. Don’t feel like you have to totally cover the piece in primer unless you’re going to wait days to put on the copper top coat. The purpose of primer is really just to have the paint stick to your surface. A really light coat will do that.
What’s the problem with heavier primer coats? You have to be really careful with spray-paint because too much paint equals runs. I’ve gotten runs in my paint so many times and the only real cure is to face that side to the wall sand it and paint again. Nobody wants to do that, so light coats work best.
Step 4 – Paint Copper Parts
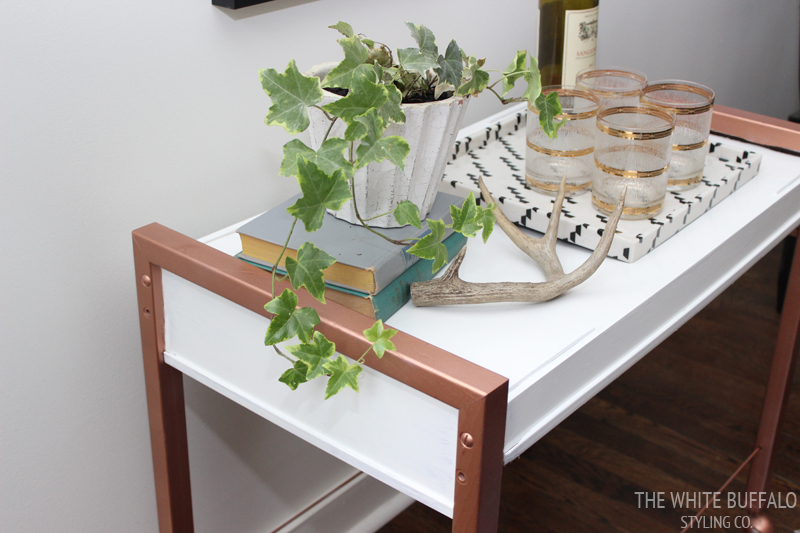
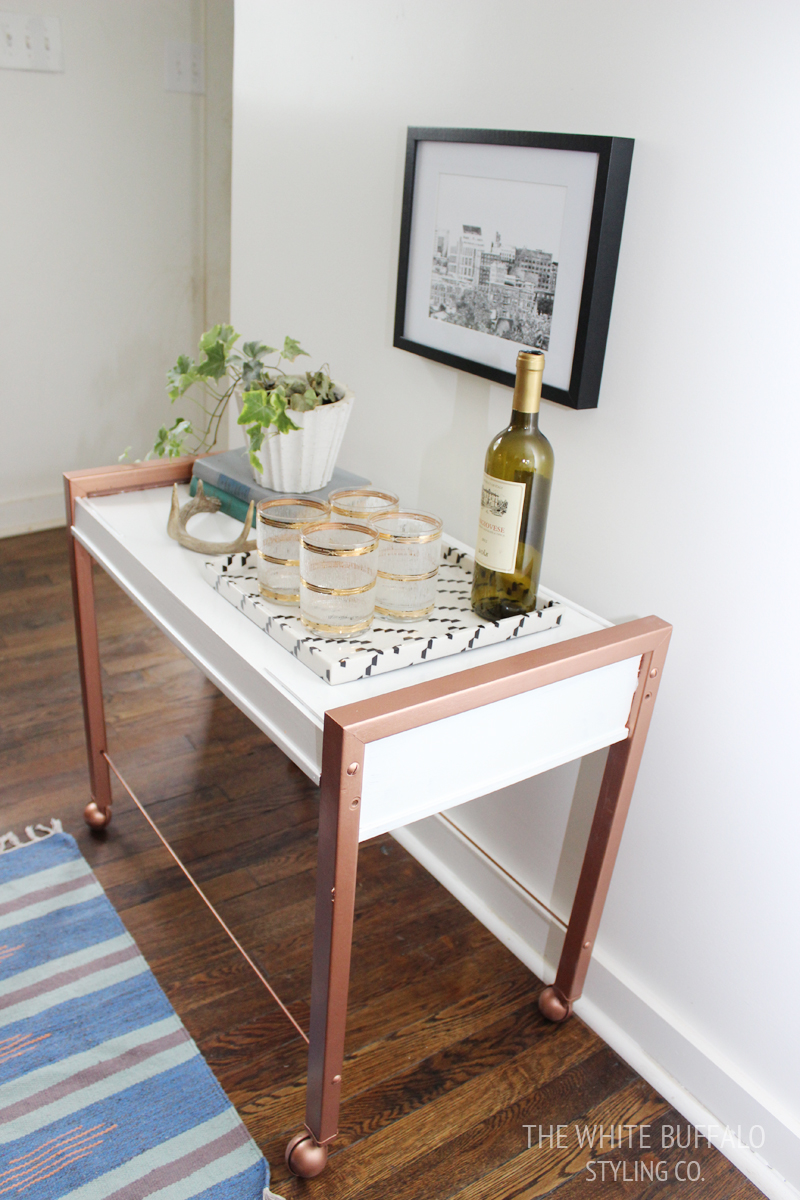
I choose not to paint the entire thing copper. The shape of the furniture looked to me like the top of the bar cart would’ve been a wood shelf and the legs would’ve been copper metal pieces.
You want to spray paint everything copper first, so you don’t risk getting over-spray on the rest.
Step 5 – Brush on your Finish Paint
I chose to go white on the shelf because there’s just something about white and copper that I like.
You definitely want to use oil based paint for this because (if you’re like me), you sprayed on the primer, which is oil-based. And the copper paint is oil-based. I’ve tried to brush on latex paint over oil-based before and it didn’t turn out so hot.
One of the best parts about this copper spray paint is that there is no recommended time to wait between coats, so I was able to go from start to finish on this project in a matter of two hours or so. I waited a little bit between each coat, so the actual work time on the project is significantly less. But start to finish was around two hours.
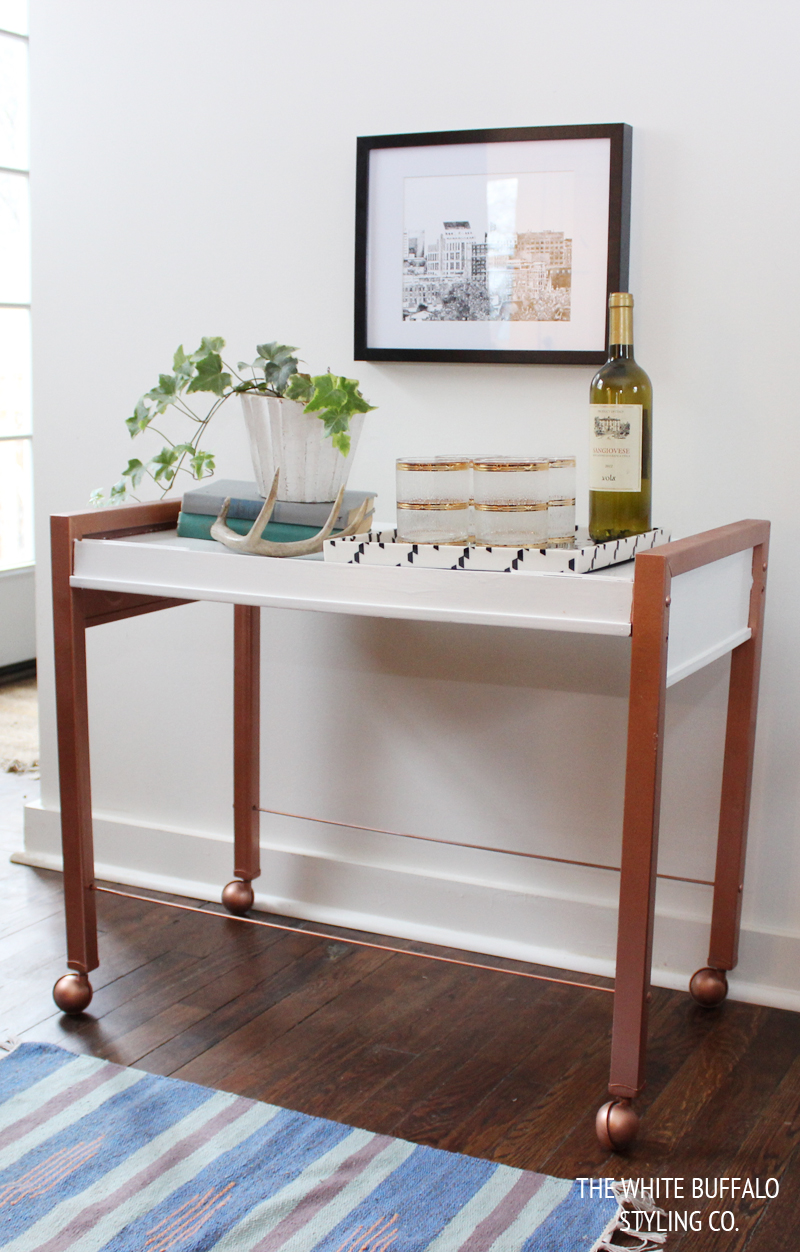
$18 and two hours later and I finally got my copper furniture.

Thanks for having me, Lindsay!
Love this idea, so clever and pretty.
Love it!
Nice. Sharing this to my daughter. Thanks for sharing!
I love it, Lindsay! Thanks for sharing such a quick and easy update!
Great stuff! Thanks for sharing 🙂
Thanks for the tutorial. Btw I love the small tray on the cart, where can I find that?
Really does look like copper Lindsay! You did find the perfect piece! Looks great!