Until we built the new bed for our master bedroom, I had never stained a piece of furniture. Between my dislike of most stain colors and my fear that I wouldn’t be able to correctly apply the stain, I just decided that paint had to be much easier. After staining the entire bed, I still hold my belief that paint IS much easier to apply, but stain isn’t as scary as I had imagined.
I worked with the folks at my local Sherwin-Williams store to come up with a custom formula for gray stain. Yes, they have a pre-formulated gray stain, but it is too blue for my liking. It took the better part of a day for the SW gals to come up with the formula – I left them a sample piece of wood and I could tell that they mixed and re-mixed the stain about five times. Eventually, we came up with the below custom formula.
Just for the record, a gallon was far too much for my bed. I have enough stain left over to last me until the end of time. I feel confident that one quart would have been more than sufficient.
I sanded our bed very well and used a tack cloth to remove any left over sawdust. When using a soft wood, such as pine, you need to apply a wood conditioner before staining. I applied Mixwax Pre-Stain Wood Conditioner with a white cloth in the direction of the wood grain. I let it sit for just a few minutes, and then wiped off any excess with a dry cloth. You have to apply your stain in about an hour after you’ve applied the wood conditioner, so you don’t want to do this step and then save the staining for another day.
There are a few ways to apply stain, and I feel like I practiced them all on scraps before starting on the bed. You can apply it with a rag or a brush. You can also let it sit for varying amounts of time – the longer it sits, the darker your wood will become (up to a point).
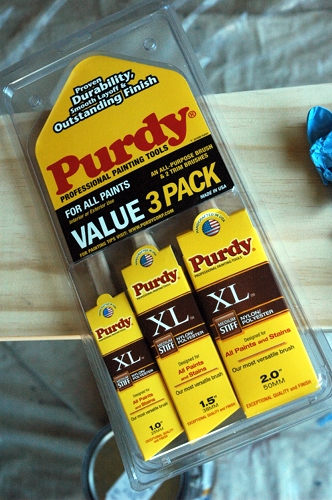
What worked best for me and this project was applying the stain with an excellent paint brush. The folks at Purdy sent me a package of paint brushes to test out, and I decided that using them in a way I’ve never used a brush before (i.e. applying stain instead of paint) would be a great test of their ability.
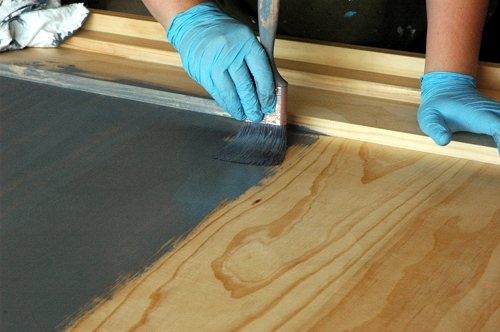
I dipped the 2-inch brush into the can of stain and just “painted” a section of the bed at a time. I started with the back of the side rails and worked my way to the front of the headboard, so that I could make sure I was happy with my technique. I just worked a small section at a time, and the Purdy brush worked flawlessly. There were no dropped bristles or brush marks. I always use Purdy brushes for my painting projects, and I’m glad to know they worked equally as well in stain. The few dollars extra that the Purdy brushes cost are well worth it – just clean them well after each use and store them in the cardboard holders so the bristles don’t get damaged in between uses.
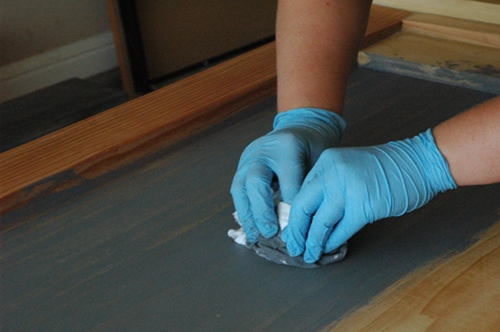
Now, here is where all your practicing really comes in handy. This particular stain can instructed to let the stain sit on the wood for up to 30 minutes before wiping off. In my climate (HOT and HUMID), that was far, far too long. In fact, I decided that I would stain a section 3 x 3 foot section with my brush and then I’d wipe it off immediately with a soft cloth. I had to wipe pretty hard at that point to get enough stain off. When I let the stain stand longer on my practice boards, it was far too opaque and I couldn’t see the wood grain. If I wanted that look, I would have just painted!
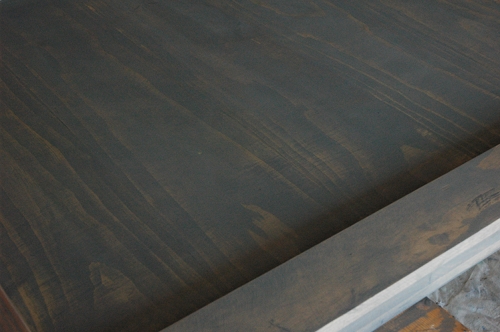
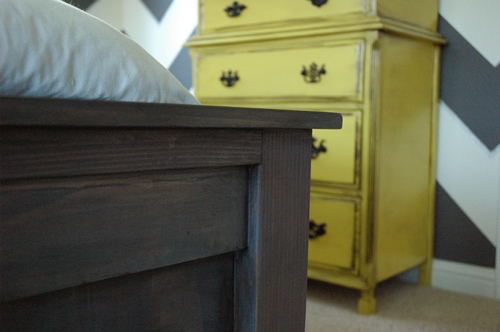
After hours of brushing and wiping, I finished staining the bed. I was happy with the way the stain turned out, but I still felt it had a slight bluish tint. I wanted a really neutral gray to coordinate with my dresser and walls.
To solve this problem, I turned to my best friend – Ralph Lauren glaze tinted to Black Silk. I swear, this stuff solves all problems. I painted it on in small sections with a cheapo brush (NOT a Purdy, because you basically ruin your brush trying to get the glaze into the imperfections in the wood) and wiped it with a soft cloth. When the glaze dried, I applied 2 coats of Minwax Wipe On Poly. The end result is just perfect for my room.
 Do you have any questions about brushes, painting, staining, or color? Ask my friend, Lisa! 😀 HGTV designer extraordinaire, Lisa LaPorta, is answering reader questions at Purdy’s You Can Save the Walls website. If you ask a question, you can win dinner with her. I promise, it would be the best dinner you’ve ever attended.
Have you ever stained a piece of furniture?

Great tips on staining Lindsay! Honestly, I am the same way about stain. I usually stick with paint because of my apprehension with the staining application, drying time, wiping it off, etc. I’m going to give it a try though!
Sharing this on my FB page!
~Jenna
I love how the color turned out! I’ve only stained once myself too.. I like how it brings out the wood… definitely a highlight from just painting. You did a great job!
Great tutorial! That stain is a perfect color!
Your stain looks so good!!! Adding in the black gives it great dimension!! I’ve always been intimidated by staining…but your post gives me some confidence!! Thank you!!! 🙂
Ahhhhh, grey-stained wood is my favourite. I’m a much better stainer than painter. I’ve had a devil of a time finding it locally though. I had to custom layer my dresser – brown stain + watered down pale green paint + minwax – to get the colour I wanted. If I had a gallon of grey stain, I’d have trouble controlling myself – everything might end up grey!
I stained my first piece today. I didn’t realize I had to wait 24hours before poly. Ya don’t know how hard it is to keep a cat off a HUGE farm table that can’t be moved to the garage until you go to stain it, lol.
I’ve stained before. I was like you, too. I was afraid, but I think this mindset comes from a former generation. It used to be hard, but stain is so easy to use now. I prefer gel stains, and using a rag (the perfect rag is an old burp cloth), it leaves a lot less excess to wipe off.
Oddly enough, given my preference for stained furniture over painting, I found painting furniture much more stressful in the beginning.
perfect color i like it….
If the wood is in good condition, I prefer a stained look. I love the colored stain you created – very pretty!
Hi Lindsay,
I looked at a few post of yours and decided to redo an old dresser that needed a lot of help. I have it painted already, but cannot find the Ralph Lauren glazed tinted in black silk anywhere! I went to Home Depot, Lowes, Menards, Blaine’s, and none of them carry it. Do you know where I could order any online or where you found yours? A few places had it, but they discontinued it. Thanks in advance.
Brandi
Hi Brandi- I get my glaze at a local paint store that carries Benjamin Moore, Ralph Lauren and other brands. For RL, try this store locator and select the drop down that says “Ralph Lauren Paint Stores.” Hopefully, there will be one near you! http://www.ralphlaurenhome.com/stores/
how do I stain a piece of softwood like pine without the end grain getting real dark?
Try a wood conditioner. I stained alder today without a conditioner (preferred the look) and the end grains did turn out a bit darker.
Just finished staining an alder bed today in a very similar color. Poly time tomorrow.
Lindsay do you remember if you used a water based or oil based wipe on poly? I read the oil based can mess with the color.
Travis, mine was oil based. I’ve had poly affect the color on white painted furniture, but I haven’t had that trouble on anything darker than that.
What type of wood are you staining here? I want to stain my cabinets but thery are red oak and I am worried how it would turn out with the heavy grain. Obsessed with grey stains right now!
At this time I am ready to do my breakfast, after having
my breakfast coming yet again to read more news.