Note from Lindsay: I’d like to welcome Jackie from Teal & Lime as a new contributor to Makely! Jackie is one of those gals who just blows me away, time and time again. She has a great modern eye and uses color in fabulous ways. I am incredibly excited to have her on board, and I can’t wait to see what she shares with us each month. Welcome, Jackie!
Hello Makely readers! I am Jackie. I am so honored to contribute to the Makely community in 2014. Like Lindsay I have a passion for taking ho-hum home decor and making it awesome!
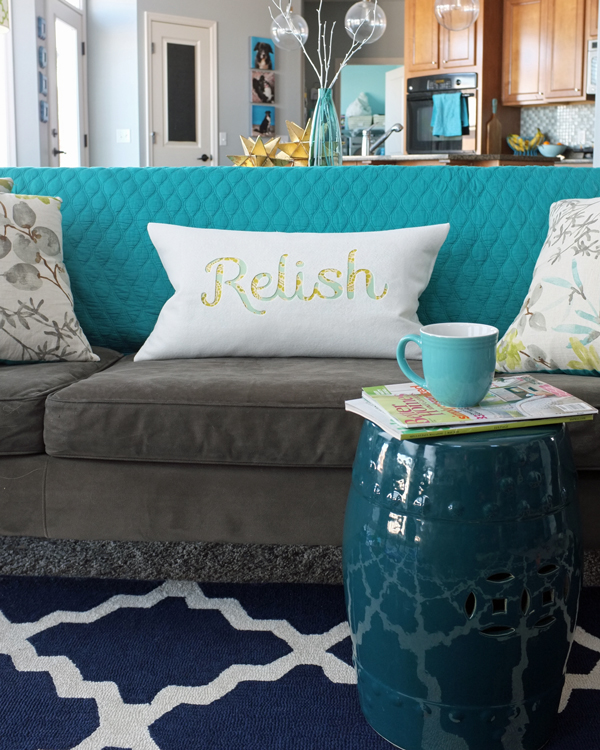
Making pillows is one of my favorite ways to personalize my home decor and save money while doing it. I want to show you how easy it is to make a custom typography pillow with a favorite word or phrase.
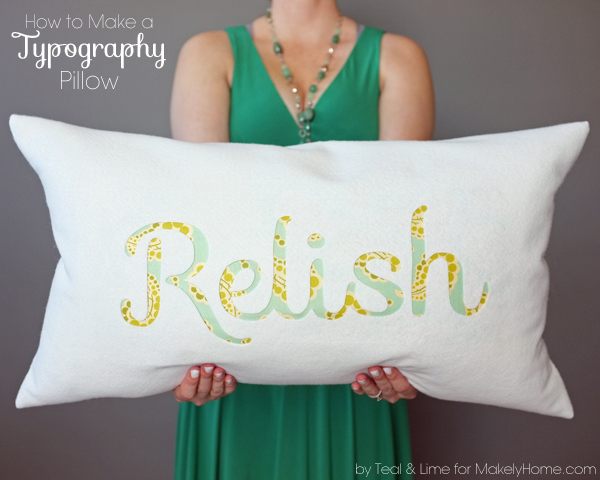
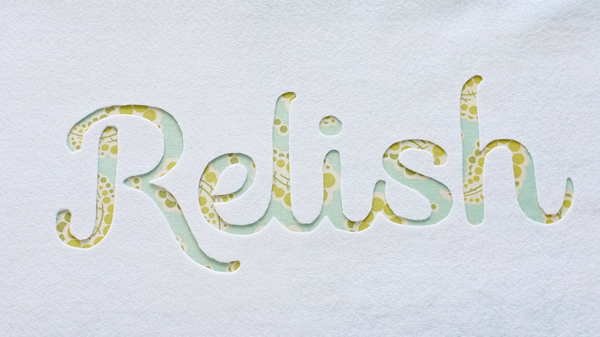
For my pillow, I chose my 2014 word of the year: Relish. This year I want to relish in all good things big and small. This pillow will be a not-so-subtle reminder to relish everything.
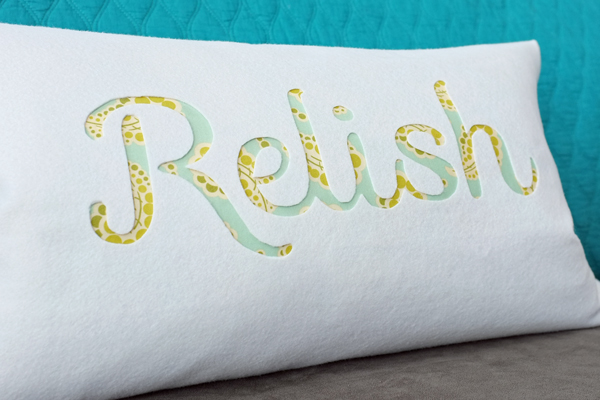
The technique I used to create this pillow is called reverse appliqué, basically cutting away from the top fabric to reveal a contrasting fabric below. My version is easy and no-sew. And, with my easy envelope pillow method you only have to sew two straight seams to make the pillow cover. I first used reverse appliqué to create personalized stockings for my family. They have held up really well for three years now.
The whole process is as easy as tracing and cutting!
Supplies:
- Felt
- Thread to match felt
- Decorative Fabric (lightweight cotton quilting fabric works best)
- Heavy Duty Fusible Web with Paper Backing
- Pillow Form
Tools:
- Iron
- Ironing Board
- Extra Fine Tip Permanent Marker
- Fabric snips or sharp fabric scissors
- Sewing Machine
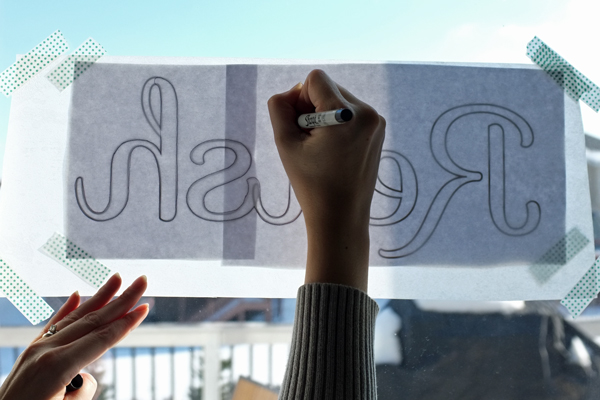
1. Print out your word or phrase the actual size you want the text to appear on your pillow. You may need to print across several pages. Choose a font with thick letters, or use the bold setting for thinner fonts. The font shown here is one of my new favorites, Sofia (and, it is free).
To save ink when printing, turn the letters into an outline.
- In Pages (Mac), you can highlight the word, then select Edit > Font > Outline.
- In Word (PC), highlight the word, then expand the font menu and select Text Effects > Text Outline. From there you can adjust the outline settings.
2. Trace your word onto the fusible webbing. Use a window as a light box. First, tape your printed word with the text facing out the window. The text should appear backwards to you. Second, tape the fusible webbing over your word with the paper backing facing you. Use a fine tip permanent marker to trace the outline of your letters on the paper backing. I chose to remove the extra loops from the l and h in my word to make the following steps easier.
3. Cut a piece of felt large enough to wrap around your pillow form with a 6″ overlap on the backside. For a well-fit, snug pillow cover, your felt should measure the width of your pillow form by two times the height of your pillow form plus 6″ for the overlap.
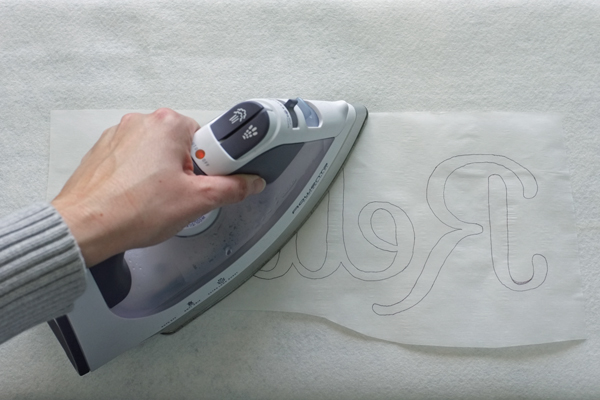
4. Iron your fusible web onto the center of the felt piece. First, trim any excess fusible web leaving a minimum of 1″ border around all sides of your word. Position your word directly in the center of your felt. Follow the directions on your fusible web, to fuse it to your felt.
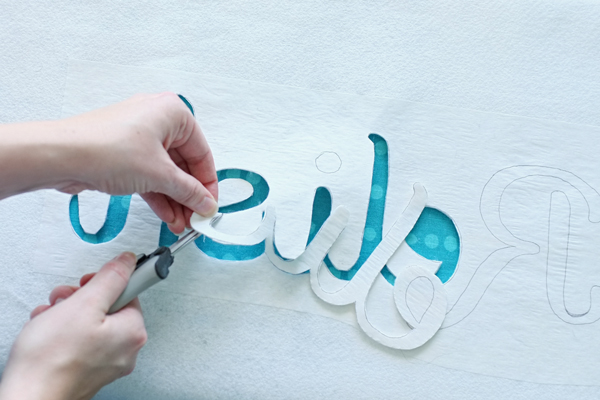
5. Using sharp fabric snips or scissors, carefully cut out the letters. Also, carefully cut out the centers of any letters, like the e in the word Relish. Don’t lose the center pieces. For snips, I love my Fiskars SoftTouch Scissors with 1.75 inch blades and a sharp point. I use them for cutting everything! Please do not attempt to cut out your letters with an xacto knife, it won’t cut very well through the felt.
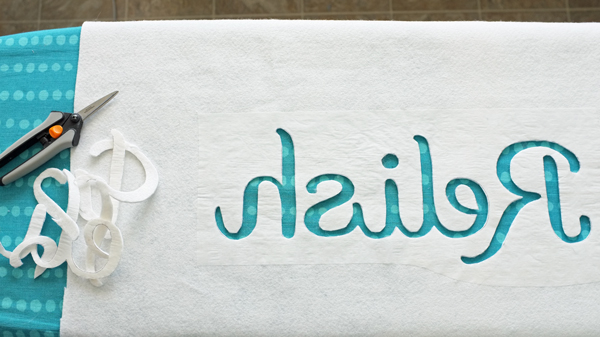
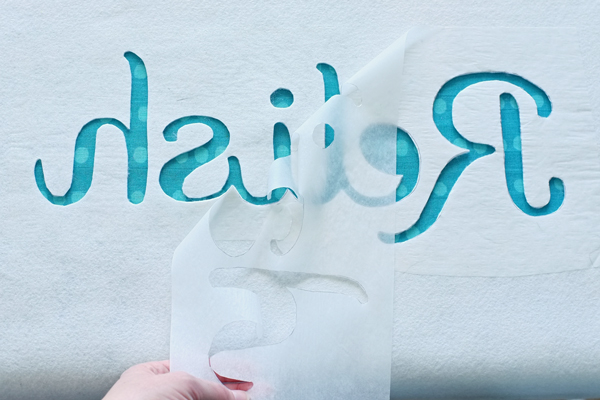
6. Once all your letters are cut out, remove the paper backing from the fusible web.
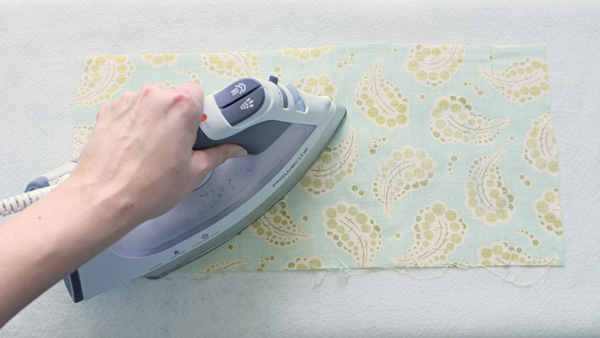
7. Cut a piece of decorative fabric slightly larger than the fusible web ironed on your felt. Make sure it is large enough to cover the fusible web on all sides, otherwise you will get melted web on your iron.
8. Position the decorative fabric right-side down onto the fusible web. Make sure any letter centers are sitting in the right place before putting the fabric down. Iron over top your decorative fabric following the directions on your fusible web to fuse the decorative fabric to the felt.
9. Flip your felt over to see your word!
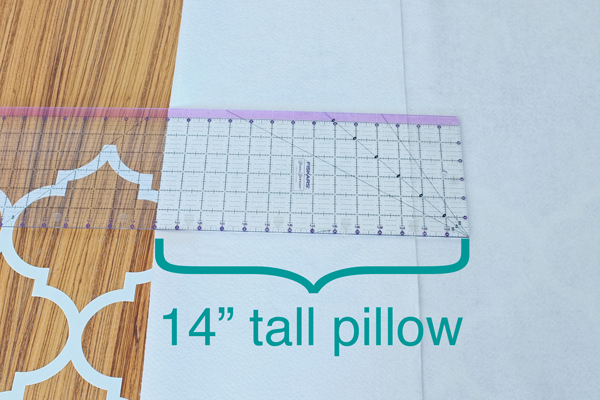
10. The last step is to sew your pillow. With the felt right-side up (your word facing you), fold over the top and fold up the bottom forming a 6″ overlap across the center of back of the pillow. I like to use my quilting ruler to make sure I fold at the right spots, as shown below.
Start with the center mark of your pillow width on the center of your word.
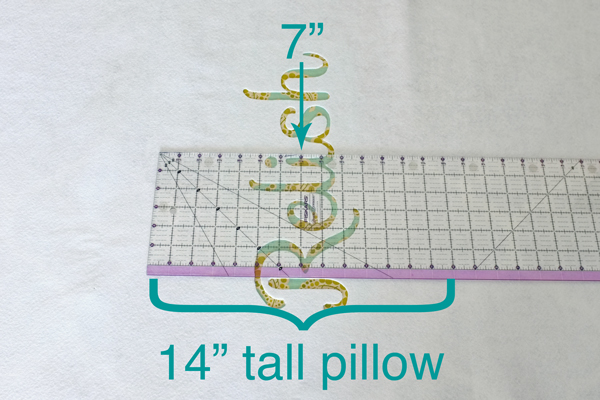
Fold down the top over the end of your ruler.
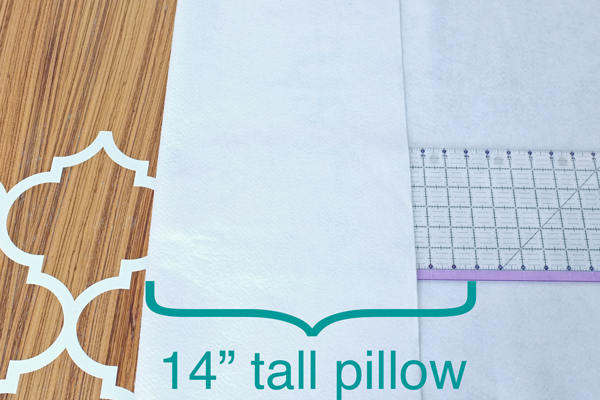
Flip your ruler the other way, so the 14″ mark (or whatever your pillow height is) is on the fold you just made.
Fold the bottom edge up over the ruler.
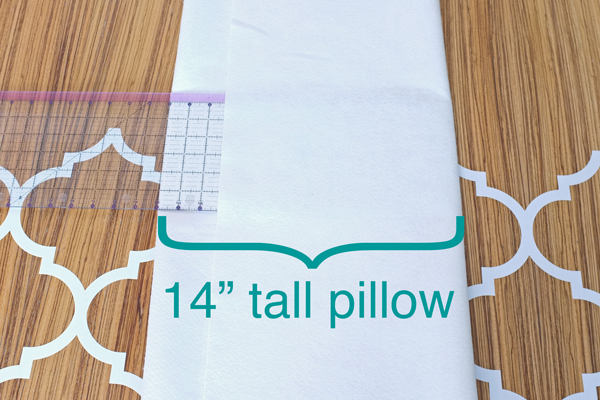
Now, pin and sew the two open ends of the pillow cover with a 1/4″ seam allowance. Flip your pillow inside out and stuff with your pillow insert.
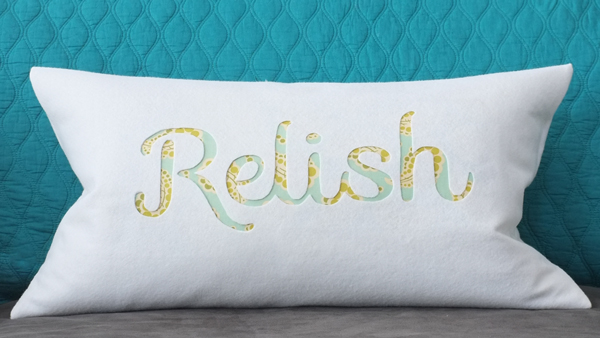
Now, relish in your pretty pillow making skills!
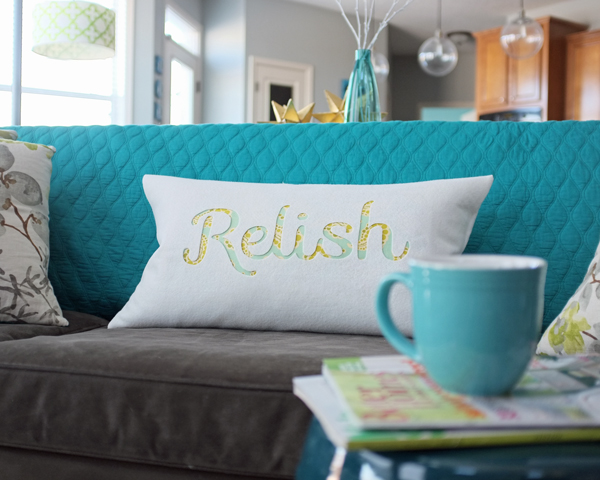
How easy was that? I know it took me longer to write out these directions than to actually make this pillow. The great thing about this project is you can customize it with any word or short phrase you like, and font you like, and any decorative fabric you like. This would also make a sweet and thoughtful gift!
If you loved this project, please come over to Teal & Lime to see more pillow making and home decorating ideas.
The pillow is adorable! I can see this making a great DIY present…I may have to get cracking for next year!
Katrina, These would make great gifts. They are so easy you can make one for everyone on your list!
I absolutely LOVE this pillow, Jackie! Thank you so much for sharing it and your excellent tutorial with us.
This is such a great idea… I love the way the pillow came out! Thanks for sharing!
Absolute LOVE!
This is adorable! I love that it isn’t just ironed onto the pillow but it is a cutout. It seems so easy too. Love it and love Jackie being a contributor!
Thanks Megan. The reverse appliqué gives it a much more finished and dimensional look!
What a cute idea and I love how the letters / word look 3 dimensional because of the thickness of the felt. Great project Jackie! xo Jenna
Thanks Jenna! I know, it is like engraving on your pillow 🙂
This is genius! I love it! I’ll have to try one soon – there are so many possibilities!
pretty pretty!
I love that pillow too! You’ve inspired me!
This is awesome! I love it!
Mmmm….relish… (said like Homer Simpson).
This is gorgeous, such a creative way to really make the word pop!
PS stopping by from East Coast Creative, I’m their new blog assistant! 🙂
Wow I love this project. What an inspiration. I love your technique most of all. Pinned!!
HI it is 4.28am here when i am reading this so maybe i am a bit tired to understand but i am wondering in photos from top photo 6,7, & 8 what is the different colour material in backing of word please? I mean it looks different to the finished pattern . Did you just have it sitting on something different or did i miss a step where that different material came in please? Sorry if this question sounds silly but i would love to make some of these for gifts and just want to make sure i have everything correct to be able to do this right 🙂
Kim
Find out exactly what you have to do and say to make herr miss youu annd want you bafk again here.
In fact, this is one of the most common reawons why relationshipss fail.
If you are a guy who is eager too create a good image on your first
text message to a girl, here are some tips based on personal experience.