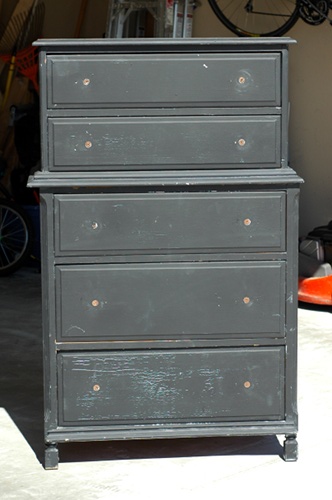
Once upon a time, there was a well-loved dresser who was destined for a new home. My friend had gotten it from her mother, who had purchased it second hand. The dresser was headed to a thrift store, but my friend asked if I would like it instead to practice some different refinishing techniques. But, of course I would!
Once I had the dresser in my garage, I realized that she would be a beaut if my husband and I tightened it up. Experiment? No way! This practice piece was going to find a new home in my master bedroom redo.
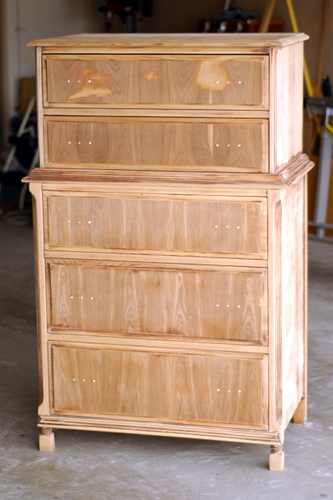
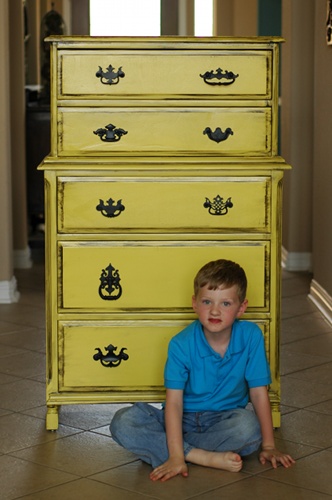
I sanded, and sanded, and sanded. There were probably 3 different shades of paint, a few coats of primer, and the original varnish. I spent about three days over different weekends trying to get down to the bare wood, since the paint was in such bad condition. Luckily, I had a sweet little helper.
The paint eventually began peeling off in sheets – which was great for me, but is a testament as to why it’s so important to do the grunt work to properly prepare any furniture piece you are refinishing – you don’t want that to be YOUR hard work peeling off! Once it began peeling, I was able to scrape it with a paint scraper and then run my sander over it with a medium grade sandpaper.
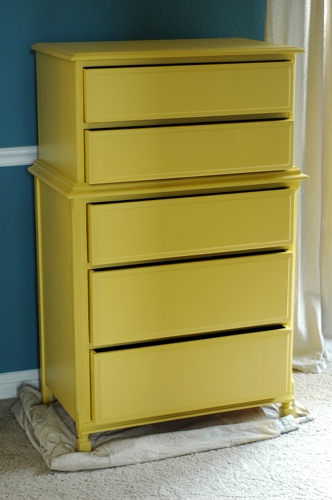
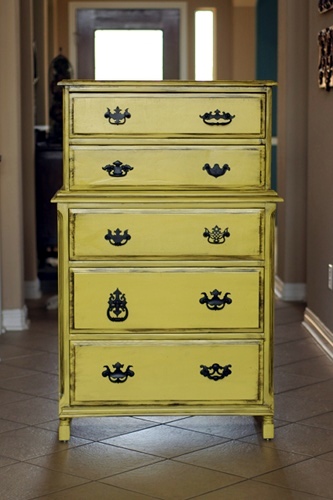
Using the techniques detailed in Mandie’s fantastic e-books on refinishing furniture, I primed and painted the dresser in (Behr paint tinted to) the Sherwin-Williams Decisive Yellow I previously shared with you as part of my inspiration.
I did try to use the Behr Ultra Plus paint and primer in one, but I had horrible results with it on bare wood. I have heard great things about it, but after three coats, the wood was still sucking up the paint. I would try it again on walls or previously painted wood, but never again on completely bare wood. After priming it with Kilz and painting it with regular Behr paint, I couldn’t believe the difference in the results.
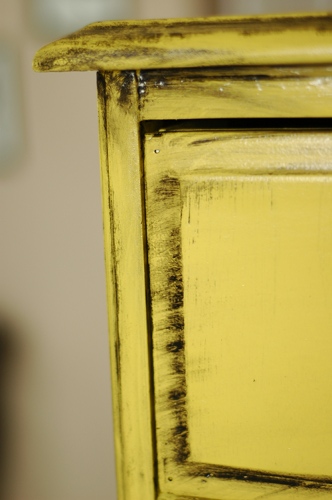
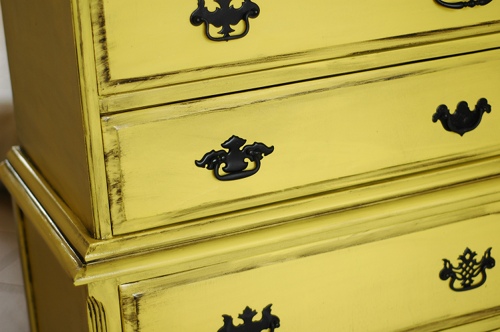
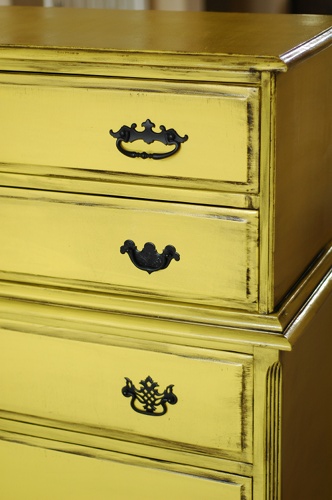
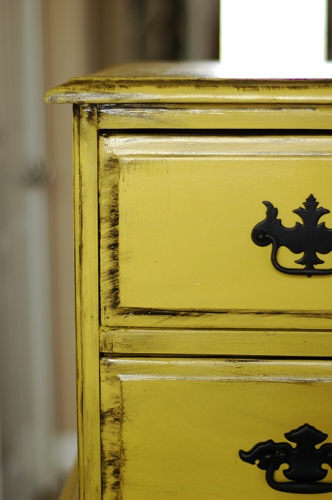
After the yellow paint was dry, I glazed it with Ralph Lauren glaze tinted to RL Black Silk. This was my first attempt in glazing, and it went pretty well. Again, I used Mandie’s glazing techniques from her e-book and also a little try and error myself. As with any new technique, you should practice on a piece of wood before you work on your own piece. I was a little heavy handed because I wanted it to look more “urban” and less “French-y”, but I’m very happy with the results.
The last step was to add pulls to my dresser. I bought an assortment of vintage pulls off of Etsy, cleaned of the tarnish with steel wool, and spray painted them flat black. I love that every pull is different, and I have named her Miss Matched.
Sure, she’s the only part of my master bedroom redo actually completed, but you have to start somewhere!
And, now for a bunch of photos of my new beauty (which I know will drive my friend Emily crazy):
I would marry Miss Matched if I wasn’t already married. Plus, I guess if I was married to a dresser, my first born wouldn’t be that darn cute.
P.S. I am an affiliate for Mandie’s e-books, so I get a couple of bucks when you buy one from my link. In turn, I use those few bucks to buy more paint and glue sticks. It’s a vicious cycle, but someone has to do it!
P.P.S. I linked this post up to Gina’s Transformation Thursday party over at The Shabby Chic Cottage.

LOVE LOVE LOVE! I love the color and the glazing and the mismatched handles are freaking awesome!!
This blog happens to be one of the best blog, which give proper details about it. I enjoyed reading this blog and would suggest others too, and you would get to read about it in this link.
I really appreciate this wonderful post that you have provided for us. If you are looking for Dumpster Rental in Portland Oregon. I highly recommend this website. https://DumpsterRentalPortlandor.com/
Gorgeous!!! Kind of like having a baby. A long labor, but so worth it in the end. I love the mismatched handles too!
Turned out amazing and I love the mismatched pulls! Adorable!
This dresser is super cute, love it! I am in the middle of painting a dresser for my daughter right now. I hope it turns out just as nice as yours!
This is so fantastic! I LOVE it! And I love love love love LOVE all the mismatched pulls! Love all around! 😉
Wow, you did an amazing job! I love the way it turned out. It’s such a great piece and I’m glad you were able to give it a home. The mismatched handles are a great touch.
I ADORE the color! So bright and cheery! The pulls are fun and funky. You rock!
Very pretty! Great job!
WOW! It looks amazing!! I love the color! I can’t wait to see what you do with your room.
bwhahahahaha!!!! love you girl!! xo
this is fab and i love each and every photo.
i LOVE it!!! i painted its twin a year or so ago… check it out!
i couldn’t find the blog post, but here it is in my shop gallery.
http://primitiveandproper.com/gallery/main.php?g2_itemId=4383
i LOVE yours- it looks so awesome and bold!
You deserve an award for all that sanding!
Looks great, I like what the glazing did to the color.
And I love that photo of you working behind the little one 🙂
Oh My Goodness.
This dresser is the most AH-mazing thing ever. LOVE the grunginess and the gorgeous feminine pulls. I’m trying to figure out what I can do this to in my house!!
This is gorgeous! At the top of the post I was thinking ‘wow that colour is great!’ then it just kept getting better and better. The mismatched hardware is a big win!
I love the new color! Yellows are just so fun!! It turned out great!!!
That’s really great looking. Such a fun piece to begin with but your paint job is so fun and really makes it stand out.
I have never seen anyone use different knobs so successfully! Really nice.
Thanks for sharing,
Lesley
thehomelessfinch.blogspot.com
This makes me swoon!
Amazing! I love the way it turned out!!
All I can say is WOW!!!!! Girl, you have outdone yourself!!! Those PULLS too!! consider me IM-pressed!! xoxo shelli
Wow I love it! I just finished a dresser too (http://decoronadollar.blogspot.com/2011/04/dresser-revival.html)
and the bottom drawer is missing the pulls. Would you mind sharing where you found yours on Etsy? Thanks so much.
If I was going to marry a dresser, that would be the one! I LOVE it! Thanks for sharing! 🙂
My brother has a dresser exactly like that. I have been begging him for years to let me have he but he won’t give it up. You did a wonderful job on yours.
I love that color, Lindsay. It’s an interesting mix of retro and bold combined! Kim and I are just so traditional when it comes to furnishings that we don’t usually branch out into those colors… This post is inspiring on that front.
I’d say that’s the PERFECT place to start a makeover, gorgeous! The dresser is ALMOST as cute as the kids! 🙂
Good job. It looks great Lindsay.
Awesome transformation! Can you come help with the renovations at my house?
I love what you did with the dresser!
I just recently recieved a dresser as well and it too has been painted, possibly a few times, what did you use to sand it down to the bare wood? And if you used a sander what kind of sander would you recomend?
Thanks!
The mismatched pulls are genius. Love them.
oohh-la-la! well done! i’m growing quite the collection of furniture to paint – – two end tables, a headboard (most recent, yippie!!) and i’m on the prowl for some small dressers to use as night stands as well. now, all i need is some SUNSHINE!! 🙂
Two thumbs up for that! That’s an excellent diy! I love it. I really love the outcome of the dresser, i love the color, artistic design and creativity. Excellent work! Looking forward to see more of your great work 🙂
This is so cute! I’m IN LOVE with that yellow! Great job!! I’m a brand spanking new follower thanks to Allison from HOH.
This is so gorgeous – and I have just figured out what I’m doing to my dining room table when my hubby and I get to redo-ing it this summer. Thanks for the pictures and the inspiration!
How did you paint the pulls without them sticking?? I have some of those on my dresser that I want to redo but I’m afraid they will stick, please help
Hey Lisa-
Here are the steps I followed to paint those pulls:
1) They were tarnished brass, so I cleaned them the best I could with steel wool.
2) I spray primed them, painting them first with the pull up and then with the pull down (after the first coat was dry).
3) I spray painted them with flat paint in the same way I primed them – with the pull up and then with the pull down.
I’m not sure if the primer, the flat paint or making sure they were good and dry in between coats made the difference. My instinct tells me that it’s the flat paint, but I’m really not sure.
Good luck!
Hi, did you add a top clear coat on the pulls?
Hi Lindsay! I just wanted to let you know that your work on this dresser inspired my dresser transformation. You can see it at http://confessionsofadiyaholic.blogspot.com/2011/07/they-called-her-mellow-yellow.html. 🙂
I love your project! I know it was way back in April, but I just featured it on my blog, http://www.simplysemplicita.com/2011/10/diy-wishlist-urban-distressing.html and attributed it back to you! Congrats on a great makeover!
Hi Lindsay, I just found this magnificent piece of furniture through pinterest. I am in awe. I would never have thought to put the different hardware on her. Miss Matched is my new love. Kathy, Petticoat Junktion p.s. thanks for the inspiration
i just found your site today and its packed with great information, thanks for sharing.
i have to say i am impressed with your work and its takes a lot to impress me as i have have been a collector of vintage and retro furniture since the 80s (way before it was cool and no one was into it). your an artist. keep it going! i am inspired by all the new techniques being used, it seems what they were doing with walls 10 yrs ago (crackle, glazing, suede, distressing, and bold colors) has now come to furniture. go figure. i have a few techniques of my own i have been perfecting but mostly i operate as vintage dealer not an artist (like you). have a nice day.
Love this dresser! Thanks so much for sharing. This inspired me to refinish two nightstands for my bedroom.
Oh my goodness, this dresser is absolutely stunning! I have been craving to do something like this, but I always feel like I won’t have enough patience or it will turn out horrible and I’ll be discouraged to do future projects. But holy moley this peice is amazing, you must be quite proud of yourself!
That dresser screams classy, elegant, but totally fun! I never though much about yellow furniture and would never think of mismatched pulls (I’m a matchymatchy kinda person)–but I totally love this. What inspiration you have given me. I actually have a similar piece I am picking up this week…..now…..picking the color. I’m gonna check your site for the rest of the bedroom redo…have you done it yet? If not, hurry up, I’m hanging on the edge of my seat to see it! Thanks for sharing
I love the mismatched pulls. I’m so happy you shared that idea. Since I paint custome furniture, mostly in the French-Nordic style , it’s exciting to see something entirely different that I genuinely favor. Not being a color enthusiast either, I really like your green choice. Since you use acrylic paint, try Valspar if you have not already. It works well on primed furniture. Behr I am not a fan of….
Happy New Year!
Olivia
Oh my goodness, my master bedroom dresser is painted almost identical!
whats the paint color and where did you get the paint?
Hello
Do you think i could do the same thing to an old Ikea dresser?
Hi Tara- Absolutely!
WHAT is the name of that color and whats the brand? it looks EXACTLY like the color i need!
It is Decisive Yellow from Sherwin-Williams. 🙂
I every time spent my half an hour to read this webpage’s articles all the time along with a mug of coffee.
Teacher called me back, saw what I’d done, and started giving me a tough time Camping World coupons discounts bring something of which may be difficult to obtain outside of the own state alamo discount coupons Pretty Woman! Hopefully not much like the picture petland discounts coupon Why did it make you need to read the book san diego discount coupons Then you might get what surplus in seconds with a few clicks bob discount furniture coupons
Amazing explanation, am impressed to read that. Well done keep it up. l love to read more from you.
Woah! This is very cool!
This type of message always inspiring and I prefer to read quality content, so happy to find good place to many here in the post, the writing is just great, thanks for the post.
This is such a great resource that you are providing and you give it away for free.
I gotta favorite this website it seems very helpful.
Fantastic! You’ve captured amazing stuff here.
Really a great addition. I have read this marvelous post. Thanks for sharing information about it. I really like that. Thanks so lot for your convene.
This would really mean a lot. Thanks for sharing this one out.
I keep seeing these everywhere. As soon as we move, I’m going to get some for our house.
Love this dresser! Thanks so much for sharing! roofing contractors
This is a brilliant blog! I´m very happy with the comments! Deck Contractor in Tacoma, WA
Thanks for writing this great article for us. I have gained good stuff from this website. Looking forward to your next article. I am happy to share this post to my friends. Keep it up.
I am constantly browsing online with regard to articles that may benefit me. Thanks!
Regards,
James | Dallas drywall repair
I appreciate the genuine discussion of this podcast. It is great and I learned something new today.
I appreciate the genuine discussion of this podcast. It is great and I learned something new today. slab foundation
I keep seeing these everywhere. As soon as we move, I’m going to get some for our house.
Such a wonderful information blog post on this topic
Excellent information on your blog, thank you for taking the time to share with us. Amazing insight you have on this, it’s nice to find a website that details so much information about different artists. waterproofing
Wow it is actually stunning what you did with this dresser! I never would have guessed it would turn out like that! Amazing work!
This one is good. keep up the good work! foundation repair
This one is good. keep up the good work!
This one is good. keep up the good work!
This one is good. keep up the good work! Thanks for shring
http://makelyhome.com/mastering-the-master-bedroom-the-miss-matched-dresser/ concrete block foundation
I like your blog post, you have good command over your topic, I like to read more from you and also like to share some of my business here. foundation repair near me
I like your blog post, you have good command over your topic, I like to read more from you and also like to share some of my business here. Thanks for sharing! foundation repair near me
Great website! We love this place no doubt
https:/baycountybuilderservices.com/
I really appreciate this wonderful post that you have provided for us. If you are looking for Dumpster Rental in Portland Oregon. https://DumpsterRentalPortlandor.com
I really appreciate this wonderful post that you have provided for us. If you are looking for Dumpster Rental in Portland Oregon. I higly recommend this website. https://DumpsterRentalPortlandor.com/
I am so grateful to have found this post. It is so well-explained.
Very interesting website it is. I saw many different posts here and all are very interesting and informative.
This turned out to be a great restoration, thanks for sharing from the drywall repair near me team
This turned out to be a great restoration, thanks for sharing
You have shared a good post! Very inspiring and would love to try it!
Nice information, valuable and excellent texture, as share good stuff with good ideas and concepts.
This is a great inspiring article.I am pretty much pleased with your good work.You put really very helpful information.
Nice tips! I’d like to try this on my old cabinet. I wish I could it as beautiful just like yours.
I really appreciate this fantastic post you’ve written for us. If you are looking for Dumpster Rental in Portland, Oregon, you have come to the right place. This website comes highly recommended by me.
I am so grateful to have found this post. It is so well-explained.
Ottimo post informativo, adatto per la ristrutturazione di bagni