This is a Sponsored post written by me on behalf of Elmer’s ProBond Advanced. All opinions are 100% mine.
I have a healthy skepticism of DIY products that promise the moon and the stars. Even though I know that it’s completely bull headed, it’s always hard for me to believe that there are really such big advances in things like paint or glue.
So, imagine my feeling when Elmer’s approached me to do a review of one of their premier glues – ProBond Advanced. Yes, the same Elmer’s that makes the school glue that I probably ate 30 years ago. They asked me to create a mixed materials project that showcases ProBond Advanced’s ability to bond wood to metal, glass to concrete or ceramic to drywall. I generally make it a practice to not make projects just to make them (ain’t nobody got time for that!) – even if someone wants to pay me to do so. This time, though, I did have a mixed materials project that had been on the back burner for some time, so I decided to give it a go.
Now for some history on this project. Back in May of 2012 (yes, almost two years ago!), my friend Pam of Retro Renovation sent me an email and told me to go see a guy here in Austin who had stumbled across a bunch of brightly colored plastic decorator panels from the 1960s (Pam wrote a post about them here, where you can find more details about their history and more pictures of the different patterns and colors of the panels). The guy’s father-in-law is a picker who got his hands on an unopened box of these beauties in an old Pennsylvania warehouse. I bought three of them from him – two are blue and have a bottle design and the other is green with a bubble design. He told me to lay them flat so that they wouldn’t break (they are a little brittle from age), so I slid them underneath my bed.
And they were there until a few weeks ago. Seriously.
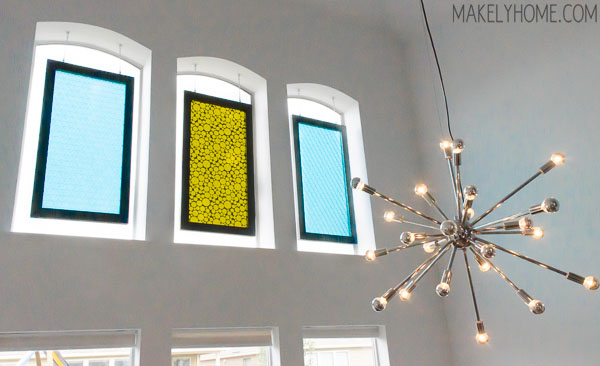
I knew that I wanted to turn them into framed panels to hang in the second story windows in our living room. They would be really unique and give us some privacy without losing all of the light from the windows. I envisioned a silver toned metal frame.
The problem became my fear of ruining the panels. I was paralyzed, and I don’t get like that very often. I spent a decent amount of money on them because they were so special, and the thought of breaking them kept me from doing anything with them. But when Elmer’s approached me, I decided that this was the right project to try out the ProBond Advanced.
This was either going to turn out amazing, or I was going to end up throwing a better fit than my 3 year old can throw. At this point, I thought that it could go either way.
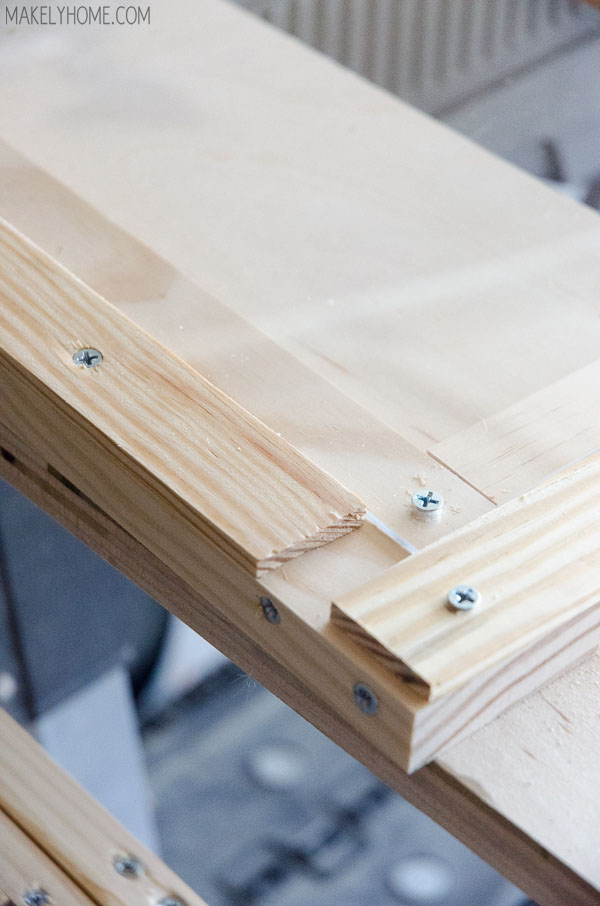
I began by figuring out exactly how I wanted to build the frames. I knew that I wanted to build them from wood and then attach aluminum facing to it. But, I went through a lot of trial and error to get there. I ended up building a frame out of 1×3 lumber and screwing some lattice trim around the edges so that the panels would fit in like a picture frame. Because I was worried about breaking the panels, I screwed a sheet of plexiglass to the 1x3s so that the panels couldn’t bend or sag. The lattice is the same thickness as the plexiglass plus the plastic panels.
I originally wanted to do glass instead of plexiglass – and even tested it with the ProBond Advanced – but glass ended up being too expensive of an option. But, in my mockup, I will say that the ProBond Advanced held the glass onto wood gorgeously! It’s not moving at all, and it didn’t leave a foam residue that other types of glues can leave. I highly recommend this glue for glass to wood bonding.
Back to the project. After the frames were assembled, I careful cut the vintage panels to fit inside. I scored them with a plastic cutter and they snapped in a clean line really easily. WHEW! What a relief. Two years of worry for nothing. That should teach me something.
I fit the vintage panels into the frames and then screwed more 1x3s on top to sandwich the panels into the frame. This helped me to not damage the panels in case I wanted to use them in a different way in the future.
And this, my friends, is a good example of “Ballard Overbuilt,” as my husband and his father call it. Tom was out of town while I was working on this, so I was on my own. I’m sure I could have done this with 1/4 of the wood. But guess what? This worked and it looks great. And better yet – it finally got done!
Because I wanted to make the frames look like they were made of aluminum, I needed some aluminum strips cut to the widths of the wood I used on my frame. I went to a local metal shop and ordered the strips. I’ll tell you what – it was really intimidating, but the cost was like a quarter of the price I would have spent buying aluminum bar from Home Depot or Lowe’s.
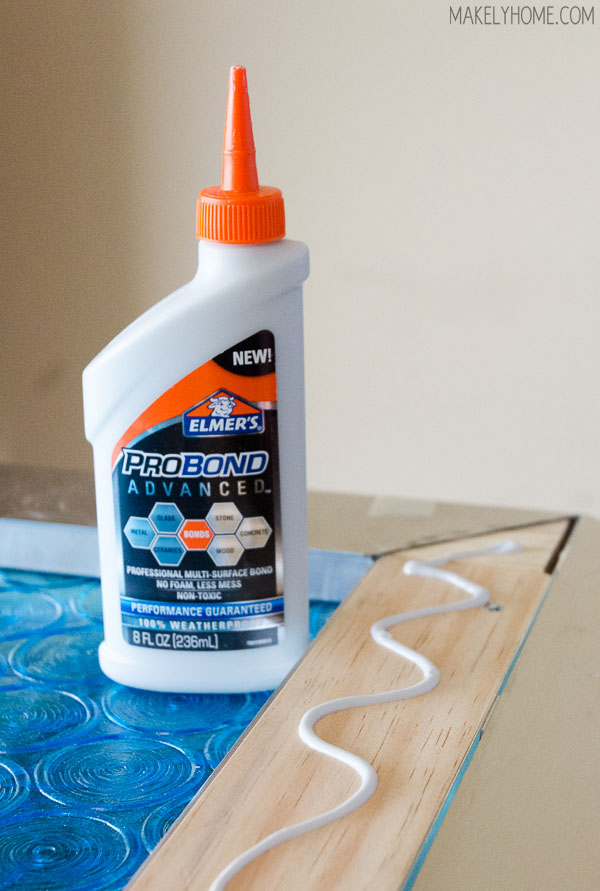
After I cleaned the aluminum with rubbing alcohol to remove any grease or oil, I used the ProBond Advanced to glue the strips to the wood. Here’s an image of the metal on the sides:
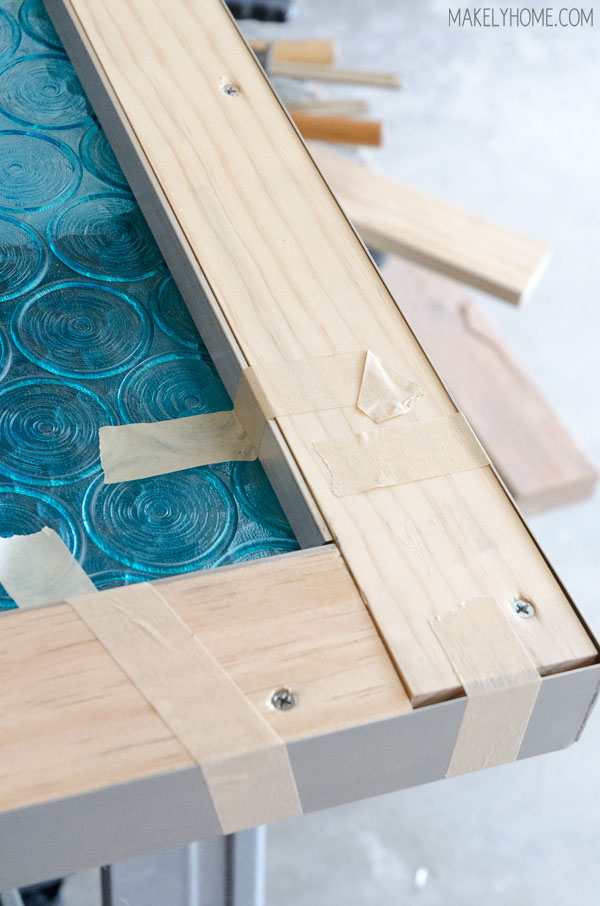
ProBond Advanced needs to be clamped for 2 hours, so I just used masking tape to hold it tight. It worked great! After 24 hours, the bond was perfection. My friend Heather was visiting me and helped with this part of the project – we were the dorky DIYers who couldn’t quit talking about how great this glue held. And just like the original Elmer’s school glue, a little goes a long way, which makes it really easy to apply it exactly where you want it to go.
Then, I did the same thing to put metal on the fronts.
Here is a word of caution, though. The instructions on the ProBond Advanced bottle state that you should use it only when the temperature is above 60 degrees. Y’all, they aren’t kidding. I tried to use it when it was 53 degrees outside, and it wouldn’t hold at all. Instructions really are written for a reason.
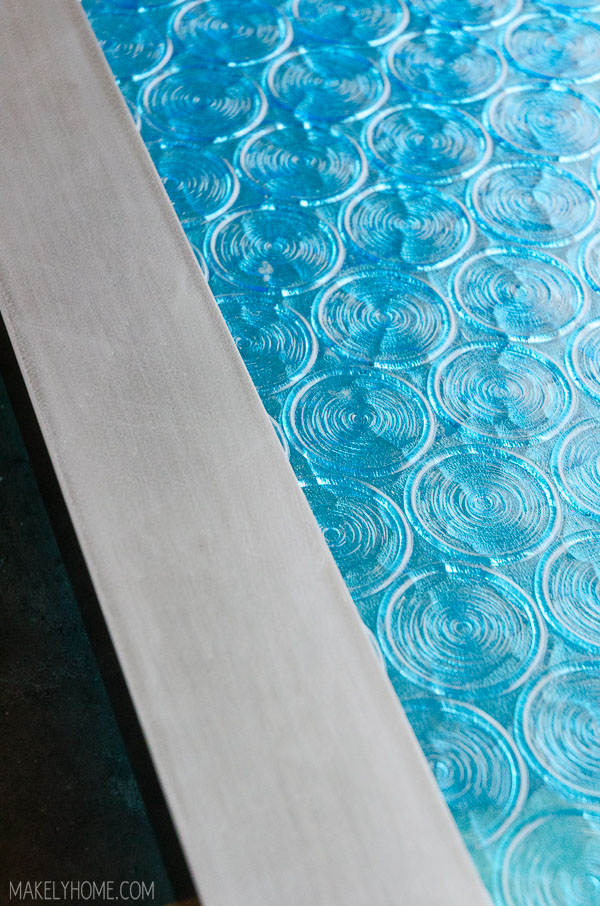
After the glue was dry, we roughed the aluminum up a bit. We used 220-grit sandpaper and then 600-grit sandpaper to take the aluminum from shiny to brushed.
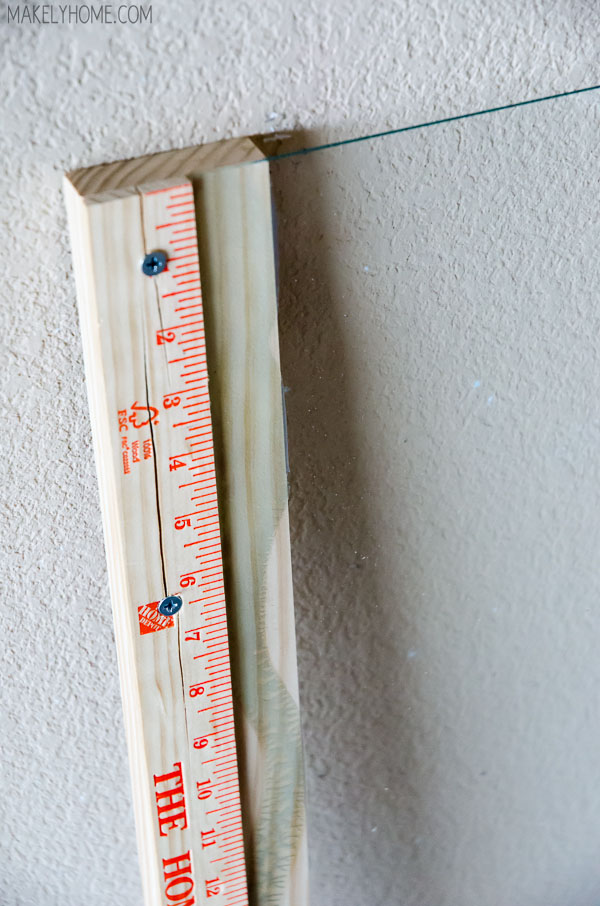
Tom then screwed two eye hooks into the top of the frames so that we could hang them in the windows. And like a champ, he crawled up the giant ladder to hang them up. He was sort of mad at me, but it was worth it.

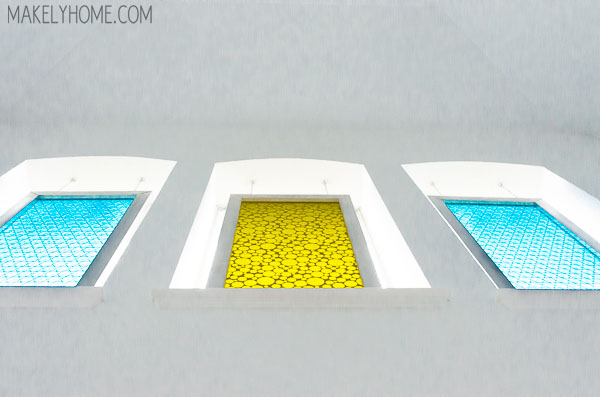
Now when the sun shines through my windows, I am as giddy as a school girl. Look at that color! It’s incredibly hard to photograph, so I wish I could just fly you all down to my house so that you can see it in person.
Here’s a shot looking straight up at it, where you can really see the color of the aluminum. I don’t know why it looks black in the previous image.
If you have a metal to wood or glass to wood project, I do recommend that you try ProBond Advanced glue. It will not work on wood to wood applications, though, so don’t try that! And if you don’t have a project in mind but want to play with some fun glue, check out the Elmer’s Mixed Materials Pinterest board.
What do you think about my new panels? How would you use ProBond Advanced?
Those turned out awesome! Love them! The colors are really amazing.
Thanks, Kim! I’m sure you could shoot them way better than I did. They were hard!
I love them! They turned out so very amazingly!
Thanks so much, Sarah!
wow!! that is the coolest thing. id love to see what it looks like from the outside!
I need to take a pic of it from outside!
Lindsay!!! They turned out AMAZING!!! I love it. The perfect solution for high windows that are hard to hang curtains on.
Thank you, Stacy!! I was so nervous about messing them up, but I am thrilled now.
Those turned out perfectly! I should have taken a souvenir home 🙂 I LOVE them!
I do have those pieces that I had to cut off! Move to Austin and they’re yours. 🙂
I love this gorgeous project with a burning hot fire.
When I was a little girl in the 70s, my parents had a couple of pieces of furniture that included these panels in a burnt orange circular pattern just like your blues. What a great find, and you did them proud, Lindsay.
And for the record, “Two years of worry for nothing. That should teach me something.” describes my life to a tee. xo
That is awesome, Cindy! I wish I could see those!
Beyond amazing!!!! And, I have two story windows like that…now I am daydreaming about colored glass in my windows!!!
Thank you, Jackie! It’s so nice to have a little privacy but still have some awesomeness, too.
Your panels look fabulous! I think one similar would be just the thing for my kitchen window.
Thanks, Cindy!
Really really love this idea!!
Thanks, girl!
These are gorgeous!!! I would love to make something similar.
Thank you, Jen!