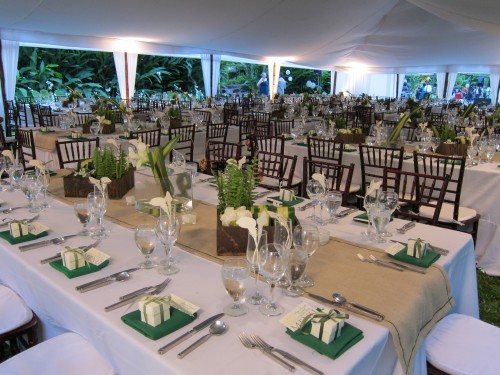
One of the most popular posts I’ve ever written for this blog is the tutorial for my $7 burlap table runner. And for good reason, if I do say so myself. It’s cheap, it’s easy, and it fits a wide range of decorating styles. It’s even perfect for wedding decor, as sweet reader Camille proves:
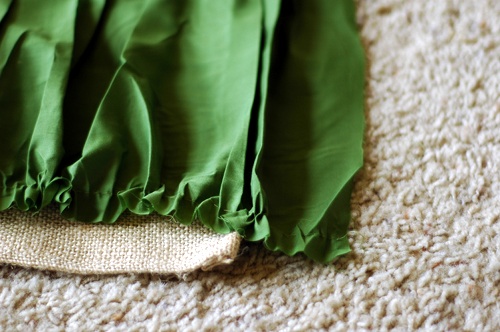
A year and a half later, my table runner is in need of an update. The sun had bleached portions and I may or may not have accidentally splattered some paint on it. So, I spent $7 more dollars, and my runner became the $14 Modern Ruffled Table Runner.
You totally love it, right? Me too! It’s incredibly easy to put together – if you can sew a straight line, or even a not-so-straight line, you can create this table runner.
Modern Ruffled Table Runner
1. If you haven’t already, follow the instructions to create the original burlap table runner. You will use this as the base.
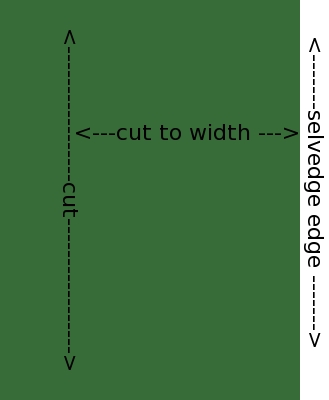
2. Buy some fabric that’s about two and a half times the length of your runner. Your measurements will be different, but my runner was about 80 inches long, so I needed a length of fabric that was about 5 yards long. I bought 3 yards of cheap quilting cotton ($3.99 “Symphony Broadcloth” at JoAnn’s, made cheaper by a 40% off coupon) and sewed two lengths of it together. You want to cut the length WITH the selvedge edge, not against. This ensures your ruffles will be nice and full.
3. You want the finished width of the new piece to be about 2 1/2 inches shorter on each side than the width of the burlap runner. Again, your measurements will be different, but my runner is 18 inches wide so I wanted my finished width of the new piece to be 13 inches wide. Add a 1 inch seam allowance on each side, which makes what I call my “cut to width” 15 inches wide.
Oh, gosh. I’m not even making sense. Refer to the diagram above again and see if you can make heads or tails of it.
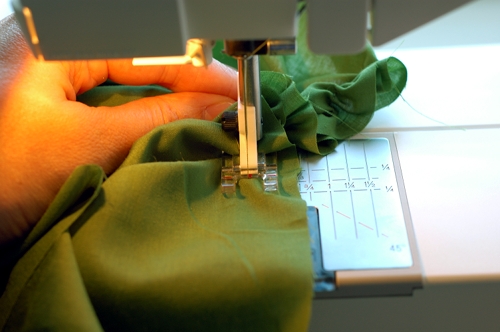
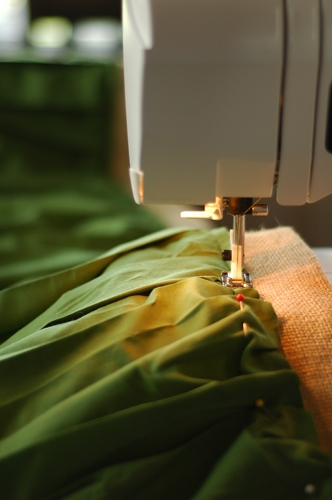
4. Set up your sewing machine to stitch a long basting stitch with a lo0se-ish thread tension (mine was set to a 4). At about 5/8 of an inch from the long edges of your fabric, run your basting stitch, catching the fabric behind the foot so that it gathers. Hold it for as long as you can, and then let go and hold the next length. Do this for both of the long edges, and leave long thread tails (about 6 inches long) hanging off both ends on each side. You’ll leave the basting stitches in for this project, so you may want to choose a thread color that matches the fabric.
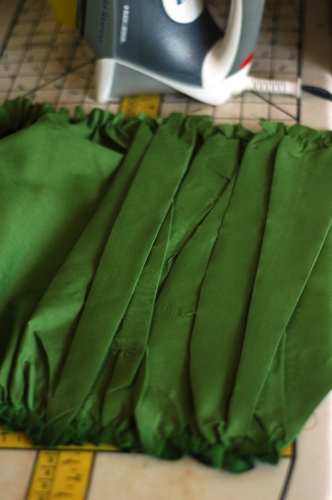
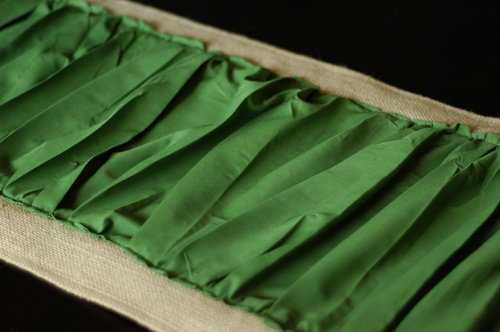
5. Head to your ironing board and press your new ruffles so they become folds. I’m sure this kind of ruffle has a fancy name, but I’m going to just call them modern ruffles. You don’t want them to look uniform, so it’s perfectly fine (and even preferred) to have creases and the folds going in different directions.
6. Lay out your burlap runner and place your new runner on top of it. Pull the fabric down the basting stitches (using the 6 inch tails if you need to) so that the new fabric is a few inches longer than the burlap. DON’T pull the basting stitches out.
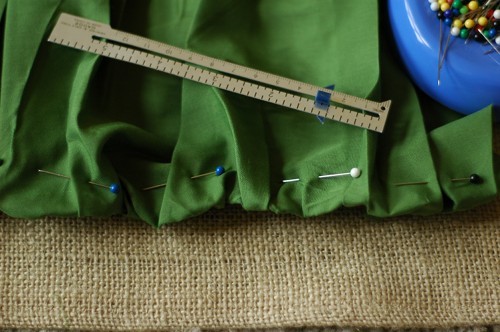
7. Turn the basted edges under 1 inch and pin into place. I used a lot of pins to make sure that I got it all turned under and no ruffled poofs where hanging out. Because you placed your basting stitch at 5/8 inch, it will be hidden when you make you turn the edges under.
8. Go back to your ironing board and press the new fold on the edges that you turned under. I left the pins in place – just don’t iron over them if they have plastic heads.
9. Lay your new piece of fabric back out on the burlap and pin it into place. I pinned it down on both long edges and a few times down the middle. Stitch it down about 1/4 of an inch from the edge of the new fabric. However, since the edge of your fabric is now folded gathers, your edge won’t be completely straight and even. Your stitch will even make the fabric pinch and fold. I’m sure that professional seamstresses will hyperventilate over that, but it’s totally fine (and again, preferred) for this project.
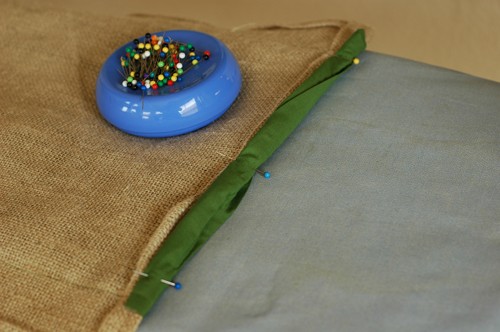
10. Visit your ironing board again and turn under the parts of your fabric that you let overhang the ends of the burlap. If it’s more than about an inch or so, you may want to trim it. Just turn it under the burlap, pin it, press it, and then stitch it in place.
Now you’ve got yourself a nice set of modern ruffles on a great burlap table runner. I absolutely love the look of this updated version and wonder how I lived with the Plain Jane version for so long.
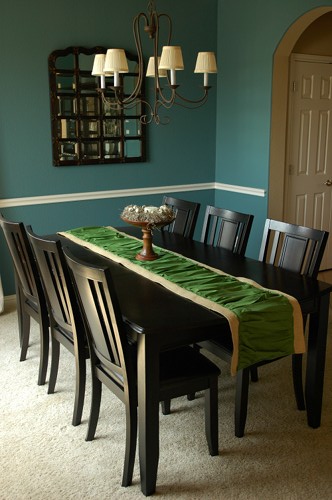
I also really love the green against the blue walls (Smoked Topaz by Glidden) in my dining room. This green perfectly matches my new Ikea fabric that I’m going to use in this part of the house, so it’s not as random as it may seem.
What do you think? Will you update your burlap runner with the modern ruffles? Did you never get around to making the original runner and are now inspired to do so? Do tell!
********************
I am really excited to announce the winner of the Rusted Chain giveaway! We have TWO winners who will each receive a $25 gift certificate to Beki’s wonderful shop.
Congrats to Melinda B and MoniCue for being the randomly selected winners! I will get in touch with your shortly about your prize.
************
The winners of the AboutOne giveaway will be announced by the fabulous folks at AboutOne. The winners will be contacted directly by the company.



This is amazing! What a great transformation! I remember the original, and I loved it. Never got around to making it, but this re-do is killin’ me with its awesomeness! 🙂
I love this! I don’t love all the ironing, but I love the way it looks! Nice work.
LOVE this! What a great idea 🙂
Great way to update the runner Lindsay!
What do I think!! I lurve, love, LOVE it! Gorgeous!
It looks beautiful, and that green is just lovely! That kind of ruffle is called ruching (pronounced rooshing).
Arlene
Love this! =)
I love your dining room table (and gorgeous table runner). Where did you get the table from? I’ve been looking for something like that.
This is going on my “to try” list for sure!!! Love that gorgeous green. 🙂
You can never go wrong with ruffles – right?! Plus, the pop of green is perfect for spring!
I love the pleating/ruffling you did.
Its’ gorgeous!! And I love love that shade of green! I wonder if there’s someway to make this without a sewing machine…. it really is beautiful! Great job!
I LOVE how she used it in her wedding. Everything looks incredible! And this is one of my all-time favorite runner, it’s just gorgeous! Thanks for the how-to, I’ll be linking to your update.
This is such a beautiful look. I really am loving the green and the blue on the your walls is amazing! May I ask what color it is? I am doing a lot of painting this Spring and Summer.
OMG, OMG, OMG! I loooove it!
You caught me, I’m one of those who also loved the first runner, but hadn’t gotten around to making one. I’m double inspired this time!!
I am trying this tonight!! Thanks for the creative idea!!!
I love this! I made the original stayle- with the fringed edges to use for a bridal shower- on the guests tables and the serving tables too. I have the pictures on my page- The Curtain Lady~Custom Home Decor. It is the Bridal Tea pictures with the yellow cloths and burlap runners with the sunflower centerpieces. The bride actually used them at the reception too!
Thanks for your ideas!
Cheri
Wow! Simply gorgeous!
love this!!! I will have to make one love the color on your walls also!! what color is that?
PLEASE tell me what that color is on your wall! I LOVE it!!
It’s Smoked Turquoise by Glidden. 😀
I LOVE this! Just found your blog today, and I can’t wait until my Christmas sewing projects are done so I can make this 🙂 You are so creative! I, also, love your walls. I tried to find the paint color, but maybe they don’t make it anymore. I think I’ll have to go on a search for a similar color. Love your style!!
Hi Kate! Thanks so much! 🙂 The wall color is Smoked Turquoise by Glidden. It’s not in their current color palette, but if you go to Home Depot and ask at the paint department, they still have the formula in their computers.
Thank you, love this idea.
What a great website! I love your blog. So many great ideas! I will be back for sure!
LOVE the runner! But I love the room color even more!!! Do tell, please???!!
It’s Glidden Smoked Turquoise! 😀
THANKS!!! It is be-u-teee-ful!
Love this! Mine turned out great! Thanks for the instructions.
I love this runner and want to make one of my own, but I am not getting the ruffle creation. I know how to do a basting stitch and adjusted my thread tension, but if I gather the fabric with my hand after it goes through my machine, nothing happens…….I am just not getting how to do this…….are you also holding and pulling the bobbin thread? Any help would be great as yours turned out beautiful and I really want mine to as well……thanks!
Are you holding the fabric behind the foot so it bunches up? I did this a while back, but I feel like I’d hold it to make 10 or so stitches, release it and then hold the next part.
Thank you for the tutorial, I just made one long enough to span three tables for Thanksgiving. I’m now concerned with people eating on it! Any words of advice on how to launder the finished product? It seems like the pre-washed burlap will still shred a bit onto the green fabric, and I’m worried about those pressed green “ruffles” making it through the wash. Any advice would be appreciated!
Hmmmm…good question! I’ve never actually washed mine since I take it off the table when people eat there. If you have a washer with a handwash/delicate cycle, I’d probably do that in cold water.
Beautiful! It would be cool to use piping on the long sides and stitch in the ditch.