Makely

Let's Make Life Awesome

  • Home
  • Decorating/DIY
    • Create Your Decor
    • Decorate Your Home
    • Paint Your Walls
    • Transform Your Furniture
  • Healthy Living
    • Essential Oils
    • Family Wellness
    • Household Care
  • Project Gallery
  • Contact
You are visiting: Home » Archives for Lindsay Ballard » Page 160

How to Make a Charmed Wreath

by Lindsay Ballard on September 4, 2012 1,127 Comments

I have such a love/hate relationship with wreaths.  When they are full and fluffy and make a statement, I love them.  When they are wimpy and skinny and just a bunch of “stuff,” I hate them.  I am really, really deep, y’all.

I get easily bored with only having a wreath on my front door, so I started to explore some options for hanging them on interior doors, too.  There’s no reason why I should only have one awesome wreath in my home at a time.  Interior wreaths can be a bit tricky, but I happened to come up with an idea that I think could really work in everyone’s home.  I call them “Charmed Wreaths.”
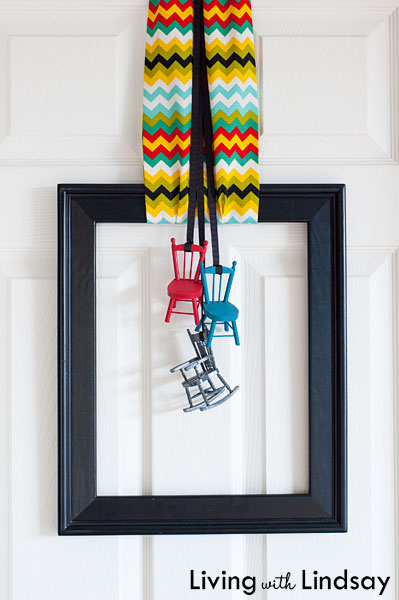
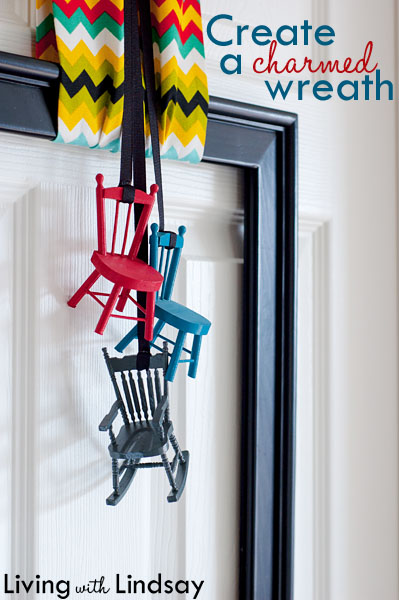
My inspiration for the charmed wreath was to create one that was unexpected and tells a little story about you.  This wreath, made from a length of fabric, some strips of ribbon, an unused picture frame and some spray painted dollhouse chairs hints, to my obsessive love of painted furniture.
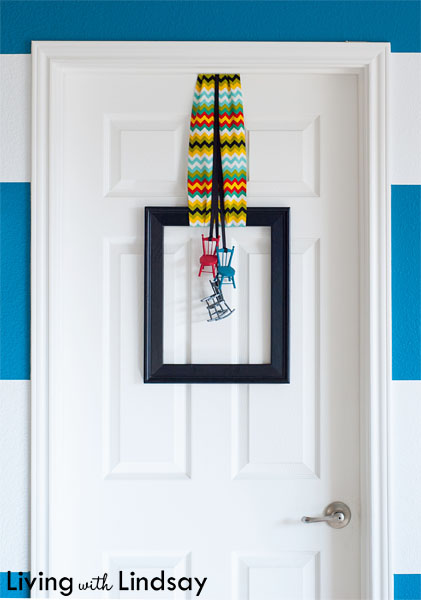
Just like a traditional charm bracelet carries charms that remind you of important things in your life, a charm wreath displays those types of important things, too.  You could add “charms” of pretty much anything you can think of – ballet shoes, heirloom silver cups, old spools of thread – anything small is fair game.

To hang this particular wreath, I looped a length of fabric around the frame like I hang wreaths with ribbon on my front door.  I folded it to form a few pleats, and nailed it to the top of my office door with finishing nails.  I hot glued the thin black ribbon around the little chairs, and I nailed them to the top of the door, too.  After the paint on the chairs dried, the whole thing took me about five minutes to put together.  Obviously, you could use a more traditional grapevine wreath, but I thought that a frame would be more fun with these particular colors.
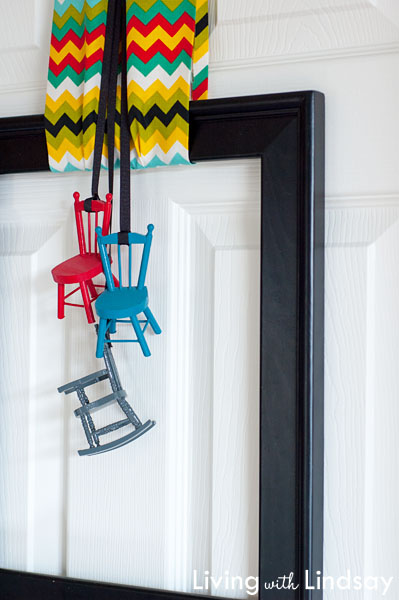
I did stick a few glue dots on the bottom corners of my frame to better attach it to the door.  Otherwise, it was banging every time I opened and closed my office door.

I think this is such a fun and easy way to display some {more} personality in my home.  My office door is right off of the playroom, so I think it really lends itself to the playfulness I’m trying to bring to that room’s decor.
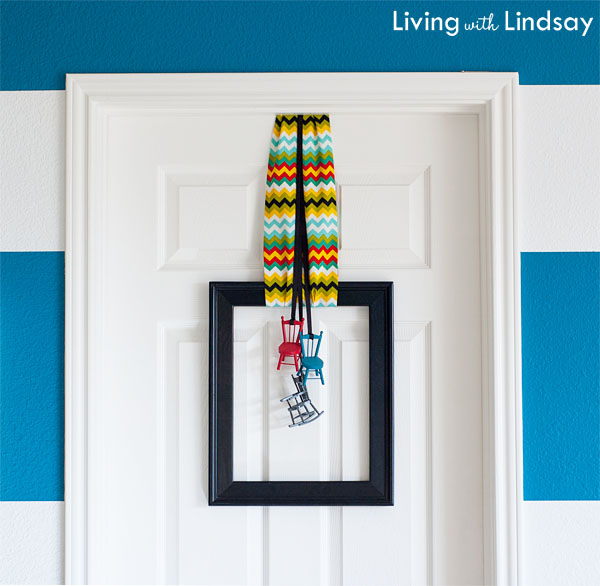
I think I’d like to add one with Lego on Zack’s door and maybe one with little dolls on Emma’s.  Or maybe Hot Wheels and Ponies.  Or maybe Star Wars and Minnie Mouse.  I could even do a combination of everything they liked.  The good thing is that it would take me only a few minutes to change it up.

What do you think about my idea for “charmed wreaths”?  What would you put on your wreath?
 

Hiding an Eyesore with a “Built-in” Bookcase

by Lindsay Ballard on August 28, 2012 1,882 Comments

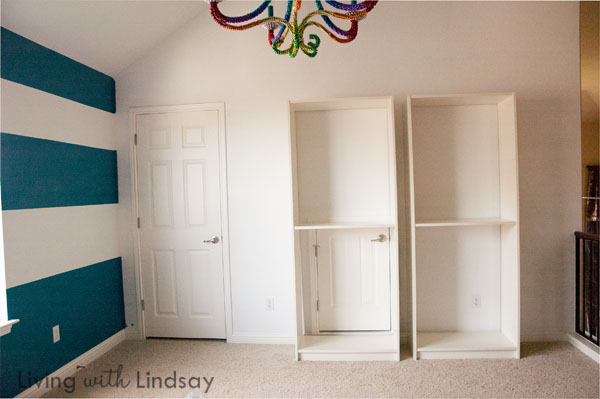
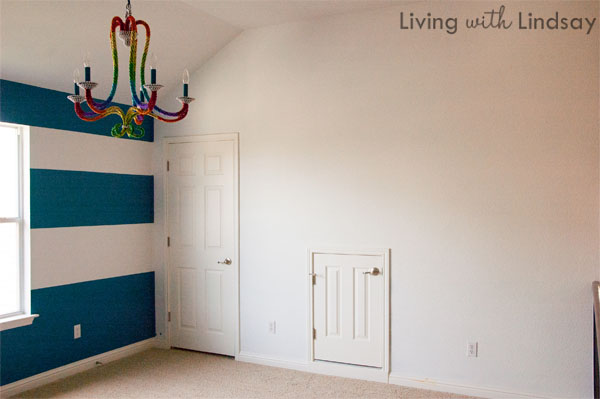
When we moved into our home four years ago, there were so many little features that I found charming.  We had the giant above the front door ledge.  There were various art nooks that provided some architectural interest.  What would become the playroom and Zack’s room had these little doors that provided access to large attic storage spaces.

As such things go, I soon realized what a pain all of those things are to decorate around.  In the playroom, I began by having a sofa in front of the little attic door.  The problem was that the door handle is at head height, so not only did it stick out above the sofa, but I hit my head on it several times when I sat down.  That sofa is long gone thanks to an old man cat with a bladder problem and a rage issue, but the door remains.  And I’ve given the door the evil eye ever since.

Several of my friends, notably Centsational Girl and Just a Girl, have created faux built-in sets of bookcases using pieces from Ikea’s Billy collection.  After obsessing about their new beautiful spaces, I realized that installing my own built-in Billy system could not only provide us with some needed playroom storage, but it could also solve the eyesore door problem.  I measured and discovered that my door would fit inside the dimensions of the wide Billy bookcase with a few inches to spare.  Some Billy Olsbo doors would hide that attic door without a problem.

Sorry for the terrible photos.  A new camera, better lenses and camera lessons are on their way to me soon!

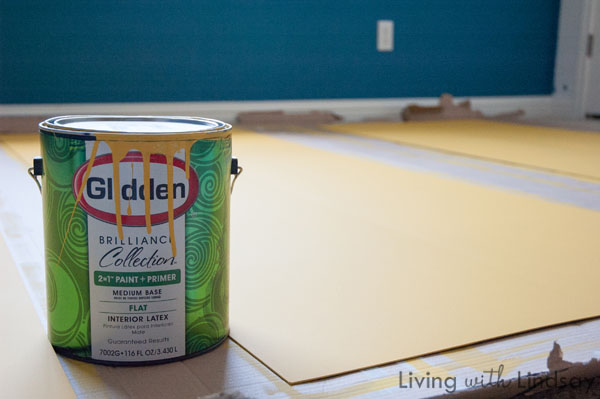
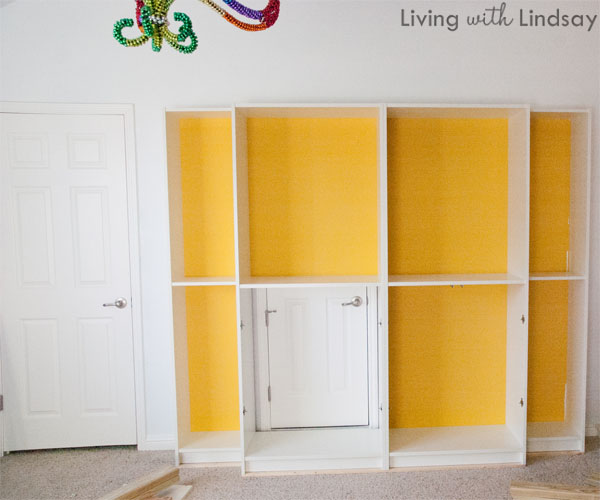
To make them look truly built-in, we had a few steps to take other than just assembling them.  The first thing I did was to lay the thin plywood backing on the empty Ikea boxes and paint them yellow (Sunflower by Glidden).  Using a high density foam roller, I primed them with Zinsser Cover Stain oil based primer, and then then gave them three coats of yellow paint.

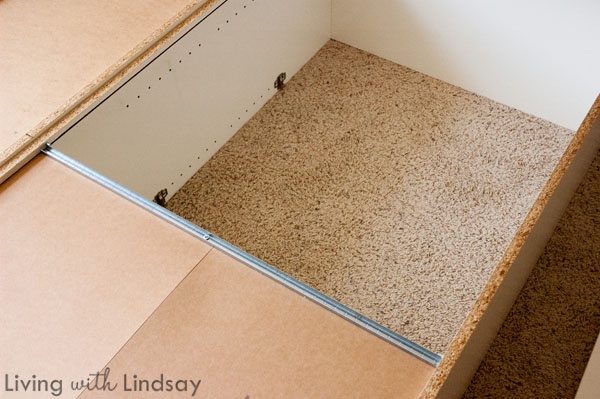
We slid the backings into our four bookcases and nailed them into place per the instructions.  For the one section of bookcase that hides the door, we had to cut the backing so that we still had access to the attic through the bookcase.  If that doesn’t make sense, it soon will.

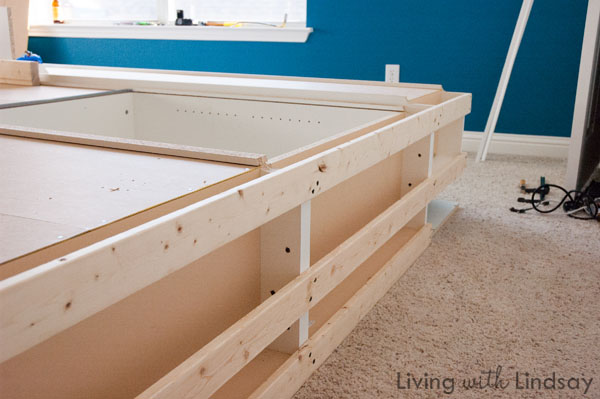
Another thing we had to do was attach the four free standing bookcases to each other.  We laid them flat (fronts down) and raised the two shallower end units so that their backs would be flush with the deeper units.  Tom drove some screws through the sides on the bottom and top of the units.  He also attached some 2 x 4 boards to the bottom to help tie them together and also raise the bookcases up so that the baseboard trim we would install would be level with the trim that was already on our walls.

We very carefully tilted the bookcases up and anchored them to the wall from the top with L-brackets going through the studs.  These bad boys aren’t going anywhere.

You can see where the paint got scraped off of the backing on the little unit on the right.  We slid the backing into the unit against the direction of the arrow that was printed on it.  Who’d have known there was really a right way and wrong way to slide those suckers in?  At any rate, I was able to easily touch up that paint.

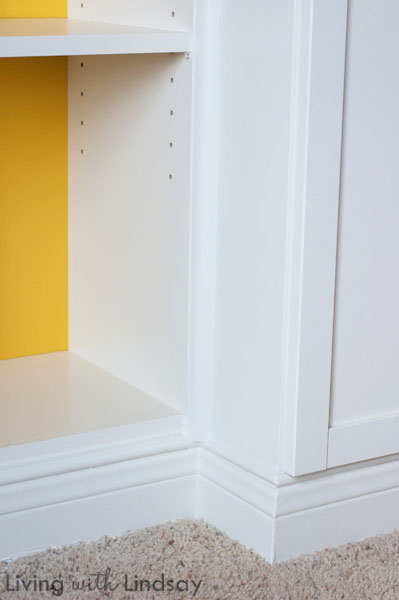
Unlike Kate and Chris, our “built-ins” couldn’t go wall to wall since we had a closet door and an open railing to deal with.  So, we had to end up buying baseboard trim (instead of removing what we already had and reusing it) and nail it to the front and sides of the unit.  We also added crown moulding to the top, quarter round at the joints to the wall and between the individual bookcases and a strip of lattice to the front to hide the seam where the two larger units were joined.  Kate did an excellent job explaining this process, so I won’t even try.  I primed the mouldings and painted them with a latex paint I had color matched to the units – I just took a shelf in to Lowe’s to do the color matching.

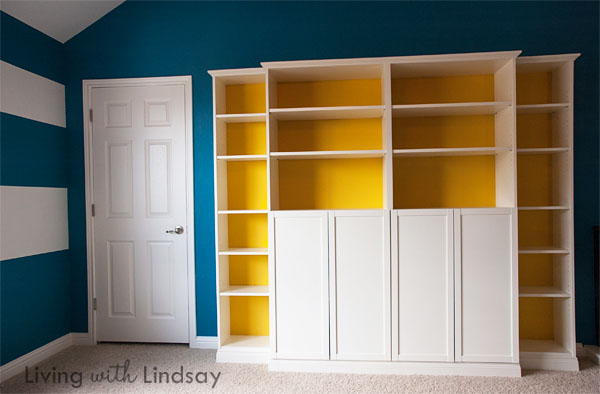
Once the moulding was finished, I painted the wall behind the bookcase and added the shelves and doors to the unit.  And in the process, the attic door was hidden.  I’m not sold on the yellow yet, and I’ll probably end up changing it.  But, I’m going to wait until my room is complete before I worry about that.  It’s just paint after all.

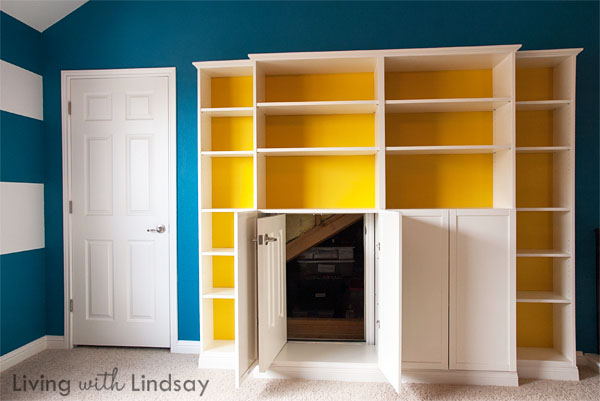
The great thing about this Billy “built-in” idea is that it looks professionally installed, provides a ton of storage, and hides the eyesore of an attic door.  See?

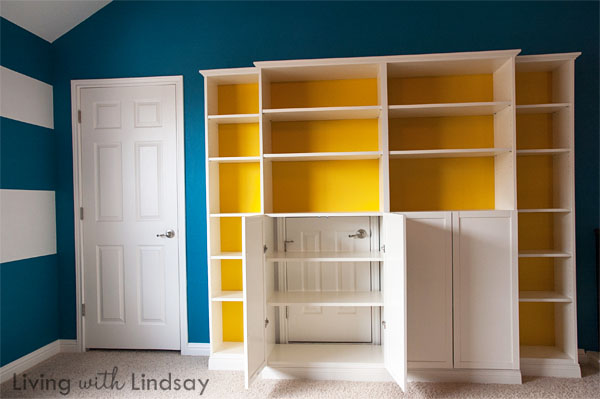
To access that attic space, all I have to do is remove the shelves and unlock the attic door.  I may take me an additional minute to get into the attic as it did before the doors were hidden.  This part of the attic is where we store all of our Christmas decorations, so we only need to get in and out of there two times a year – to get the decorations out and to put them away.

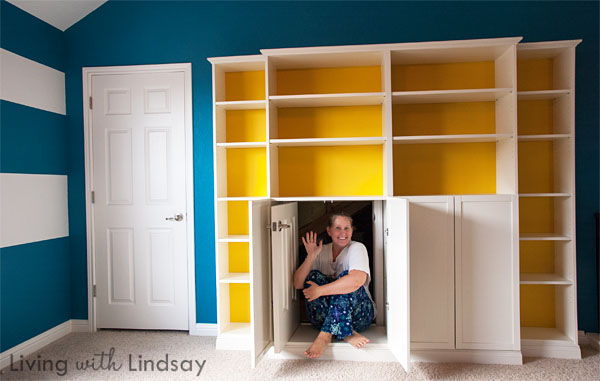
All I have to do now is crawl through the bookcases.  And it is SO worth it to have that annoying little door hidden.

Yes, I’m in my pajamas.  Yes, it may have been 3 o’clock in the afternoon when I took this picture.  Just keeping it real, y’all.

 Have you had to come up with a creative solution to hide an eyesore in your home?  Have a question about my bookcases?  See you in the comments!


« Previous Page
Next Page »
  • Email
  • Facebook
  • Instagram
  • Pinterest
  • Twitter

About Makely

Lindsay Ballard is a former college mascot turned political geek turned roller derby playing, DIY fanatic.

Lindsay chronicles her projects, design ideas, and lifestyle tips here at Makely, where she shares tutorials and inspiration. Her DIY designs are bold and graphic, while her spirit is fun and full of color.


Archives

Categories

PRIVACY POLICY
Copyright © 2009-2019 Makely School for Girls | All Rights Reserved | Posts may contain advertising content or affiliate links