A few months ago when I was updating our half bath, I knew that I wanted to rip out the pedestal sink. The sink itself was fine, but it just didn’t do anything for me. When we built the house, we tried to get the builder to not install that sink (or any of the flooring in the house, for that matter), but they said it was a legal requirement. Bummer!
Anyway, I knew that I wanted to do something unique for the vanity in that room. The bathroom itself is very small, so the vanity was going to have to have quite a personality since there wasn’t much other than paint that I could add in there. I searched for months for ideas online, and I finally came across plans to build this vanity from an old dining table.
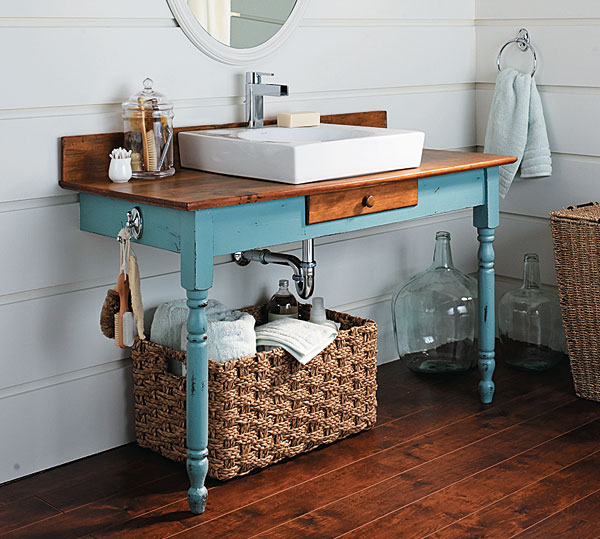
The plans are available for about $6 online, but I knew that I didn’t want to make my vanity exactly like this one. My vanity would need to be narrower for starters. I also decided to put in a self-rimming sink instead of a vessel. So, I DIY’d my own version and put together a little tutorial for anyone else who may want to attempt something similar.
How to Build a Bathroom Sink Vanity From an Old Dining Table
1. Find a second-hand wooden table that you would like to use. Make sure you like the shape of the legs and the skirt boards of the table. I decided that I wanted a farmhouse style table, and so I posted this photo on Facebook and asked if any of my local friends had one they wanted to part with.
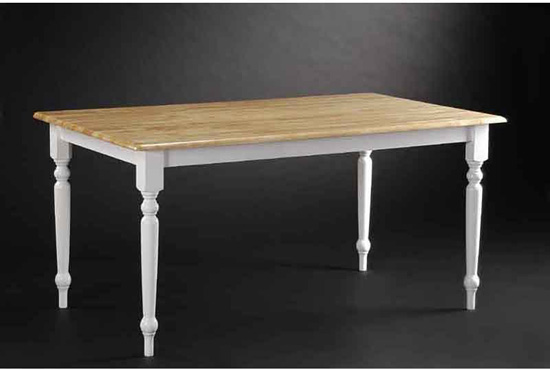 via DiningTables.com
My friend Serita came to the rescue, telling me that she had that exact same table just taking up space in her garage. Score! Even more, she didn’t want me to pay her for it – instead, we are bartering my decorating/crafting services for her table. Double Score! See? I told you that asking on Facebook pays off!
2. Sand the factory finish off of the table, legs and skirt boards. I started with 80-grit, used 150-grit after that, and finished with 220-grit. Yes, it’s a lot of sanding. Yes, it took me a few nap times. Yes, I have a few different types of power sanders at my disposal. But, I wanted the vanity’s finish to be perfectly smooth, so I did what I had to do.
You can cut down your sanding time by knowing about how deep you need your finished vanity to be. I wanted mine about 36 inches deep, so I sanded about 40 inches of it plus about 6 inches on the other end of the table (for the backsplash). I also took the legs off during sanding and only sanded 2 of them.
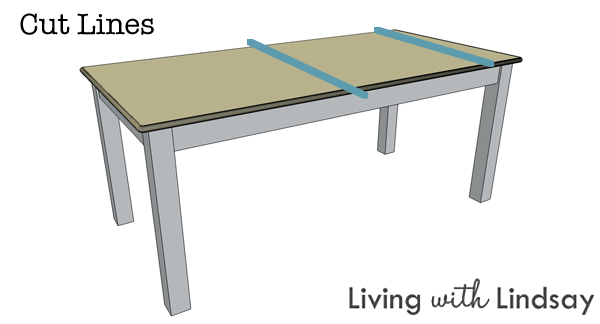
3. Cut the table and skirt boards to the needed depth for your bathroom. Like I said before, I knew I needed mine to be about 36 inches, so that’s where we cut it. Tom used a circular saw to make a straight cut. We also cut off the edge on the other side of the table to use as a backsplash. For your own reference, we made the cuts generally about where the blue lines are below. Thanks to Tom for making this pretty picture with some sort of computer magic.
4. Prop the sanded portion of your table on a pair of saw horses (or whatever you can rig up) and attach the two front legs. Measure to see if the table is tall enough to serve as your vanity. Mine was too short, so I attached some bun feet to the end of the legs to make it taller. The top of the feet were roughly the same width as the bottom of the table legs, so I was able to use wood filler and sand a little to make it work. It wasn’t the absolute most perfect fit in the whole entire universe, but it was good enough.
5. Attach the backsplash piece to the top of your table. Clamp it and use a level so you can make sure it’s going to be secured at a 90-degree angle. I attached mine with wood glue and some long screws put in from the underside of the table. We also added a bead of clear caulk on the front where the backsplash meets the table.
6. Pick out your sink and faucet. I chose an American Standard sink and a Delta faucet (both from Lowe’s). You need to make sure that your sink will fit on your table, so make sure you have the dimensions when you are shopping.

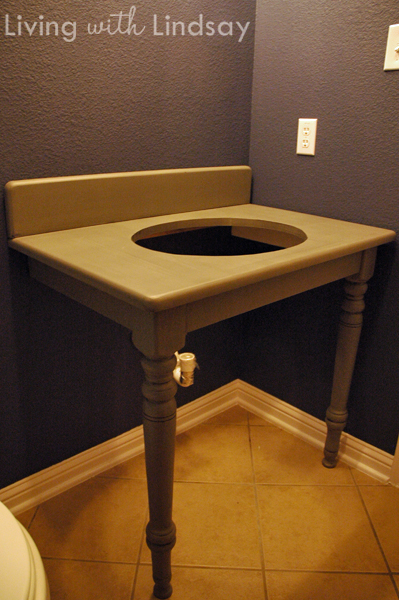
7. Trace your sink’s template onto the table and cut it out with a jigsaw. It’s always a good idea to cut your hole slightly smaller than the template just to be safe. You can always make it larger…but you can’t make it smaller!
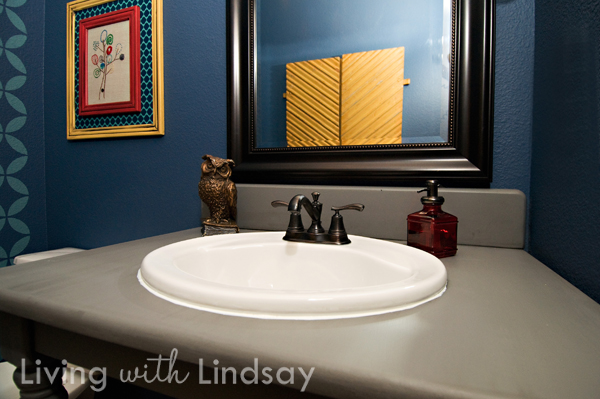
8. Now’s the fun part! Prime and paint your table and legs. You will want to prime the sink hole and slightly underneath to protect the wood in case water leaks. I also glazed mine, but that’s my own sick obsession. The paint I used is Seal Gray from Glidden, and the glaze is Ralph Lauren’s Black Silk.
9. Following the manufacturer’s directions, add three coats of polyurethane to all sides of your table (top and bottom). I used Rust-Oleum’s Ultimate Polyurethane, which is one of my favorite top coat products. The finish has a great feel, and I’ve been very happy with the protection it’s given my vanity over the last few months. In other words, I think you should use this one.
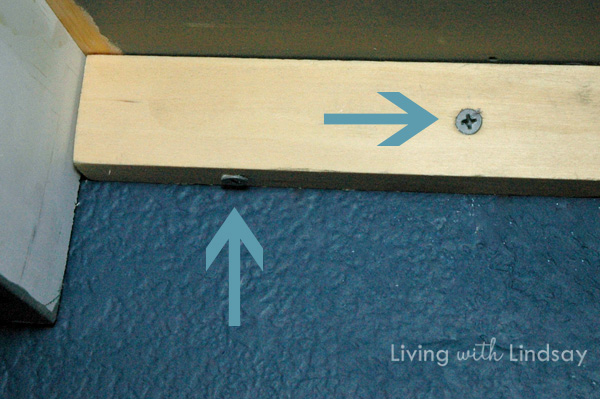
10. Once your poly is dry, you can attach your vanity to the wall in your bathroom. To do so, attach a strip of wood under the back of the table. Screw it up from the bottom into the table with a few screws. Then, you can screw that strip directly into the wall. We made sure to screw ours into the studs so that it would be very secure.
Here’s a photo from underneath the vanity. Sorry for the flashiness of it, but it’s dark under there, y’all!
And just because I want to further embarrass myself with poorly lit photos…
11. You can now drop in your sink and faucet and plumb it into the pipes coming from the walls. We replaced most of the piping so we’d have new, shiny pipes. That is a really inexpensive thing to do, and it makes the vanity look really nice since the plumbing is exposed. You’ll also need to caulk around the sink. There are lots of instructions and YouTube videos on installing and plumbing a sink, so make sure you research it if you’ve never done it before.
That’s really all there is to it – find a table, cut it to size, paint it, cut a hole for your sink, attach it to the wall and drop in the sink. And doesn’t it look so much more fun than builder grade vanities or the ones you find in a home improvement store? With a little elbow grease, you can have one, too!
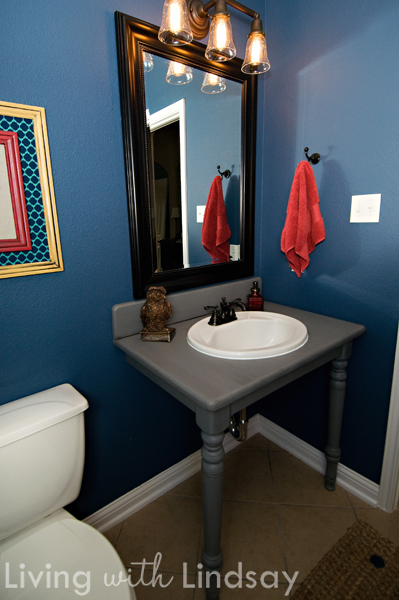
Are you ready to “turn the tables” on a traditional vanity?