Makely

Let's Make Life Awesome

  • Home
  • Decorating/DIY
    • Create Your Decor
    • Decorate Your Home
    • Paint Your Walls
    • Transform Your Furniture
  • Healthy Living
    • Essential Oils
    • Family Wellness
    • Household Care
  • Project Gallery
  • Contact
You are visiting: Home » Archives for Lindsay Ballard » Page 326

A Primer on Primer

by Lindsay Ballard on August 7, 2009 27 Comments

Yesterday, I found myself covered in primer. From head…


Yep, that’s primer on my eye.

…to toe.


Yep, that’s primer on my pedicure.

I have taken on the big task this week of transforming Zack’s room. He’s on what he calls a “Lake ‘Cation” (aka visiting his grandparents at their lake house), so I am taking this opportunity to work on a little surprise for him.

I have never painted a room by myself before. Usually, my husband does the hard parts – like the ceilings, the trim, the cutting in, anything on a ladder and the touch ups. I usually roll the roller a few times on the walls and drink a Diet Coke. It pays to have a handy husband.

This project, however, I am doing alone. After spending three hours removing everything from Zack’s room and taping off all of the trim, priming seemed like a daunting task. But, I put on my big girl panties and just dealt with it.

As I was painting, I was thinking of you guys and wondering how many primer virgins we have here. I’d guess quite a few, but I really don’t know. Just in case, I thought I’d give you a little primer on primer:

1. Primer is a type of paint that you apply under your color coat of paint. It is a thinner product than regular latex paint, and is made from different properties than regular paint so that it will stick to the item you are priming very well. Most primer comes in white, but you can buy brown, black, red and gray primer if what you are painting is closer to those colors (it will be easier to cover). You can also have primer tinted close to the color of you paint, but that’s not really necessary with all of the different colored primers available today.

2. When painting your walls, primer is a MUST. Not only does it help cover a previous wall color, but it helps your paint color stick better. It’s possible that you will only need one coat of your paint color if you use primer. I also always use primer when I paint furniture. Don’t skip the primer or you’ll wind up spending more money on paint and doing more coats than you should have to.

3. Before you begin priming, make sure you tape off the parts of the room (doors, windows, trim work, etc) that you are not painting. I like to use the blue 3M painters tape.

I did buy some of the expensive green Frog Tape that’s supposed to be “the best” to use on one part of the room. I wasn’t impressed, so save yourself the expense and just get the blue tape. If you get some primer on the trim, just wipe it off immediately with a dry paper towel. It’s so thin that it will come right off.

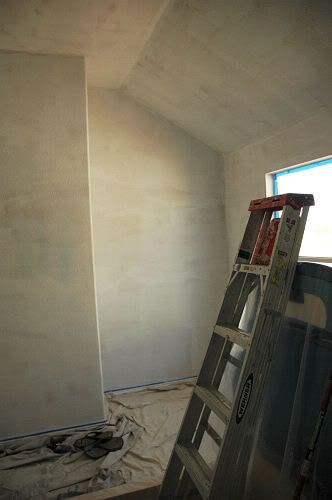
4. Your coat of primer will not look good. This bears repeating, so I’ll say it again: YOUR COAT OF PRIMER WILL NOT LOOK GOOD. Because primer is so thin, it will not look like a coat of white paint on your walls.

Do not get discouraged. I always look at it and think, “Oh no! What have I done? This looks awful!,” and then I remember that yes, it does look awful. That’s just the way it goes.
5. Wear a baseball cap if priming the ceiling or anything above your head. Again, since the primer is so thin, it slings and drips off a paint roller (be careful not to use too much primer on the roller!) — more so than paint. I wish I could have shown you a picture of my entire body after my priming session. It literally took me 25 minutes in the bathtub to scrub it all off with a loofah…and then a friend found some on my ear later that night!

6. I know that you can now purchase paint that already has a primer mixed in. I’ll admit that I have not tried it. I will say, however, that I generally do not like products that do a double duty. For instance, when the embroidery part of my sewing/embroidery machine malfunctions, it means I can’t use the sewing part either (and led to me buying a new stand alone sewing machine). I’d like to hear your thoughts on the new paint with primer that’s available out there. Maybe I should just try it one time and see how it works.

Hopefully, I’ll be able to show you photos of the great transformation early next week. Keep your fingers crossed that I can get it finished and surprise Zack when he comes home!

How about you? Any good primer stories or lessons out there? Any newbie painters out there who have never primed? Any old pros who never prime?Let us know!

P.S. I can’t believe I’m posting a picture of my crazy-haired, crows feet laden, make-up free face for all of the Internet to see. The paint fumes must be getting to me. I need more Diet Coke.


Making Your Dream Room a Reality: A Series

by Lindsay Ballard on August 3, 2009 78 Comments

Lately, I’ve received a lot of messages in my inbox asking how you can achieve the look you envision for your home. Most of the time, the phrases “I just don’t have the eye for that” or “I’m not sure I could do that” are included somewhere in the message.

What is it about layouts we see in magazines, the room designs we see on television, or the warm decor we see in model homes that make us think that our own homes can’t look like that? Do we think it will cost to much? Do we think our kids/husbands/pets will destroy it? Do we think that we just simply couldn’t pull that “look” together?

Regardless of what our issues may be, I’m ready to pull us all out of that mindset (including myself). Today, I’m beginning a weekly series called, “Making Your Dream Room a Reality.” I’m going to take us step by step through the process of seeing an idea you love and turning it into a room you love.

Due to my complete lack of patience, I just don’t want to wait until next week to start the series. So, let’s start right now!

Are you ready?

Part One: Identify Your Inspiration

Once you’ve decided that you are ready to make your dream room a reality, it’s time to identify your inspiration. What is it that inspires you? When I talk about inspiration in a home, I’m talking about things that make you smile, make you feel warm and cozy, and make your heart skip a beat whenever you see them.

Inspiration can be found all around us. It could be a layout in a home decor magazine that just came in the mail. Maybe it’s the seashells you collected on your family’s beach vacation last summer. Perhaps there’s a scene in a movie that features the most wonderful kitchen you’ve ever seen. Whatever your inspiration, it’s important that you identify it.


Tori Spelling and Dean McDermott’s former bedroom from Luxist. Y’all are going to grow so tired of seeing this room.

If you are anything like me, you have tons of inspiration images saved on your computer that you’ve found online and mountains of magazines with dog-eared pages. As I begin to refocus my decorating efforts on the master bedroom, I needed to put all of that inspiration in one place so I can see everything at once. I’m a very visual person, as I bet you are, too, if you are interested in beautifying your home.

This weekend, I set up a Flickr photostream for my inspiration photos. I’ve been adding my photos there and labeling them with different tags to help me locate them (i.e. bedroom, blue, DIY, etc). I have been scanning magazine pages into digital files as time allows, so I will be able to house everything in one place.

I’m also hoping that my Flickr photostream will help you when you are looking for a little inspiration. Feel free to search the photos with keywords, comment on the photos you like (or dislike even) and save the ones you love. I have also set up a Flickr group so that you can add your photos if you would like. It will inspire me to see what inspires you! The link to both my Flickr photostream and the Flickr group will always be over in the sidebar, so you can visit it anytime you like. I’ll be updating the pictures almost daily.

Flickr is quick, easy, and free to use, so online resources like this are perfect housing our inspiration “files.” However you decide to organize your inspiration, spend some time this week pulling it all together in one place. I don’t want any “I love this but could never do it” thoughts in your mind at this time. Let’s just find photos and images of what we love and get them organized.

Next Monday, we’ll move on to Part Two of Making Your Dream Room a Reality and start working with those inspiration photos. I hope you’ll join me!

« Previous Page
Next Page »
  • Email
  • Facebook
  • Instagram
  • Pinterest
  • Twitter

About Makely

Lindsay Ballard is a former college mascot turned political geek turned roller derby playing, DIY fanatic.

Lindsay chronicles her projects, design ideas, and lifestyle tips here at Makely, where she shares tutorials and inspiration. Her DIY designs are bold and graphic, while her spirit is fun and full of color.


Archives

Categories

PRIVACY POLICY
Copyright © 2009-2019 Makely School for Girls | All Rights Reserved | Posts may contain advertising content or affiliate links