Makely

Let's Make Life Awesome

  • Home
  • Decorating/DIY
    • Create Your Decor
    • Decorate Your Home
    • Paint Your Walls
    • Transform Your Furniture
  • Healthy Living
    • Essential Oils
    • Family Wellness
    • Household Care
  • Project Gallery
  • Contact
You are visiting: Home » Decorating/DIY » Create Your Decor » Page 2

Building This Adjustable Five Arm Brass Chandelier Basically Put Money in My Pocket

by Lindsay Ballard on November 6, 2015 2 Comments

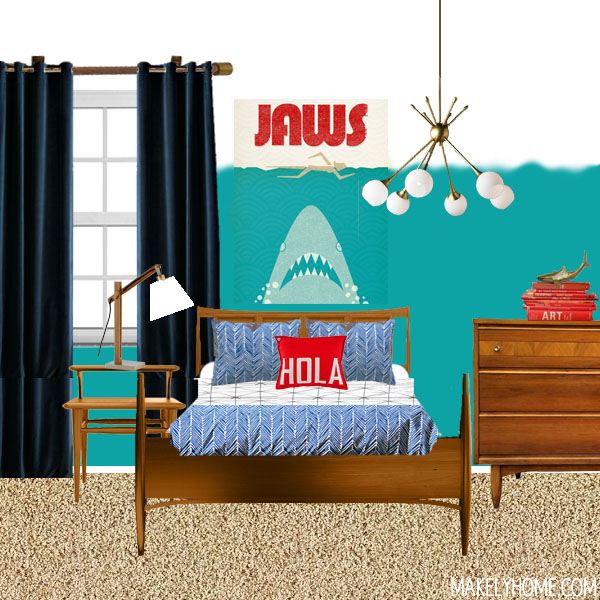
As is the continuing saga of my life, I fall in love with light fixtures on a daily basis.  DAILY.  And if see a homeless light fixture, it comes home with me.  Some people adopt pets.  I adopt light fixtures.  Well, I do have two adopted dogs, so don’t throw things at me.

So, when I was planning for Zack’s new room, I desperately wanted a $350 light fixture from Shades of Light.  Y’all, that’s a lot of money to spend on a light for a bedroom.  I’m okay with that kind of cash in a living room, but not so much in a room that not many people will ever see.  However, I was obsessed and really considering it, but then I noticed that it took G9 Halogen bulbs and I CAN’T GET DOWN WITH THAT.

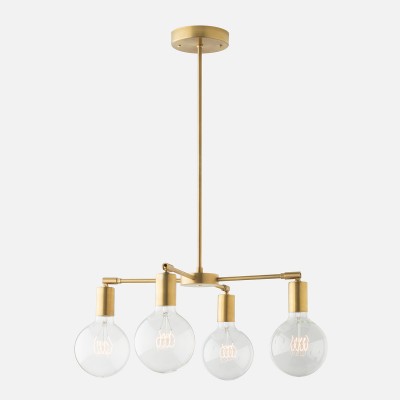
Back to the drawing board.  I knew I wanted a brass fixture that had room for fun bulbs.  After lots and lots of searching, I came across the Odyssey 4 Chandelier from Schoolhouse Electric.  ANOTHER $350 light fixture, y’all.

5 Arm 5 Arm Adjustable Brass Chandelier DIYAdjustable Brass Chandelier DIY

Okay, so hear me out.  This one is pretty cool.  The socket connectors are adjustable, so you can change the direction of the bulbs.  Fun, right?

Screen Shot 2015-11-06 at 10.47.05 AM

But, even though I think it is cool, it is still $350.  And the fact that it had an even number of arms really bugged me.

After some more searching, I came across this post from Mandi at Vintage Revivals and this post from Kelsey at Simply My Simple.  They both pointed to a website where they bought brass parts to build their own chandeliers.

Challenge accepted.

5 Arm Adjustable Brass Chandelier DIY

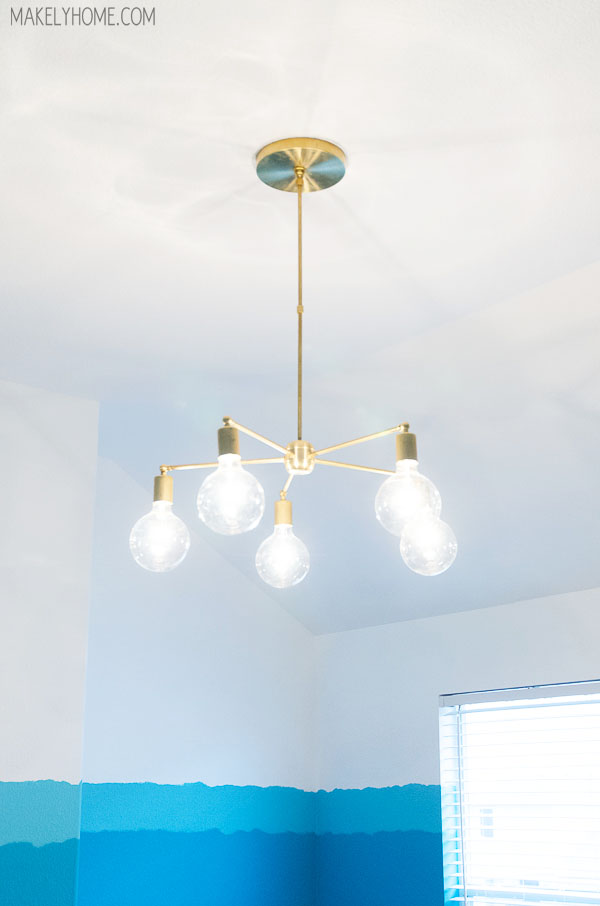
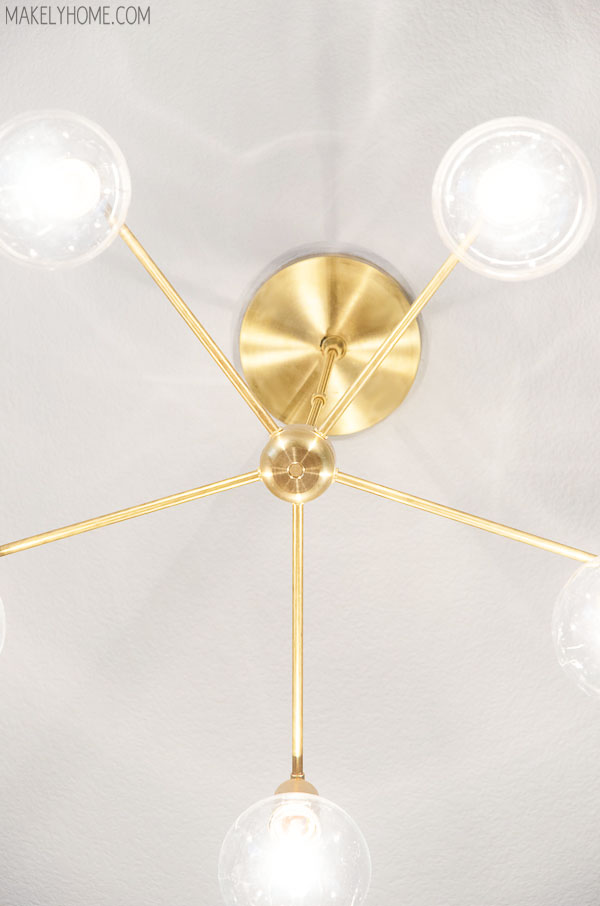
So here’s what happened.  I ordered a bunch of parts and was going to do a tutorial for you on how I built it.  But, my sweet husband put it together one day as a surprise when I was at roller derby practice. I actually really loved that he did that, so sorry that you don’t have a tutorial.  However, Mandi’s and Kelsey’s tutorials will walk you through the general things you need to know.  The rest is like Tinker Toys.

5 Arm Adjustable Brass Chandelier DIY…

Read More »

How to Paint a Modern Ombre Wall and Finally Get Moving on a Long Ignorned Project

by Lindsay Ballard on November 4, 2015 5 Comments

Well over a year ago, I came up with the game plan to transition my then 8-year old son’s room from a little boys room to one more fit for the confident, brilliant, and creative young man that he’s become.

Mid Century Modern boy's room moodboard

He was excited for us to get started on it, but then life got in the way (as it has been doing for the last few years).  And then he turned 9.  And then he was mere months away from turning 10.  And then it was REALLY time to get started, because I was embarrassed at my lack to time management, if nothing else.

So one day last month, I decided that it was time for the massive paint job to begin.  I emptied the room, taped off the trim, laid down the drop cloth, and somehow convinced Tom to help me with the paint sprayer.  We primed all of the walls and ceiling and then painted the ceiling and top half of the walls Lindsay White.  This is what it looked like – pretty and pristine on the top and full on hot mess on the bottom.

How to Paint an Ombre Wall

And Tom was all, “Good luck!”  Ok, thanks.

In an effort to give Zack’s room an ocean feel (without being theme-y), I wanted to paint an ombre wall – starting with dark blue at the bottom and transitioning to white at the top.  Instead of it being a graduated, seamless ombre, I wanted a more modern, choppy feel.

So, I divided the wall into three sections – dark blue, medium blue, and white – and marked them with painters tape.  I left a six inch gap between the two blues so I would have a space to blend the colors.  I was going to blend the white and light blue, but I didn’t need to leave a gap since the white was already painted, if that makes sense.  Probably not.

How to Paint an Ombre Wall

Then, I painted the middle section with Glidden’s Paint + Primer (flat) in Marine Blue.  I (obviously) didn’t worry about painting sharp lines, because I’ll be blending the colors together.  I just used my paint roller to slap the paint on the wall.

How to Paint an Ombre Wall

…

Read More »

« Previous Page
Next Page »
  • Email
  • Facebook
  • Instagram
  • Pinterest
  • Twitter

About Makely

Lindsay Ballard is a former college mascot turned political geek turned roller derby playing, DIY fanatic.

Lindsay chronicles her projects, design ideas, and lifestyle tips here at Makely, where she shares tutorials and inspiration. Her DIY designs are bold and graphic, while her spirit is fun and full of color.

Lindsay lives outside of Austin, Texas with her husband (Tom), children (Zack and Emma), and dogs (Duke and Jill). She plays roller derby for the Rockin' City Rollergirls out of Round Rock, Texas.


Archives

Categories

PRIVACY POLICY
Copyright © 2009-2019 Makely School for Girls | All Rights Reserved | Posts may contain advertising content or affiliate links