Okay, so maybe not everything. If you are a master carpenter, you should probably just move on to the next topic in your Google Reader. However, if you are just an average DIY guy or gal like me, perhaps I can help.
Sanding is one of the DIY tasks that I really despise, but it is absolutely necessary. To make the job move a little quicker, I taught myself a few things about the process and materials so that I could sand more effectively.
Sandpaper Grits and When to Use Each One
As you’ve seen in your local home improvement centers, sandpaper comes in a vast array of grits. The larger the abrasive material that’s glued to the sandpaper, the more coarse the paper and the lower the grit.
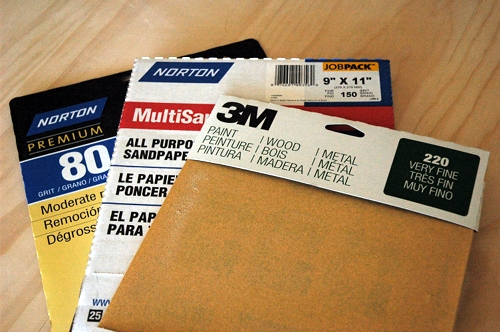
Generally, I have found that there are four ranges that I use when working on wood projects:
- 80/100 – Coarse – Use these grits when you are removing a previous finish from a project (like sanding off paint) or if you are working with wood straight from the lumberyard or home improvement center;
- 120/150 – Fine – Use these grits for sanding bare wood in preparation of finishing;
- 180/220 – Very Fine – Use these grits for sanding bare wood right before finishing;
- 240 – Ultra Fine – Use this grit in between poly and other clear finish coats.
There are also “microgrits” – those that go above 240. They are used for polishing metals and for sanding wood when you need a super-de-duper glass smooth finish. I think they go up as high as 3000.
You may wonder why the descriptions for “Fine” and “Very Fine” are essentially the same. That is because you need to take a step down approach with sandpaper. If you start with a “Coarse” paper, you should then use the “Fine” and “Very Fine” before you get to “Ultra Fine.” Skipping a range will make it difficult to get to the smooth finish you desire, as it will take you much longer to get down to that finish.
When the sandpaper you are using no longer feels rough to the touch, it’s time to use a new sheet. Don’t skimp on sandpaper and try to use it until it rips. Your project will sand much quicker if you change out the sandpaper often.
Sanding Tools
Other than sandpaper, there are a few tools that you will need. At the very least, you need a sanding mask and safety glasses. You really don’t want the sanding dust (the leftover grit and wood debris) to get in your lungs and eyes. PLEASE wear a mask and glasses.
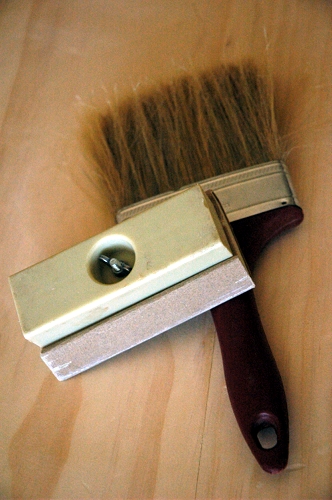
The next level of items you will need are a sanding block and an old paint brush. Instead of buying the sanding sponges that come in different grits, I recommend buying a plastic block that you can fit to your own sandpaper. You can buy one package of flat sandpaper instead of a bunch of different sanding sponges. In my experience, the flat sandpaper lasts longer than the sanding sponges anyway. The old paint brush is used to brush the sanding dust off of your project.
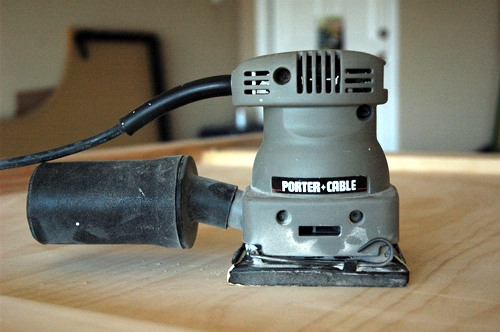
The third thing I’d recommend is a finish sander. This tool is easy to use and makes sanding go faster than just sanding by hand. They are inexpensive (mine was under $40 at Lowe’s) and they use a 1/4 sheet of the flat sandpaper that you already use. If you can only afford to buy one sander, get one like this. When sanding, you’ll want to move the sander in different patterns (figure 8s, circles, etc) instead of just going back and forth since it doesn’t make a random orbit.
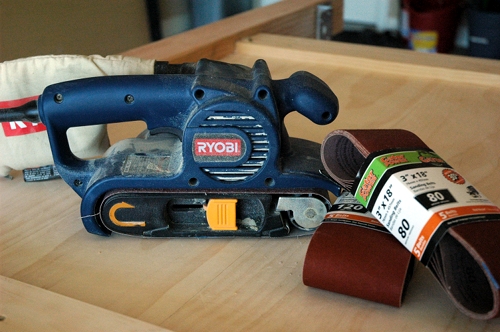
If you are super fancy and want to buy two sanders, you’ll also want to get a belt sander. The reason why you don’t want to ONLY have a belt sander is that it requires sanding belts. You generally won’t be able to find sanding belts finer than 180 at your local home improvement center, so you won’t be able to use the belt sander for any sort of finish sanding. You can find finer sanding belts online, but you would really have to plan ahead for your projects (and hope that you order enough that you don’t run out).
This baby has a lot of power and will require two hands to hold it. However, you will be able to sand your project so much quicker than using just a finish sander. Honestly. You will be blown away at how quickly it goes with a belt sander. We have this Ryobi model from Home Depot, and it cost about $50.
There are several other types of big boy (or big girl) sanders that cost more, but I’ve never felt the need to have any of those.
What else do you want to know about sanding? Let me know and I’ll try to answer!
P.S. Have big plans to improve your home this summer? From now until August 14, visit TheBagsterProject.com to enter Waste Management’s The Bagster ® Summer Home Improvement Project Sweepstakes for a chance to win $10,000 to put towards your home improvement project.
NO PURCHASE OR USE OF BAGSTER NECESSARY. Void where prohibited. Open to legal residents of the 50 U.S., D.C. or Canada (except Quebec) who are, as of Entry, 21 years of age or older. Promotion starts at 12:00:01 AM (ET) on 6/20/11 and ends at 11:59:59 PM (ET) on 8/14/11. Click here for Official Rules. Sponsor: WM Bagco, LLC.