Last week, I opened the door to the closet in my office/craft/guest room, and I decided it was time for an intervention. I was either going to have to clean it out and organize it, or an avalanche of craft paint, Post-it Notes, and spray adhesive was going to bury me.
Back when we moved into our house, one of the first things I did was to put two inexpensive Ikea Ivar shelf towers into the closet. It created space to store all of my craft supplies, yet still left room for guests to hang a few things when they were staying overnight. But obviously, this wasn’t working out any longer.
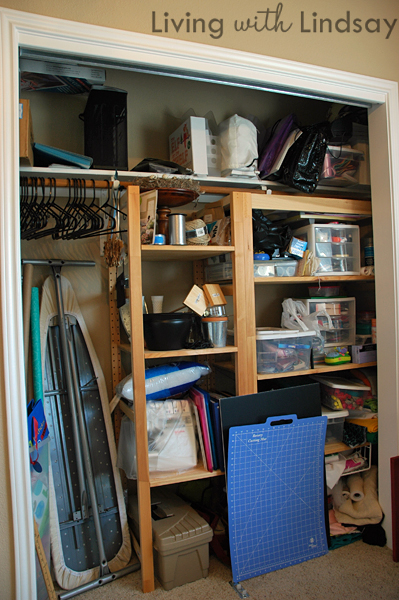
I removed the sliding doors so you could get a better view of the scary. You’re welcome.
As I used things and acquired new supplies, I just sort of shoved them onto the shelves. There was really no rhyme or reason to the organization (and I use that term loosely), and I found myself re-buying supplies that I already had in the closet.
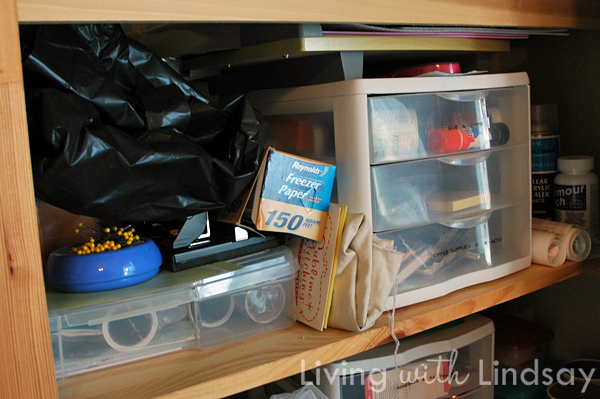
Something had to be done. And in a serendipitous moment, the Apartment Guide contacted me and asked if I could put together some tips for them on organizing a space. So one morning last week, I set to work getting this closet organized. I put together some tips in case you have a similar looking space to tackle.
How to Organize a Multi-Purpose Closet Space
1. Set Aside Organizing Time in Your Schedule – Don’t try to completely reorganize a closet just minutes before the Queen of England is coming to your house or a magazine photographer is coming to shoot your house. Oh, wait. Those things don’t happen here, either! Just make sure you allow yourself enough time to finish your organization project, even if you have to work on it in small chunks of time across several days.
2. Completely Empty Your Closet – Emptying your closet will be an overwhelming experience, so understand that it will look like a tornado went through your room. Take deep breaths and realize that it will soon be worth it.
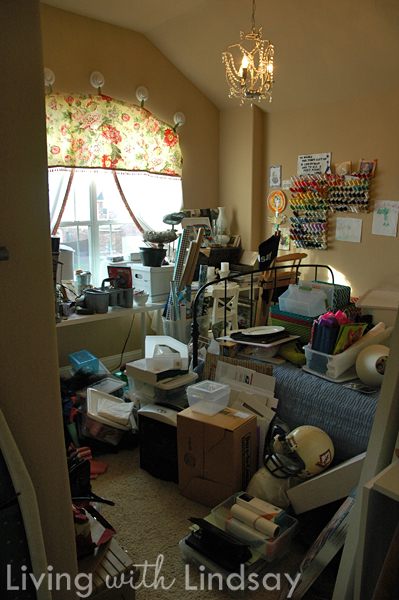
Emptying the closet will benefit you in two ways. First, you’ll be able to go through and declutter. Throw out/donate all of the items that you don’t need or use. I got rid of craft supplies that I haven’t used in the last year or so, and that made a big difference.
Second, you’ll be left with just the structure of your closet, and this will give you the ability to add in new shelving or move pre-existing shelving. I actually removed the hanging rod from the closet and moved my Ivar shelves to a different location within the closet.
3. Sort Your Stuff – Because this closet is in a room that serves as our office, guest room, and my craft room, I knew that I needed to keep those areas separate for my own sanity. I decided that craft supplies would go on the larger Ivar shelf and office supplies would go on the smaller one.
4. Utilize Various Sizes of Lidded and Open Baskets and Bins – I had been eyeing the chevron collection from Target (duh!), so this was the perfect opportunity to pick up some of their organizing essentials in bright colors (this room will be redone in bright colors sometime this year). I used to try to organize with only clear, lidded bins, but I soon realized that my supplies sometimes outgrew their boxes. Having a few open bins will help with that problem.
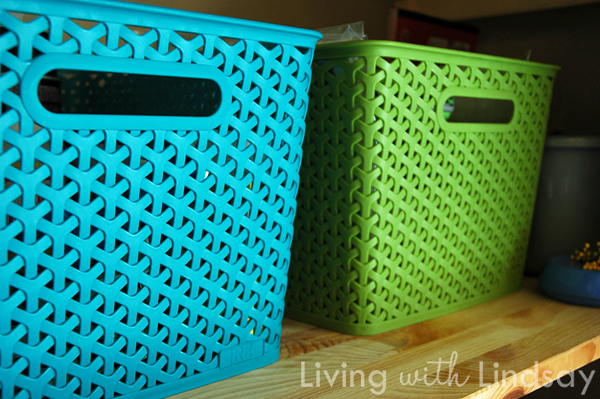
Do you notice how I listed this step forth in the process? I did that because you need to see what you have to work with before you decide what sort of bins you are going to use to organize the space. You also may already have creative storage solutions in your home that may work, so definitely shop your home before you shop a retail store.
5. Thoughtfully Add Items Back into Your Closet – Bin by bin, put items back onto your shelves. As I was adding, I was rearranging at the same time. Unless you are actually Martha Stewart (and if you are, “Hi, Martha!”), don’t worry about your shelves being exactly perfect. Work towards creating the most useful space instead of the prettiest.
6. Consider Oddly Shaped and Bulky Items – There are several things in my closet that I didn’t want/couldn’t put on a shelf, such as an ironing board and a yard stick. I bought an over-the-door ironing board hanger and put it on the back of the door to the room. I screwed some hooks directly into one of the Ivar shelving units to hang the yardstick and another large ruler. Now, maybe Zack won’t pretend like they are swords and leave them laying around for a dog to chew.
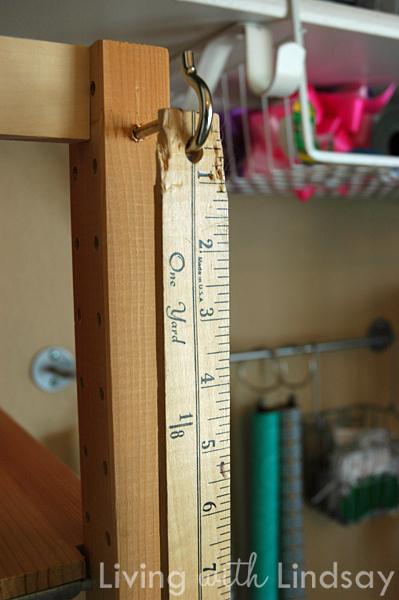
I’m also going to install a large, decorative hook on the wall outside of the office so that guests can hang clothing there. It’ll be like their own little fancy dressing room.
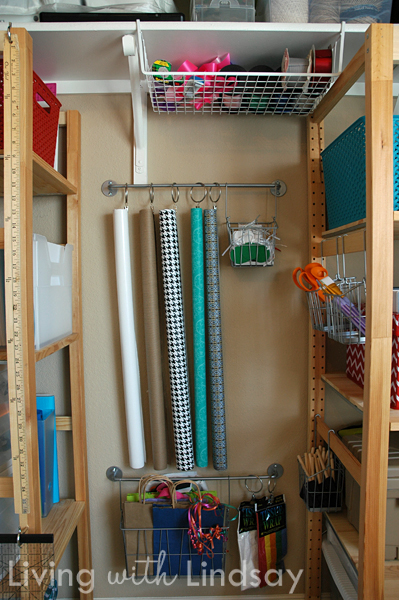
7. Get Creative – One of my favorite parts about this closet is the gift wrap station I created. Before the reorganization, my gift wrap was a wrinkled mess in a tall, plastic bin. I found myself buying new gift wrap almost every time I needed to wrap something. It was highly annoying (and expensive).
I adapted Brooklyn Limestone’s Easy Back of Door Gift Wrap Tutorial for my space, since I actually already owned everything I needed to do this. Don’t you just love when that happens? My gift wrap, ribbons, tissue paper and gift bags are now completely organized.
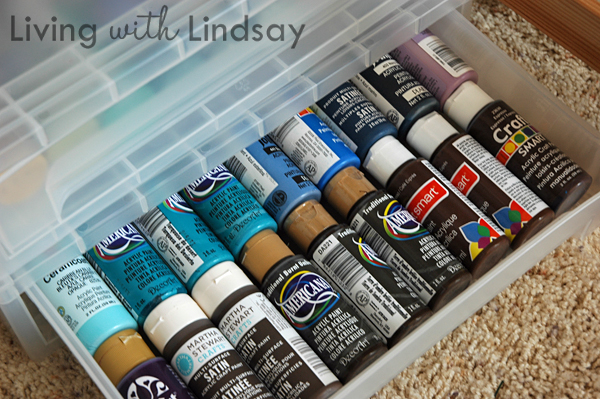
8. Sort Abundant Items by Color or Size – If you have a lot (or too much, ahem) of one particular item, organize by size or color. I sorted all of my craft paint by color and put it in some sliding paper trays that I already had in the room. Now, maybe I won’t buy another shade of brown when I realize that I already have 42 others.
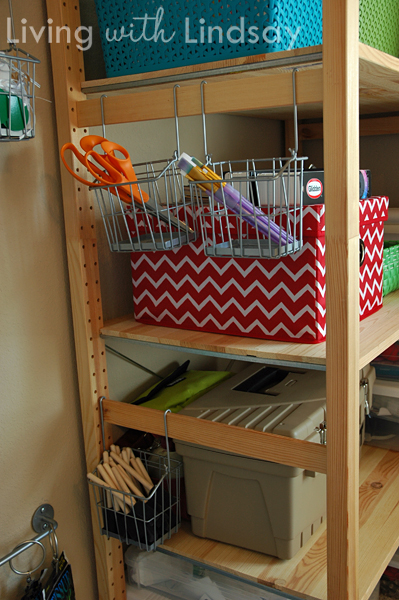
9. Store Often Used Items Within Quick Reach – One way I have found to organize items I use often, like scissors, is to put them where they are easy to reach. If I have to open a bin to take them out, my laziness concludes that it will be too difficult to put them away. Don’t judge, because I know I’m not alone in that.
In my closet, I used some leftover baskets from the gift wrap wall to store scissors and paint brushes. I hung the baskets on the rails of the large Ivar shelves. They fit perfectly. It’s almost like Ikea made everything modular. Who’d have thought?
10. Maintain Your Organization – This is the hardest part for me. I’d like to blame my creative mind for not wanting me to put things away where I found them, but we all know that’s not the case. Make your life easier, and just put things away when you are finished with them. If it’s too hard to put things away, then you may need to rethink how your store things. I’m looking at myself here.
I love the new closet space that I created. My office supplies are stored separately from my craft supplies. I realize that I actually have two expensive jars of etching cream. My guests now have a place to slide a suitcase in the closet instead of having to push it under my desk. I discovered that I have a ridiculous amount of gift bags. And, I’ll get a good tax write-off for donating a ton of stuff to Goodwill. Win, win, win, win, win.

If you are looking for more tips on organizing spaces, from your kitchen to your “junk” drawer, be sure to check out the articles on Apartment Guide and it’s sister site, Moving Today. They have some nice tips for helping you make the most of your space, regardless of it’s size or if you rent or own. And if you feel like you need to burn it all down and start over, let Apartment Guide help you find a new place to live. Just don’t really burn down your current living space. I was kidding.
What tips do you have to share with me for organizing a closet? Believe me when I say, I have plenty more to tackle!

Find Apartment Guide on Twitter, Facebook and Google+.
Apartment Guide and owner Consumer Source, Inc. partnered with bloggers such as me to participate in their monthly blogger programs. As part of that program, I received compensation. They did not tell me what to purchase or what to say about the products used, and believe that consumers and bloggers are free to form their own opinions and share them in their own words. Consumer Source’s policies align with WOMMA Ethics Code, FTC guidelines and social media engagement recommendations.