Makely

Let's Make Life Awesome

  • Home
  • Decorating/DIY
    • Create Your Decor
    • Decorate Your Home
    • Paint Your Walls
    • Transform Your Furniture
  • Healthy Living
    • Essential Oils
    • Family Wellness
    • Household Care
  • Project Gallery
  • Contact
You are visiting: Home » Decorating/DIY » Paint Your Walls » Page 10

It’s Just Paint

by Lindsay Ballard on May 16, 2012 12 Comments

On Tuesday, I had one last thing to do to finish my new treasure.  I simply needed to brush on a coat of polyurethane and let it dry.  I have gone down this road many, many times, so it should have been a breeze.

I set to work on the poly as soon as Emma went down for her nap.  Unfortunately, the fast-dry poly dried so quickly on the top of the piece that I had trouble keeping a wet edge.  When my brush drug across a spot that had just been painted 15 seconds earlier, it was already a gummy mess.

I thought that perhaps I was applying the coats too thinly.  So, I let it dry and added another coat with a loaded high density foam roller.  This time, I had a different problem in that the poly was super bubbly (and I’m not talking about it’s personality, y’all).

Instead of freaking out, which is quite often my reaction to something like this, I grabbed a sheet of 220-grit sandpaper and lightly sanded off the poly coats on the top.  I then went back to my paint can and repainted the top of the piece.  It’s not perfect, but it’s certainly good enough that only I will notice the flaws.  Today, I’ll reapply the poly in a thicker coat and hope that it will solve my problem.  Keep your fingers crossed!

I mention all of this because there is something I want you (and I) to remember:  It’s Just Paint.  Instead of worrying about messing up a finish or not liking a color, just remember that it can always be undone.  You may have to sand it.  You may have to strip it.  But there is nothing that you have painted that can’t be repainted.  And then repainted again and again.
The holds true for walls as well.  A few weeks ago, my Question of the Day on Facebook asked if any of you have patterns on your walls.  One sweet and loyal reader replied that she didn’t because she doesn’t want anything permanent.  I totally understand that line of thinking.  I change my mind with the seasons, too.

But the thing is, paint is one of the least permanent things you can do to your walls (or your furniture).  If you paint a stripe or try out a new stencil on a wall and you absolutely hate it, just paint over it!  You’ll only be out the time it took you to put it together and the cost of the paint.  That’s a pretty low risk for a giant payoff in my book.

Paint has amazing transformative qualities.  So much of what I do in my own home is driven by color, and that would be hard to do if I was paralyzed by paint.  The number of projects I’ve sanded down and repainted are too numerous to even remember.  I just keep washing my brushes, waiting on the coats to dry, and stocking up on fine grit sandpaper.

Do you feel nervous to tackle a painting project?  What is it that worries you?
How to Dispose of Leftover Paint

by Lindsay Ballard on May 7, 2012 2,810 Comments

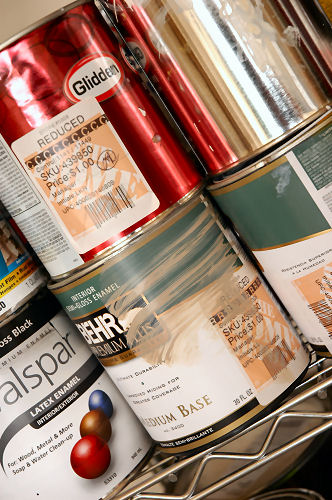
For years, I stored all of my leftover paint in the garage.  We had several shelves full of half-empty gallon and quart size cans.  About this time last year, I decided that needed to change.  Not only were they taking up valuable garage space, but it turns out that paint goes bad after being stored outside for just a short while.  I felt silly for not realizing that.

So instead of storing the new cans I have more recently acquired in the garage, they now take up residence on top of the cabinets in my laundry room. It’s a great solution for the new paint, but I was left with a conundrum of how to dispose of the old paint.  You shouldn’t simply throw it out with the weekly trash, as it presents a hazard to the sensitive environment.

In many areas, you can take your half-full cans of paint to be disposed of in hazardous waste collection facilities or recycling centers.  You can find a place in your area by visiting Earth911.com.

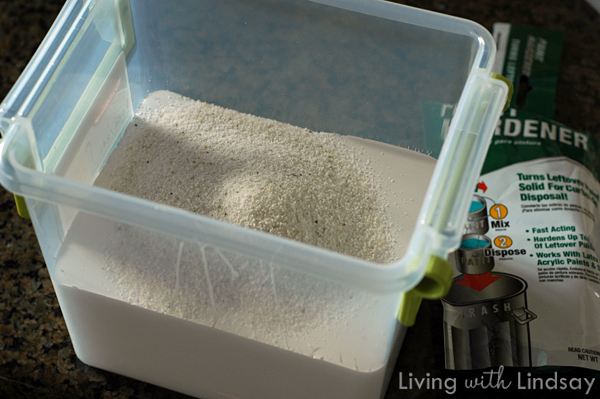
It’s also quite easy to harden leftover paint to make it okay for curbside pick up.  Now, I’m certainly no expert, but I understand that most municipal trash pickups will collect dried latex paint.  I have heard that you can use mulch or cat litter to harden the paint, but I just picked up a package of Homax Paint Harder for a few dollars at Home Depot.

To use the paint hardner, you simply dump the powder into up to 2/3 gallon of paint.  I had about a quart of paint in a plastic box that I needed to harden, so I just poured the powder into it.

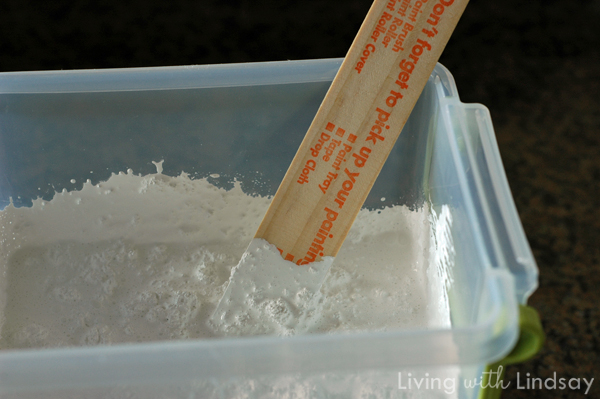
With a stir stick, I stirred the powder into the paint until it started to thicken up.

After about 15 minutes, it had hardened to the consistency of thick oatmeal.  The wonders of chemistry!

At this point, you can simply scoop the hardened latex paint into something like newspaper and throw it away on trash pickup day.  Your cans can then be recycled.

Oil-based paint cannot be disposed in the same way.  Instead, it does need to be taken to a local hazardous waste facility.

Now I just need to buy about 30 more packets of paint hardner to finish up the rest of the paint left in the garage!  What do you do with your leftover paint?  Have you ever used a paint hardener?

« Previous Page
Next Page »
  • Email
  • Facebook
  • Instagram
  • Pinterest
  • Twitter

About Makely

Lindsay Ballard is a former college mascot turned political geek turned roller derby playing, DIY fanatic.

Lindsay chronicles her projects, design ideas, and lifestyle tips here at Makely, where she shares tutorials and inspiration. Her DIY designs are bold and graphic, while her spirit is fun and full of color.


Archives

Categories

PRIVACY POLICY
Copyright © 2009-2019 Makely School for Girls | All Rights Reserved | Posts may contain advertising content or affiliate links