When we moved into our home four years ago, there were so many little features that I found charming. We had the giant above the front door ledge. There were various art nooks that provided some architectural interest. What would become the playroom and Zack’s room had these little doors that provided access to large attic storage spaces.
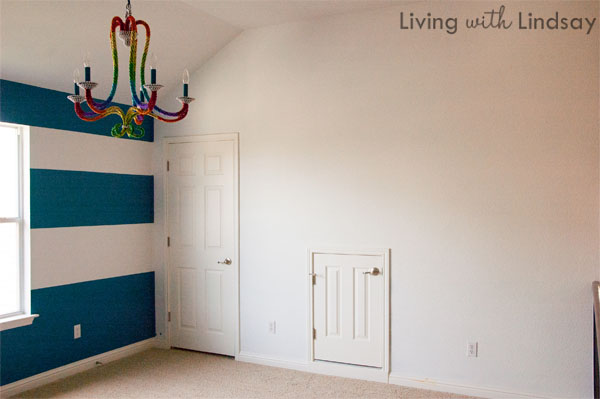
As such things go, I soon realized what a pain all of those things are to decorate around. In the playroom, I began by having a sofa in front of the little attic door. The problem was that the door handle is at head height, so not only did it stick out above the sofa, but I hit my head on it several times when I sat down. That sofa is long gone thanks to an old man cat with a bladder problem and a rage issue, but the door remains. And I’ve given the door the evil eye ever since.
Several of my friends, notably Centsational Girl and Just a Girl, have created faux built-in sets of bookcases using pieces from Ikea’s Billy collection. After obsessing about their new beautiful spaces, I realized that installing my own built-in Billy system could not only provide us with some needed playroom storage, but it could also solve the eyesore door problem. I measured and discovered that my door would fit inside the dimensions of the wide Billy bookcase with a few inches to spare. Some Billy Olsbo doors would hide that attic door without a problem.
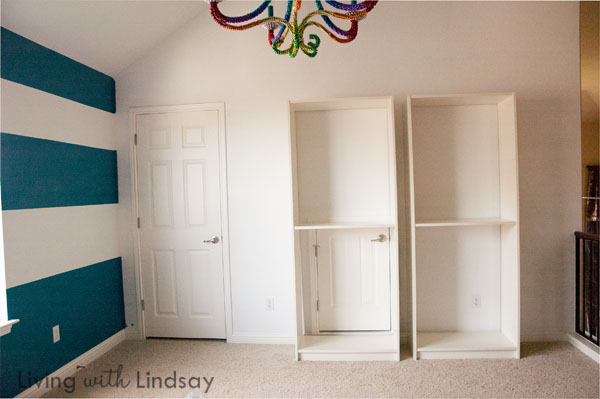
Sorry for the terrible photos. A new camera, better lenses and camera lessons are on their way to me soon!
To make them look truly built-in, we had a few steps to take other than just assembling them. The first thing I did was to lay the thin plywood backing on the empty Ikea boxes and paint them yellow (Sunflower by Glidden). Using a high density foam roller, I primed them with Zinsser Cover Stain oil based primer, and then then gave them three coats of yellow paint.
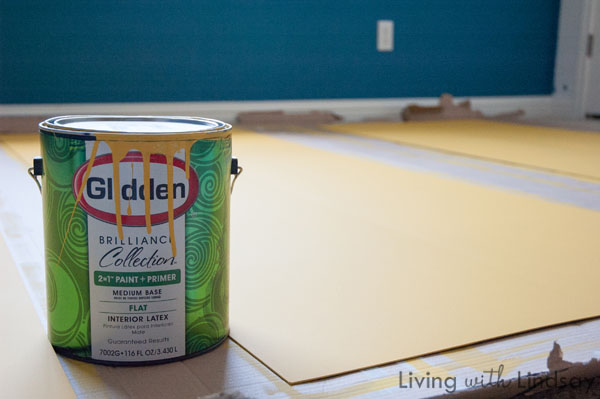
We slid the backings into our four bookcases and nailed them into place per the instructions. For the one section of bookcase that hides the door, we had to cut the backing so that we still had access to the attic through the bookcase. If that doesn’t make sense, it soon will.
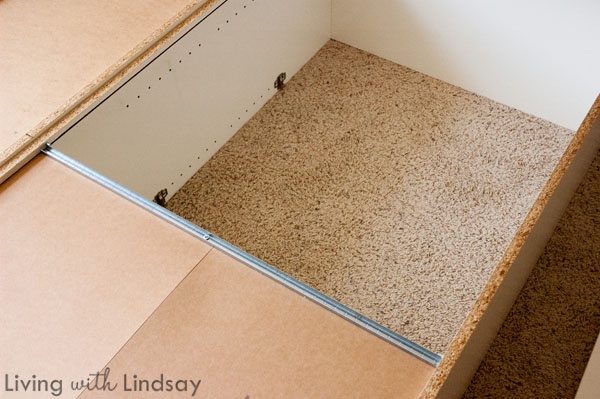
Another thing we had to do was attach the four free standing bookcases to each other. We laid them flat (fronts down) and raised the two shallower end units so that their backs would be flush with the deeper units. Tom drove some screws through the sides on the bottom and top of the units. He also attached some 2 x 4 boards to the bottom to help tie them together and also raise the bookcases up so that the baseboard trim we would install would be level with the trim that was already on our walls.
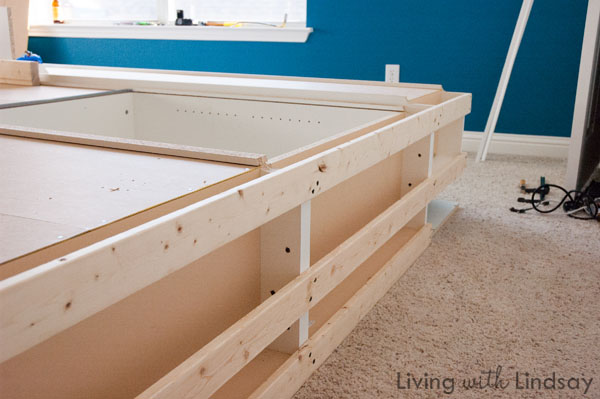
We very carefully tilted the bookcases up and anchored them to the wall from the top with L-brackets going through the studs. These bad boys aren’t going anywhere.
You can see where the paint got scraped off of the backing on the little unit on the right. We slid the backing into the unit against the direction of the arrow that was printed on it. Who’d have known there was really a right way and wrong way to slide those suckers in? At any rate, I was able to easily touch up that paint.
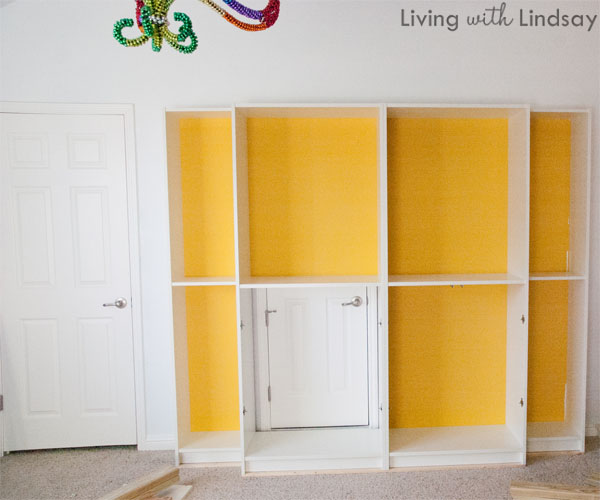
Unlike Kate and Chris, our “built-ins” couldn’t go wall to wall since we had a closet door and an open railing to deal with. So, we had to end up buying baseboard trim (instead of removing what we already had and reusing it) and nail it to the front and sides of the unit. We also added crown moulding to the top, quarter round at the joints to the wall and between the individual bookcases and a strip of lattice to the front to hide the seam where the two larger units were joined. Kate did an excellent job explaining this process, so I won’t even try. I primed the mouldings and painted them with a latex paint I had color matched to the units – I just took a shelf in to Lowe’s to do the color matching.
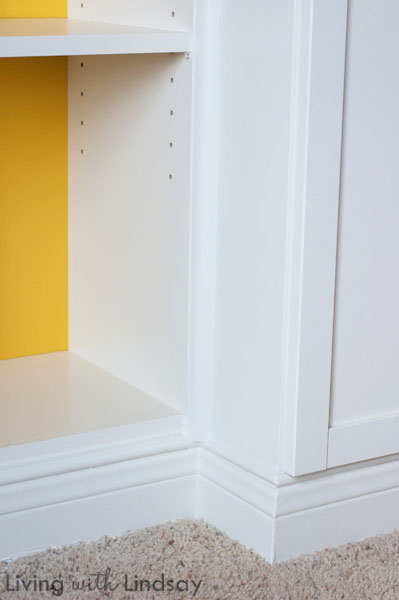
Once the moulding was finished, I painted the wall behind the bookcase and added the shelves and doors to the unit. And in the process, the attic door was hidden. I’m not sold on the yellow yet, and I’ll probably end up changing it. But, I’m going to wait until my room is complete before I worry about that. It’s just paint after all.
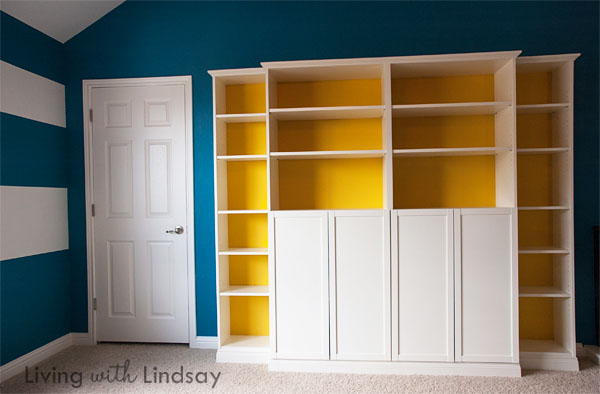
The great thing about this Billy “built-in” idea is that it looks professionally installed, provides a ton of storage, and hides the eyesore of an attic door. See?
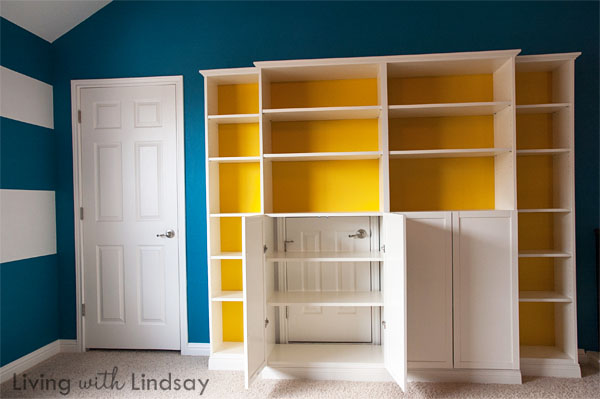
To access that attic space, all I have to do is remove the shelves and unlock the attic door. I may take me an additional minute to get into the attic as it did before the doors were hidden. This part of the attic is where we store all of our Christmas decorations, so we only need to get in and out of there two times a year – to get the decorations out and to put them away.
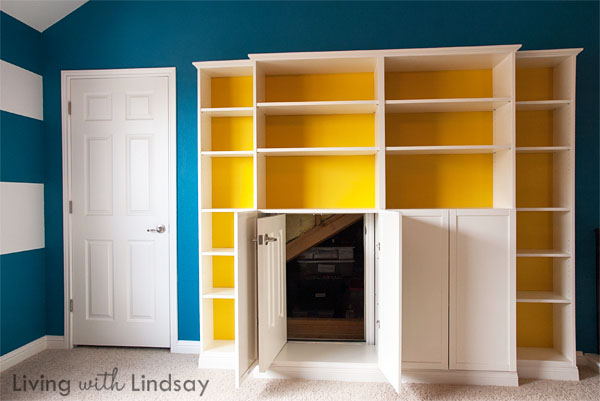
All I have to do now is crawl through the bookcases. And it is SO worth it to have that annoying little door hidden.
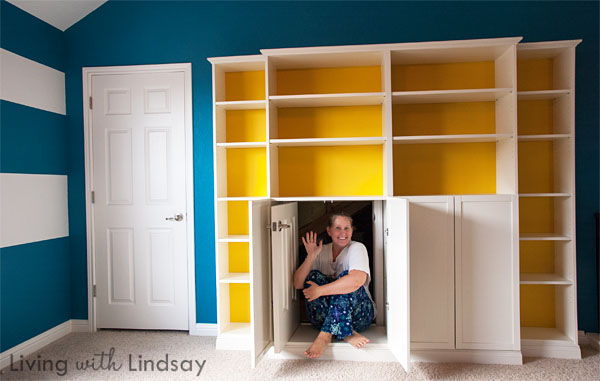
Yes, I’m in my pajamas. Yes, it may have been 3 o’clock in the afternoon when I took this picture. Just keeping it real, y’all.
Have you had to come up with a creative solution to hide an eyesore in your home? Have a question about my bookcases? See you in the comments!