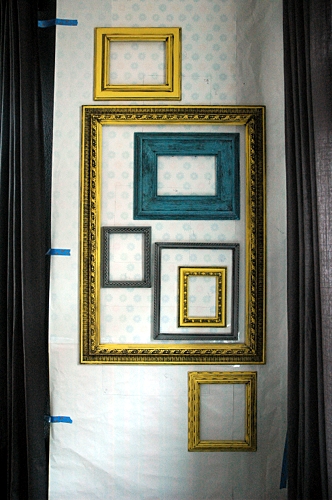
The very last project I had to complete in the master bedroom was to come up with something to fill a blank corner wall between two sets of windows. The wall is one that you see when you walk into the room, so I wanted it to make a big visual impact. Because I felt that little space was so important in setting the tone of the room, I also wanted it to be something unique. After much consideration, I ended up with a wall of colorful, layered open frames.
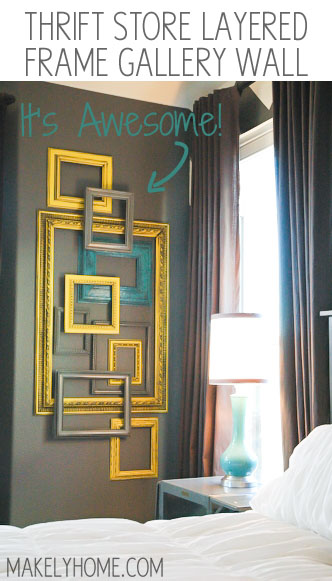
Bestow my little thumping heart! Every single thing I’ve placed in the bedroom brings me so much joy, and this wall is no exception.
It took me a bit of trial and error to figure out exactly how to hang the layered frames. There are great tutorials for hanging filled frames in a layered fashion, but the open frames presented a unique challenge because you have such a small area from which to hang since there is no back on the frame. Since I was finally able to figure it out, I’m happy to walk you through the steps in case you’d like to create a similar wall of your own.
How to Create a Layered, Open Frame Gallery Wall
1. Gather a good number of frames in various sizes and designs. You will want one very large frame, some medium ones and some small ones. The amount you need will vary depending upon the size of your wall, but I used a total of 10 frames. I found all of mine while making two different trips to Goodwill. Look for frames with a lot of detailing.

2. Next, measure the length and width of the space on the wall you would like to fill. Since my wall was on the small side, I took the measurements of the entire wall. Then, lay out paper the size of your measurements on your floor. Butcher or brown kraft paper is often used for this purpose, but I taped together a few rolls of old wrapping paper that I knew I’d never use on gifts. You’ll want to mark eye level on the frames and use this as a “center” point, as you traditionally want to hang framed art at eye level.
Take the old artwork and glass out of your frames, prime them (I used Kilz latex and a Purdy brush) and arrange them on the paper until you find a pattern that you like. Use a pencil to trace the outline of each frame. I labeled each outline and frame with a corresponding number so that I could more easily replace the frames.
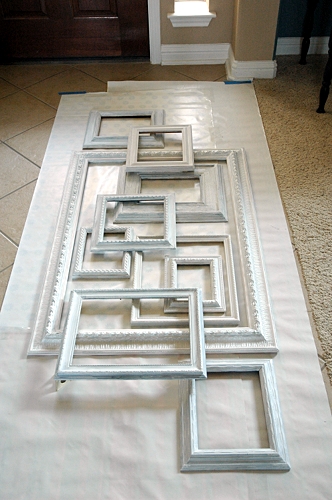
At this point, I decided which of my three colors – yellow, light grey or teal – to paint each frame. I also labeled each with the color.
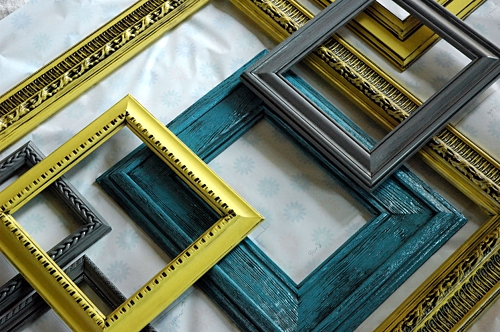
3. Next, you will paint your labeled frames. You can use either spray paint or a brush – just make sure you get good coverage on each frame. I used leftover latex paint from my yellow dresser (Sherwin-Williams Decisive Yellow), matching spray paint from my gray dresser (Krylon in Classic Gray), and a lovely teal spray paint that I found in my garage from another project (American Accents in Lagoon). After painting, I used my trusty Ralph Lauren glaze tinted to Black Silk. Really work the glaze into the detailing with a cheap, chip brush. Work a section at a time and wipe the glaze off of the high spots with a wet cloth, wipe with a dry cloth to remove the bulk of the glaze that’s not down in the detailing, and then wipe with another wet cloth to make sure the frame doesn’t look dingy. Mandi at Vintage Revivals has a great tutorial on this technique.
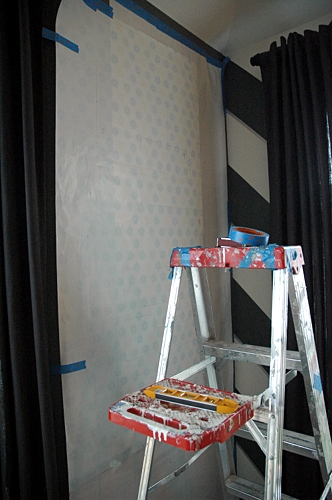
4. Hang your paper template on the wall. I just held mine in place with painter’s tape.
5. Now, go ahead and hang your frames that will be directly against the wall. I put two nails into the wall and hung them on the lip of the frame where the glass would usually go. I used a level to make sure that the nails for each frame were level.
6. Here was the tricky part for me. I tried to use several types of construction strength adhesives to attach the 2nd level of frames to the first. Perhaps it was they were painted, but nothing would adhere! So, I ended up going the old fashion route – a drill and hammer. The instructions make it sound a lot more complicated that it really is.
Take the first of your frames that would be on the top layer, and figure out where it would overlap the bottom frames. On the back of the top frame, drill a small hole just large enough for a tiny wire nail to fit into. Snip the head off of a wire nail with snips and put it upside down in the hole, so the pointy side up. I did this in two places – you’ll want your frames to attach in at least two places.
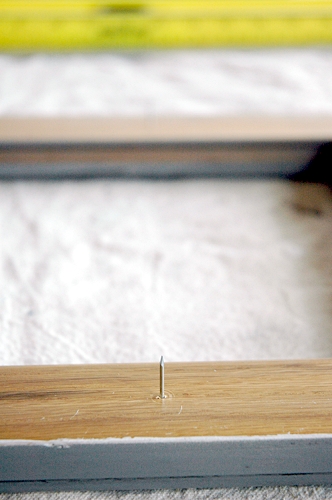
7. Take your bottom layer frame off the wall and lay it flat on a table, fancy side up. Position your top layer frame (the one with the nails) where you want it on the bottom layer frame and push down. The two nails will create little holes on the front side of the bottom layer frame. Use your drill to drill those holes all the way through to the back of the frame. In those locations, hammer finish nails in far enough so that the points start to come through the front of the frame.
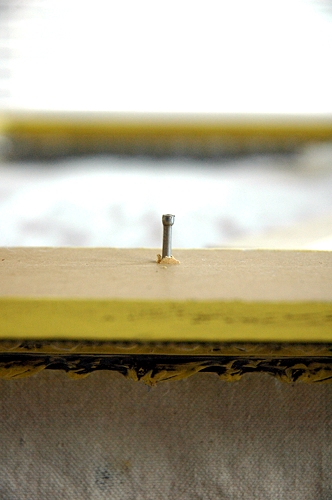
8. Take the little wire nails out of the top layer frame and position the tips of the nails from the bottom frame into the little holes where the wire nails used to be (both sides will now be fancy sides down). Hammer the finishing nails in so they go about half way into the top frame. Be careful that you don’t go all the way through!
You will likely have some of the nail head sticking up on the back of the bottom frame. Just use a Dremel to cut the nail down flush with the back of the frame.
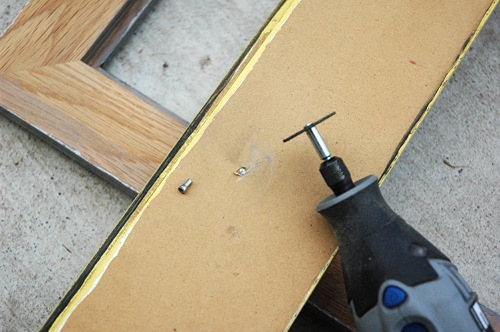
9. Repeat that process for your other layered frames.
When you are ready, tear down the paper template and hang the bottom layer on your wall. The top layer frames will hang with no problem and will be sturdy enough. As long as you don’t decide to swing from them, they will hold on just fine. I put 3M Command Poster strips on the bottom of each frame so they would stick to the wall and not shift. Love those things!
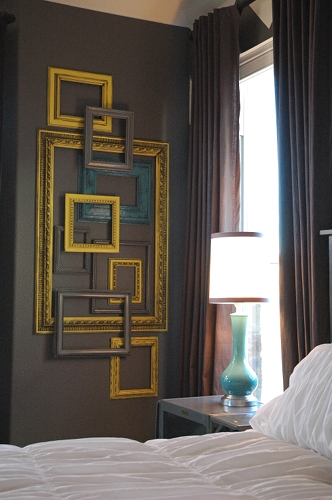
The friends who have been to my house since I hung these layered frames have been blown away. It’s an easy and cheap way to take up a lot of wall space, and the result looks incredible. Do you think you have a spot in your home for something like this?
The reveal of the complete master bedroom is coming up next week. Did you EVER think it would be finished? I was beginning to have my doubts! 😀
Linking up this post with Beth’s Tutorials & Tips Link Party at Home Stories A to Z.