Makely

Let's Make Life Awesome

  • Home
  • Decorating/DIY
    • Create Your Decor
    • Decorate Your Home
    • Paint Your Walls
    • Transform Your Furniture
  • Healthy Living
    • Essential Oils
    • Family Wellness
    • Household Care
  • Project Gallery
  • Contact
You are visiting: Home » Decorating/DIY » Page 216

The Second Annual $5 Challenge

by Lindsay Ballard on March 25, 2010 154 Comments

Welcome to the 2nd Annual $5 Challenge!

A few weeks ago, I issued the $5 Challenge to my readers.  Could you create a new Spring decor item by spending no more than $5 at a dollar store?

I’ll admit that I had a tough time coming up with a project this year.  You guys have been sending me your projects, and I was a little scared because everyone’s ideas have been so good!  I’ve been blown away.

Here’s what I cam up with:  a very easy to create embellished kitchen towel.  It’s not something to use to mop up grape juice spills off the counter.  Instead, I wanted something cute that I could use to dry my hands instead of going through endless rolls of paper towels.

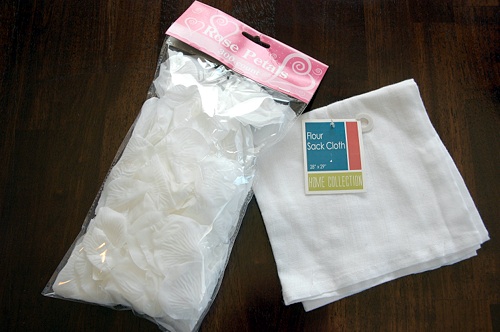
I bought a white flour sack towel from the kitchen section of Dollar Tree and a bag of faux rose petals in the wedding section.  The petals come in white, red, and pink, but I chose the white because I wanted to make the towel solid white.
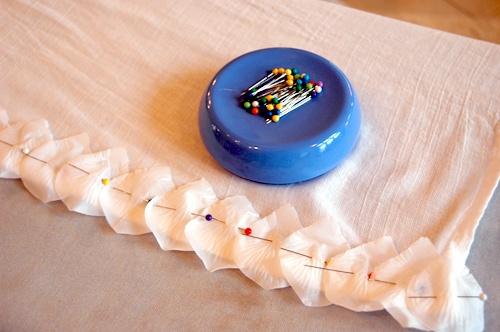
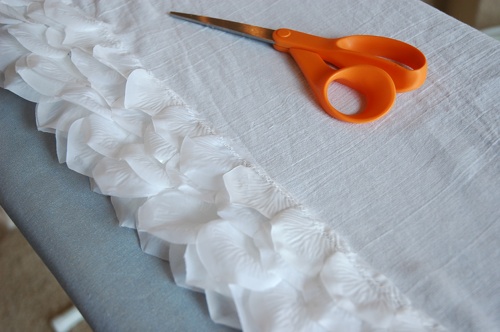
After washing and drying the towel, I pinned a row of petals along the bottom of the towel.  After the row was in place, I used my sewing machine to stitch a zig zag stich along the top edge of the petals to secure them to the towel.
After that row of petals was sewn on, I pinned another layer of petals on top of that one and sewed them into place.  Then, I added the next row.  In all, I added five rows of petals.  On the last row, I trimmed the top of the petals right above my seam.
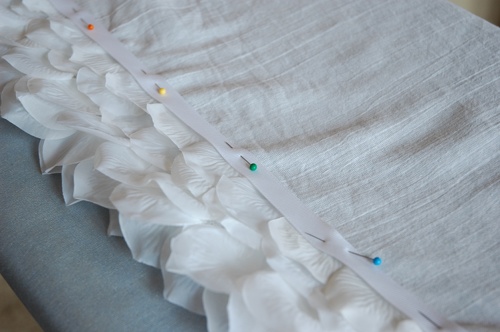
Next, I found just enough white grosgrain ribbon in my stash to cover the seam line.  I first pinned it into place, and then I ran it through the sewing machine.
After the ribbon was in place, I held my breath as I put the towel in the washing machine to see if it would pass my “hold up in the wash” test.  Fortunately, it survived the washer and dryer with flying colors.
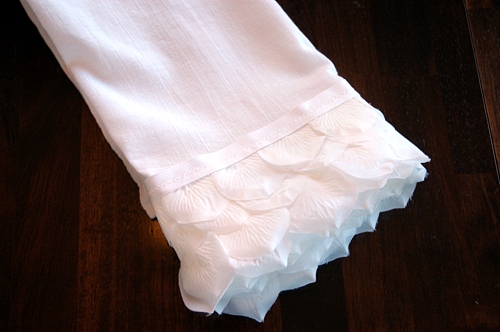
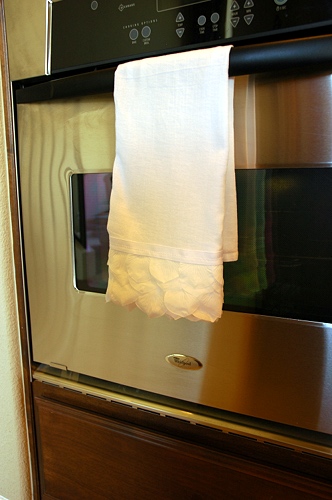
I absolutely love it!  I’m so glad that this challenge forced me to think outside of the box.  Now, I have a fresh and fun towel awaiting dry hands in my kitchen.
Now, it’s your turn!  If you accepted the $5 Challenge, please add your project to the MckLinky below.  Just make sure you have followed the rules:

– Create a new Spring decor item for your home using only $5 worth of items purchased at a dollar store – i.e. Dollar Tree, Dollar Store, Everything’s $1.00, etc. The $5 does not include sales tax.

– You may use the following supplies *if* you already have them on-hand – paint, glue, paper, fabric, tools.

– On or before March 25th, post a tutorial for your new craft on your blog. If you don’t have a blog, please email me photos and a written tutorial to lindsay@makelyhome.com and I will find a way to display it for you.

– On March 25th, come back to my blog and link up your tutorial to the Five Dollar Challenge post that will go up that morning. Any entries that do not follow the rules will be disqualified (and I’ll feel like a big, honkin’ jerk).  The MckLinky will close on Sunday, March 28th.

– A panel of esteemed judges (JJ from the Blah Blah Blahger, Emily from Remodeling this Life and Gina from The Shabby Chic Cottage) will select five entries to put forth to the Living With Lindsay readership for voting.  We’ll be announcing the five finalists at the end of next week.

– YOU guys will vote for your favorite of the entries. One winner and one runner-up will be selected to win the prizes.

And just because I know you’ve been DYING to know, here are the prizes:

One winner will receive:

  • a $30 gift certificate to The Rusted Chain
  • a $25 gift certificate to Dollar Tree, courtesy of our friends at Dollar Store Crafts
  • a handmade Robin’s Nest from The Shabby Chic Cottage

One runner-up will receive:

  • a $30 gift certificate to Back40Life vinyl decor
  • a handmade Vintage Book Page Tassel of your choice from Lindsay at Home

Oh, yeah.  You definitely want to be the winner or runner-up now, don’t you?  I told you the prizes were gonna rock!  Thank you very much to these great sponsors!

Ready, set, link up!

Powered by MckLinky

Click here to enter your link and view the entire list of entered links…

How to Cut Glass

by Lindsay Ballard on March 22, 2010 2,438 Comments

Have you ever broken a piece of glass in a picture frame?  Or picked up a great frame at a garage sale that was missing the glass?

That has certainly happened to me plenty.  I used to think that the only way to replace the glass was to buy it at a home improvement store or craft store.  But then, it only comes in certain standard sizes, and we all know that picture frame glass is rarely a standard size – it’s always seems to be just a wee bit smaller than it should be if it’s even close to standard.

Let me show you a simple way to cut glass to any size you want.  All you do is measure, draw a straight line, and snap.  It’s really that easy!

How to Cut Glass

1.  Measure the inside of your picture frame so that you know the exact size to cut the glass.

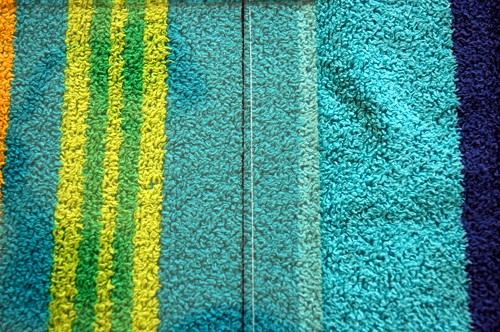
2.  Lay down a thick towel (I use a beach towel) to protect your workspace.  Your towel won’t be damaged, but it’s best to protect your surface from glass knicks.

3.  Wipe off a larger piece of glass with a soft cloth (I used a left over piece of glass I had removed from a frame for another project).  Do not use Windex, but you may use water if you need to.  Measure out the height you need with a tape measure or ruler on one side of the glass.  Draw a straight line using a felt-tiped pen or dry erase marker.  I always mark my lines 1/8″ smaller than I want the final cut to be due to the way my glass cutter is set up (see Step 4).

4.  I bought my glass cutting tool at Hobby Lobby, but they should be available at any craft or home improvement store.  It has an angled head on one end with a small rotating cutter disc on top of the head.

When you line the head up with your straight edge (like you would do if you were cutting a straight line with any sort of blade), the disc is about 1/8″ away from the straight edge.  That’s why I mark my measurements 1/8″ smaller than I want my final cut to end up.  Does that makes sense?

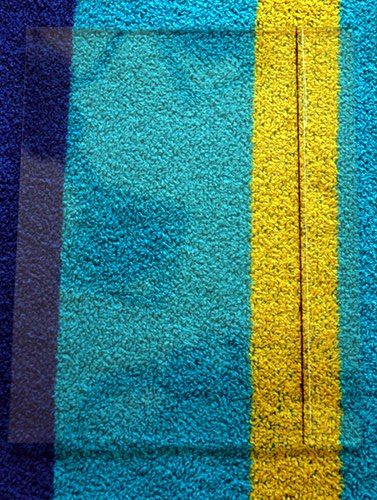
5.  Armed with my work gloves and eye protection, I line up my straight edge against my marked line and use the glass cutter to make a straight line down the glass.  You don’t want to push too hard – only hard enough that there is a hairline cut in the glass (see the white line in the picture below).  Don’t worry, the cut doesn’t go all the way through the glass.

It’s very important that you DO NOT take your glass cutter off of the glass while you are making the cut.  If you do, it will cause the glass to break unevenly.  The cut should go entirely from one end of the glass to the other.

6.  Once your hairline cut is made, all you have to do is snap the glass at the cut.  To do this, simply hold the glass on each side of the cut and then snap it AWAY from you.  You will be impressed with your straight line!

Note: It is MUCH easier to snap the glass where the piece coming off is at least an inch or so wide.  If you are trying to just trim off a tiny piece of glass, you are going to need a lot of force to get that piece to snap off.

7.  Repeat the process for the glass width you need for your picture frame.

8.  You’re done!  Add it to your picture frame and you are good to go.

Any questions? Have you tried this process before?  Let me know in the comments.

« Previous Page
Next Page »
  • Email
  • Facebook
  • Instagram
  • Pinterest
  • Twitter

About Makely

Lindsay Ballard is a former college mascot turned political geek turned roller derby playing, DIY fanatic.

Lindsay chronicles her projects, design ideas, and lifestyle tips here at Makely, where she shares tutorials and inspiration. Her DIY designs are bold and graphic, while her spirit is fun and full of color.


Archives

Categories

PRIVACY POLICY
Copyright © 2009-2019 Makely School for Girls | All Rights Reserved | Posts may contain advertising content or affiliate links