Makely

Let's Make Life Awesome

  • Home
  • Decorating/DIY
    • Create Your Decor
    • Decorate Your Home
    • Paint Your Walls
    • Transform Your Furniture
  • Healthy Living
    • Essential Oils
    • Family Wellness
    • Household Care
  • Project Gallery
  • Contact
You are visiting: Home » Project Gallery » Page 45

Easy $2 Striped Pumpkins

by Lindsay Ballard on October 10, 2012 3,143 Comments

I don’t traditionally go all out with fall decor.  I usually set a few fall-ish things out, but the earth tones associated with fall are not my bag, Baby.  I also always start to feel that my house looks cluttered with all that going on.

So this year, instead of doing the usual by setting out the things that are in my “fall” Rubbermaid bin from the attic, I’m doing something a little more fun.  I started by making the Urban Scarecrow Wreath.  And then last week, I sat down to paint a few pumpkins.

This is the point where you think to yourself, “Oh, no!  Another blogger posting another post about painted pumpkins!”  But, I promise mine are different for two reasons:  1)  They aren’t perfect and 2) They aren’t orange/black/silver.  Instead, they look like mini circus tents.
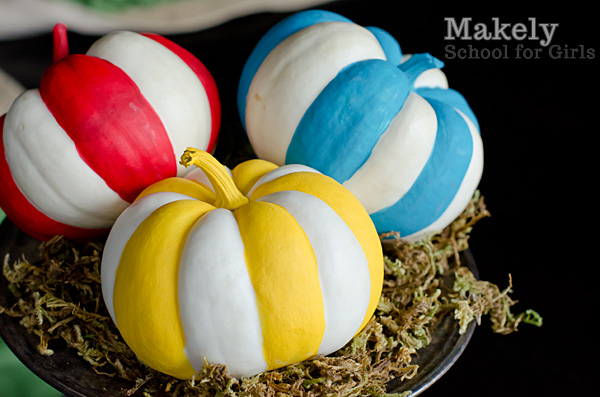
So, I’m here to lay it all out for you.  Fall decor doesn’t have to be time consuming.  It doesn’t have to take over your entire house.  And it certainly doesn’t have to be orange.

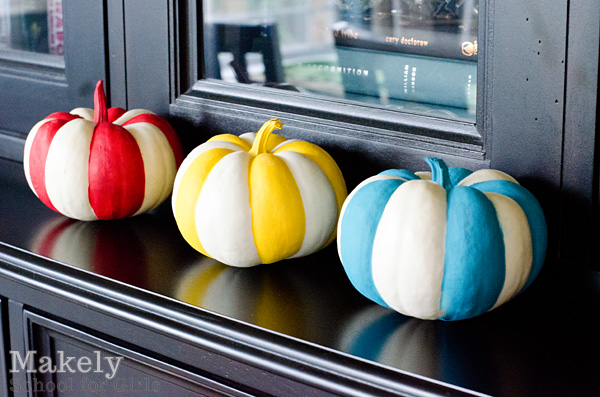
I picked up three mini white pumpkins at my grocery store for less than a buck a piece.  Last week, I sat down in front of the TV with three bottles of acrylic craft paint (yep, the $1 kind from the craft store) and a 1/4 inch paint brush (also from the craft store).  I didn’t mask off stripes with painter’s tape.  I didn’t use stencils and spray paint.  I just painted every other rib on the pumpkin with the craft paint.  They are definitely not perfect, but it’s not like they are going to hang around my house for longer than a month and a half anyway.

The pumpkins I used had thick ribs and deep crevices, which meant it was easy to get straight-ish lines. They also had an even number of ribs, so the alternating color pattern worked out perfectly.  It also led me to wonder if all pumpkins had an even number of ribs, but Mr. Google didn’t answer that question.  Does anyone know the answer ?

I painted one turquoise, one red and one yellow – one of my favorite color palettes – which means that they coordinate nicely with the rest of my decor.  Plus, they’re just kind of fun and unexpected, which IS my bag, Baby.
Have you thought about incorporating some non-traditional colors into your fall decor?  Tell me about it!
Modern Vintage Inspired Playroom Reveal

by Lindsay Ballard on October 8, 2012 3,716 Comments

When we moved into our home a little over four years ago, I spent some time trying to work with what I had.  Back before I tackled painting the walls and refinishing furniture, I simply hung some junk on the walls and arranged our rooms the best that I could.

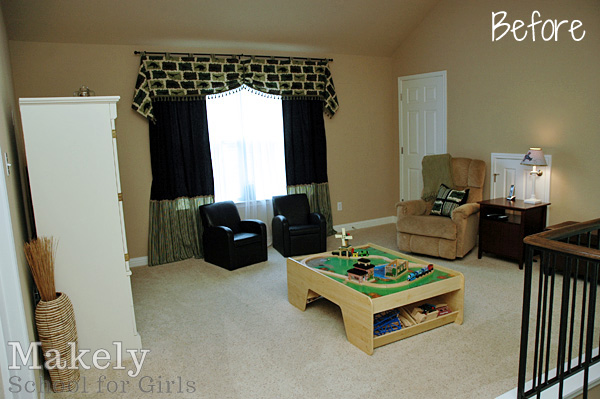
It didn’t take long before I started dipping my toes into creating some things for our home, and I decided that I need to do something to liven up Zack’s playroom (this was in the pre-Emma days).  At the time, I was so proud of putting together something that Zack loved, even though I knew it wasn’t going to be the room’s forever decor.

Looking at that space now, I get a little weepy.  I can’t decide if I want to hide rooms like this in an effort to make myself feel like my rooms have always been solid gold awesome, or if I want to share them as proof of how far I have come once I quit worrying about what anybody else thinks of my home.  I’ve obviously decided on the later, because it is such a freeing feeling.

That before picture also makes a tremendous impact when I show you this.

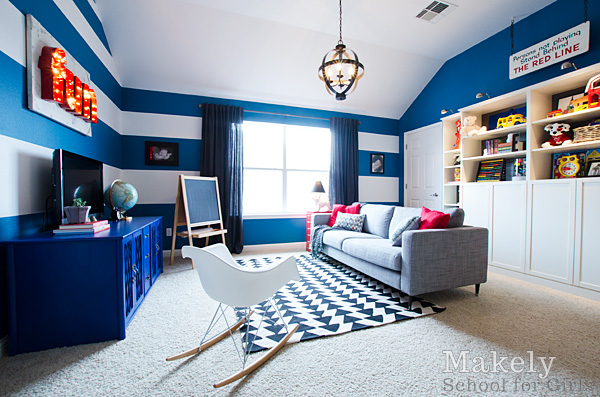
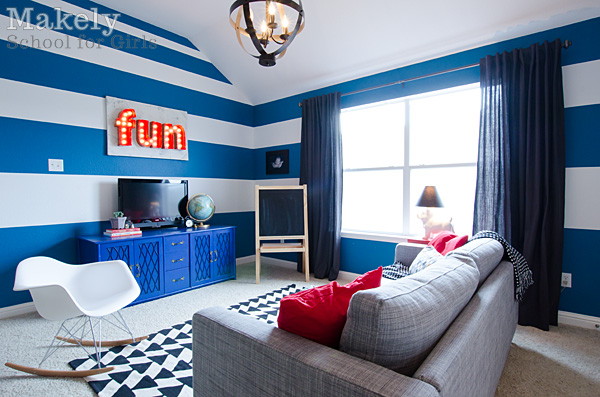
BAM!  The playroom is finished.  To say that it is one of my favorite spaces in the house would be an understatement.  And do my kids love it?  Well, let’s just say that a friend of mine came over yesterday, and Zack said to her, “Come upstairs and look at our room.  My mom is so cool.”

This room has everything a playroom needs – tons of storage and a lot of space for the kids to play – and more.  I was determined to make this room more of a family space than one where toys were just lined up around the walls.  I knew it was a success when I found myself sitting on this sofa when Zack and Emma were in school instead of sitting in our living room.

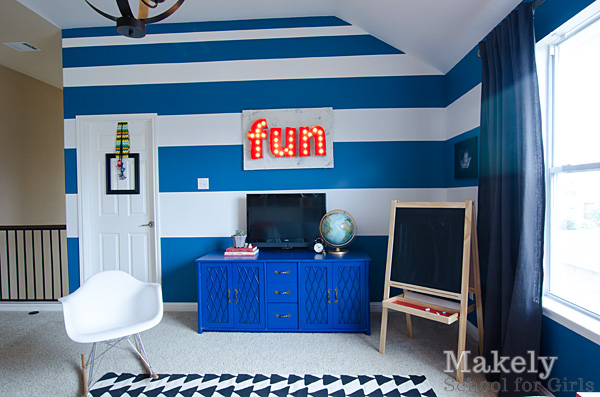
I started this transformation at the beginning of the summer when I transformed a 1960s stereo cabinet into a cobalt blue beauty.  It set the tone for the room and I kept it in the back of my mind as I moved on to the different elements.  It houses a giant bin of Duplo legos, lots of dolls, and all of our Little People.  Puzzles now occupy the spot that once held records.

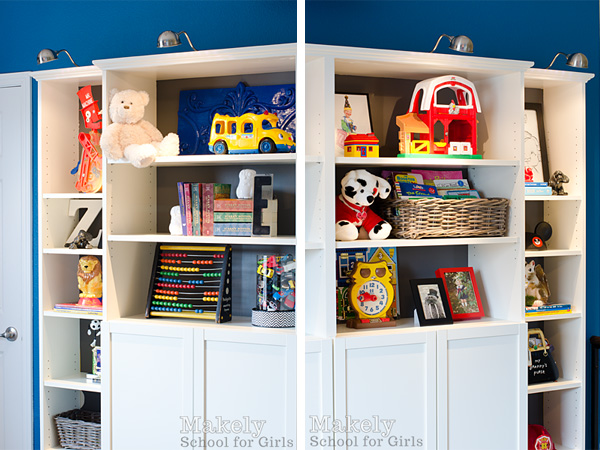
I striped two walls of the playroom in Peacock Blue by Glidden, and I painted the third wall solid.  We added a set of “built-in” bookcases to the solid wall to give us more storage.  The kids still dump toys out all over the floor, but it sure is easier to clean up when everything has its own place.

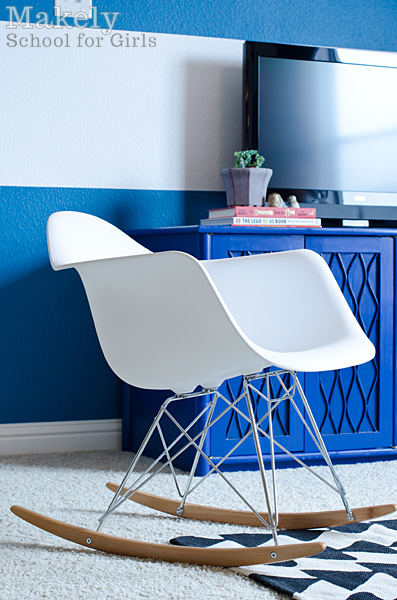
I got rid of the ugly (but oh so comfy) La-Z-Boy recliner and replaced it with an Eames inspired rocking chair.  It was at this point that I fully embraced where this room was headed.

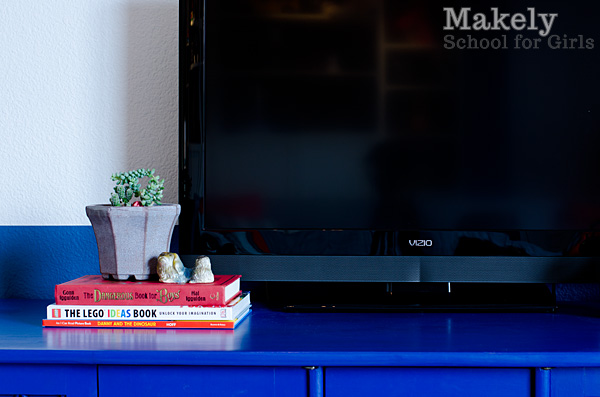
I kept the accessories minimal for a few reasons.  First, there was already a lot going on in the room. Second, everything had to be kid-appropriate and kid-friendly.  On the stereo cabinet, I ended up adding a stack of books, a pot of succulents, and a vintage carnival chalkware dog.  On the other side, there’s a clock (that Emma picked out – Mama was so proud!), a globe and a little brass duck I found for 50-cents at a thrift shop.

I used a lot of Zack’s and Emma’s toys to accessorize the bookcase shelves.  I did, however, come across some fun vintage toys to add into the mix, too.  I found styling these large bookshelves in a kid-friendly manner to be really difficult!  I originally painted the back of the bookcases a bright yellow, but that color really fought with the colorful toys.  Once I repainted it a dark gray, it looked much better.

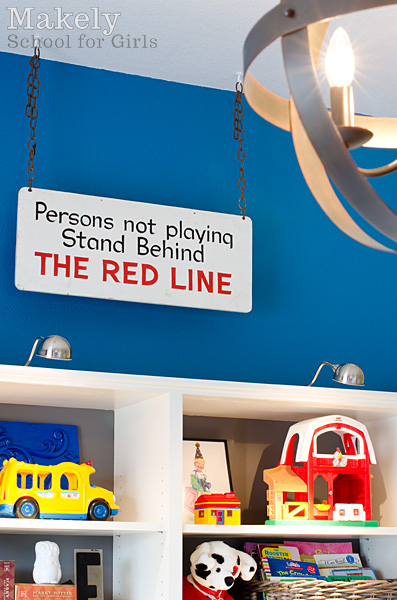
The original inspiration for this room was a beaded light fixture that I made from plastic Mardi Gras throw beads.  It reminded me of a carnival, and I knew that’s the vibe I wanted this room to have.  The funny thing was that as this room progressed, the fixture no longer fit.  I replaced it with a globe pendant light, but I still have the beaded chandelier that will eventually have another home in my house.  To keep the carnival feel, I made the DIY carnival marquee sign and hung this vintage sign from a now closed amusement park in Oklahoma.

I’m going to put together another post with sources for everything in the room and links to the tutorials I put together for the various projects.  If you have any questions, be sure to let me know and I’ll answer them for you.  I am also going to be sharing my tips for putting together a stylish, yet functional, playroom.

Until then, I leave you with this before and after.

It hardly even seems like the same room, does it?  Man, I love paint.

« Previous Page
Next Page »
  • Email
  • Facebook
  • Instagram
  • Pinterest
  • Twitter

About Makely

Lindsay Ballard is a former college mascot turned political geek turned roller derby playing, DIY fanatic.

Lindsay chronicles her projects, design ideas, and lifestyle tips here at Makely, where she shares tutorials and inspiration. Her DIY designs are bold and graphic, while her spirit is fun and full of color.


Archives

Categories

PRIVACY POLICY
Copyright © 2009-2019 Makely School for Girls | All Rights Reserved | Posts may contain advertising content or affiliate links