Makely

Let's Make Life Awesome

  • Home
  • Decorating/DIY
    • Create Your Decor
    • Decorate Your Home
    • Paint Your Walls
    • Transform Your Furniture
  • Healthy Living
    • Essential Oils
    • Family Wellness
    • Household Care
  • Project Gallery
  • Contact

Anthropologie DIY: Peek-A-Boo Lamp Shade

by Lindsay Ballard on March 21, 2011 1,866 Comments

It’s been a little over two weeks since I set foot in an Anthropologie, and I’m still ogling their goodies online every day.  Maybe twice a day.  Okay, three or four times a day, but don’t judge me.

There is one particular lamp shade that I am continuously drawn to.  It’s such a unique design, and I wanted to adapt it for use in my own home.  We all know I’m not paying $128 for a lamp shade!

My DIY version of the Anthro shade was very easy to put together, and has added a little spunk to an otherwise boring little lamp.  Peek-a-boo!
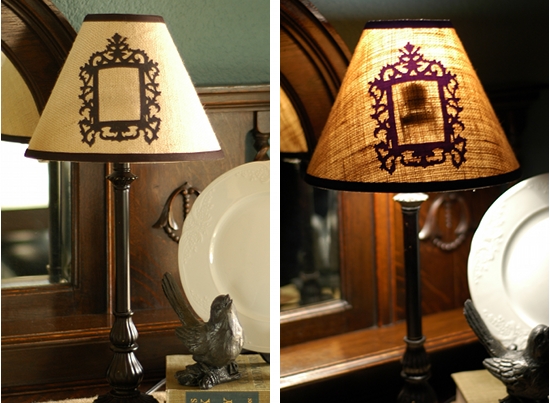
Fun, right?

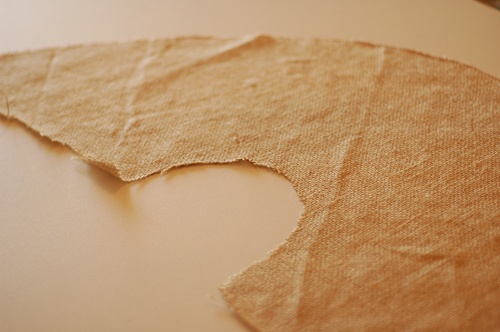
I started with a plain, white shade that needed some updating.  I cut out a piece of burlap to recover the shade using Traci’s excellent directions from last year.  You will want to use a neutral colored fabric, and something the weight of linen would be really nice.  The burlap definitely worked for the final project, but if I did it again, I might choose something more light weight.  I left some excess length on the top and bottom so I could trim it up once it was on the shade.
Then, using the new Silhouette fabric interfacing that’s just come out (LOVE it!), I cut out an ornate frame from a black cotton fabric with my Silhouette machine.  It cost me 99-cents to download that design from the Silhouette store.  If you don’t have a Silhouette (girl, you NEED one), you can either find a clip art frame and cut the fabric by hand (back it with iron-on fusible backing first) or you can paint/stencil it onto the fabric.

I wrapped my burlap around the shade and “dry fit” the frame so I’d know where I want to iron it on.
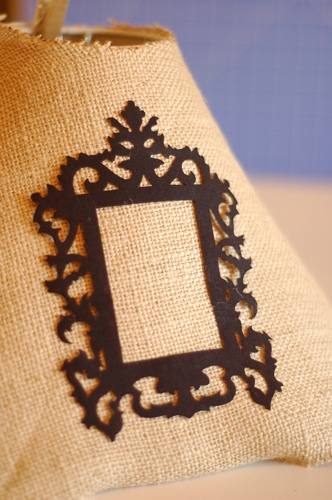
I carefully removed the burlap from the shade and ironed on the frame.  A word of caution – if you are using fusible interfacing, don’t leave your iron sitting there for too long.  I did that, and it kind of burned my burlap a little bit.  It wasn’t bad enough that I thought I needed to re-do it.
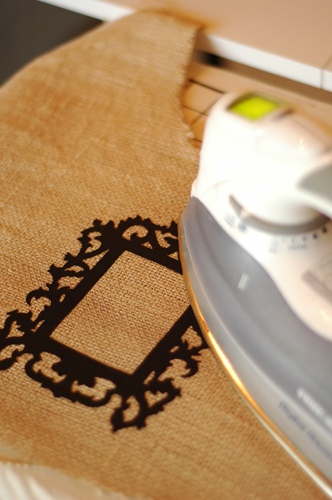
I attached the burlap to the shade in a few ways.  The first thing I did was paint Mod Podge all over the shade with a sponge brush so that the burlap would stick when I was positioning it.  Then, I did a small line of hot glue around about 1/2″ from the top and bottom of the shade so that the fabric wouldn’t peel.  I think using both the Mod Podge and the hot glue ended up working great.  I trimmed around the top and bottom so the burlap was about 1/4″ shorter than the shade.

You might even get yours on straight, unlike me.  Eh, it’s good enough.

I used black 1/2″ bias tape to trim the top and bottom of the shade.  Unless your shade is the same width around the top and bottom, make sure you use bias tape instead of ribbon (which will pucker).
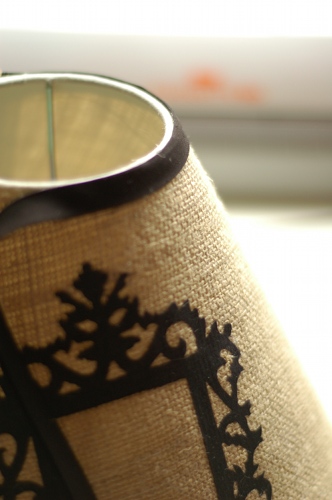
Now, to create the little surprise.  I went back to my Silhouette and cut 3 little chair shapes from black cardstock.  Again, you can do this by hand if you need to.  You can pick any shape you want, but I encourage you to pick a) something with simple lines that aren’t too thin and b) something fun and whimsical.
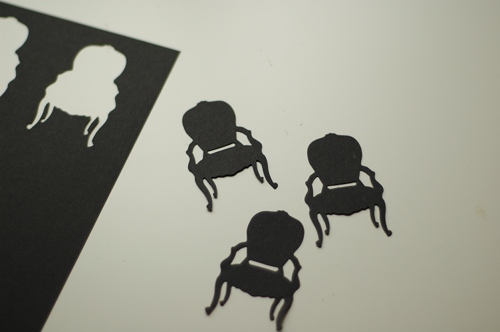
I cut three because I want to layer them to create one really thick shape.  I glued them together with a plain ‘ole glue stick.

You will then attach your peek-a-boo surprise to the inside of the shade.  I suggest using a glue that isn’t runny so that it doesn’t run down the shade.  I actually used some Aleene’s Clear Gel Tacky Glue and just brushed it on to one side of the chairs with a sponge brush.
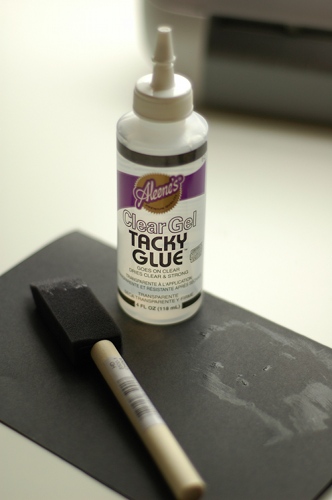
Then, just press your little surprise onto the inside of the shade, positioning it so that it’s inside the frame.  I found it easiest to put the shade on my lit lamp so that you can see exactly where to place shape.  Take the shade of the lamp and press the design on firmly.
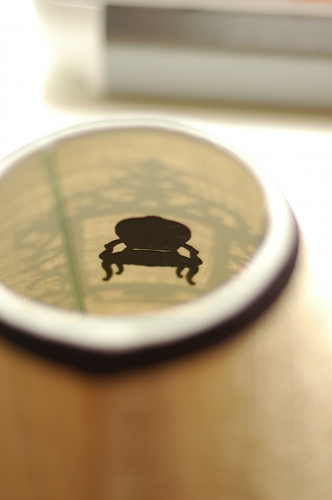
When you’re finished, you’ll have a fun lamp by day and a super fun lamp by night.  I can’t stop staring at my new shade!

What peek-a-boo design will you put in your shade?

P.S. If you are in the market for a Silhouette SD of your own, you can use the code ‘LINDSAY’ at checkout to receive a great deal.  You’ll get a Silhouette SD craft cutter for the discounted rate of $229 (that’s $70 off) – PLUS, a free bonus package of sewable fabric interfacing, clean cut fabric interfacing, and a roll of flocked heat transfer material.  Just use this link, add the machine to your cart, and enter the promo code to see your discount and free bonus goodies.  This promotion runs through March 27th.

P.P.S. Already have a Silhouette and want to pick up some of this fabulous new fabric interfacing?  Save 25% off of both types of the fabric interfacing.  Just use this link, add some fabric interfacing to your cart, and use the code ‘LINDSAY’ at checkout.  This promotion runs through March 27th.

P.P.P.S. I am an affiliate with Silhouette America, meaning I make a few dollars if you use my link when shopping on their website.  It helps to cover the cost of my glue sticks.

Shared at Made By You Monday @ Skip to My Lou and I Heart My Crafty Cutter @ Serenity Now.

Programs, Lipstick and a Tongue

by Lindsay Ballard on March 19, 2011 12 Comments

This post is sponsored by Apartment Guide.

With the last of my budget for the Apartment Guide‘s “Green Up a New Space” Blogger Challenge, we decided to do a few things in our home t rel=”nofollow”hat we’ve been meaning to do for years.  They are both those tasks that we keep saying, “We need to do X,” and “I really want to do Y,” but we for some reason just haven’t.  I think it’s akin to overlooking a ding in your wall paint or stain on the carpet – you get used to the way things are so it’s hard to remember that they need to be fixed.

For starters, we FINALLY got around to replacing our thermostats with programmable models.  We bought two Honeywell 5-2‘s at Home Depot for $25 a piece.  Basically, we can program it to run on a certain schedule on M-F and then do something different on Saturday and Sunday.  There are four modes within the M-F and S-S schedules, which works well for us.  We have it set up to be cool when we are sleeping, warm up a bit before we wake up, warm up a lot more until about noon (DH is at work and the kids and I are usually running our errands at that time), and then cool off a little bit in the afternoons.  We’ve had them installed about a week and we seem to have found a good schedule.

Old and Busted (and no, the A/C wasn’t actually running at 70.)

New Hotness

Our electric company (Reliant Energy) sends me weekly emails detailing our energy use for the week compared to the previous week, so I’m excited to see if the new programmable thermostats made a difference.  I’m not expecting to get that email until Wednesday, so I’ll update here and let you know if our energy consumption went down.

After the dog door and two thermostats, we had about $30 left of “green” to spend.  I have really been wanting some houseplants to add some color, life, and better air quality to our home.  I know there is some debate as to how many plants you’d actually need to make your air quality better, but I figured it was worth a shot.

I have a black thumb – two black thumbs, even – so I needed to find some easy plants that I’d have to try really hard to hurt.  Apartment Guide even has a list of hard to kill houseplants, so take a look at that list if you are like me.

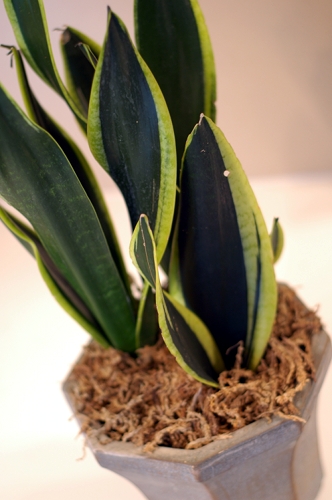
The first plant I picked up is a Sansevieria, or Mother-in-Law’s Tongue.  It’s care instructions said “WANTS MINIMAL ATTENTION” in big letters, so I knew she was the one for me.  These are resilient little guys that want low light and are perfect for offices, bathrooms, and low light areas.  I potted it in a gray pot I already had and added some sphagnum moss to the top.

She’s been in the master bath for an entire week and is still thriving, so I’m pretty proud at what an amazing plant parent I must be.

The other plant we picked up was one I thought I was going to have to fight some people at the store over.  As soon as I saw her, I put her in my cart.  Every other shopper who saw it was asking me where she came from.  She was the last one, and she was mine – all mine!

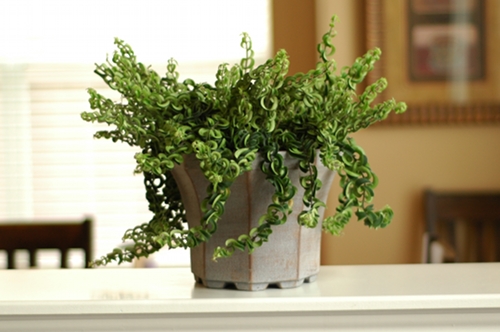
My new baby is a Aeschynanthus radicans, or a Lipstick “Twister.”  She wants medium indirect light, so this ledge between my living room and breakfast room is the perfect location for her.  This plant only needs light water, so I only need to water her when the soil feels dry.  She’s allegedly supposed to bloom red flowers, but I’m not holding my breath on that one. I just love the leaves on this plant.

One day, when she gets bigger, I’ll need to transfer her to a hanging basket.  However, since it’s a slow growing plant, maybe that will be a while.

Speaking of baskets – are you ready to find out who won the Apartment Guide giveaway for a basket full of $100 worth of green products?  Congrats to Erin for being the randomly selected winner!  She’s following AG on Twitter so she’s getting some good green home tips and now is getting some green products to put to good use!

Thank you so much to Apartment Guide for helping me (and Erin!) green up my space!  I’m looking forward to reading more green and other lifestyle tips from them via their Facebook page and Twitter feed.

Apartment Guide is owned by Consumer Source, Inc. Apartment Guide partnered with bloggers such as me to participate in its “Green Up a New Space” Blogger Challenge.  As part of that program, I received compensation.  They did not tell me what to purchase or what to say about the products used for the “Green Up a New Space” Blogger Challenge. Apartment Guide and Consumer Source believe that consumers and bloggers are free to form their own opinions and share them in their own words. Consumer Source’s policies align with WOMMA Ethics Code, FTC guidelines and social media engagement recommendations.

« Previous Page
Next Page »
  • Email
  • Facebook
  • Instagram
  • Pinterest
  • Twitter

About Makely

Lindsay Ballard is a former college mascot turned political geek turned roller derby playing, DIY fanatic.

Lindsay chronicles her projects, design ideas, and lifestyle tips here at Makely, where she shares tutorials and inspiration. Her DIY designs are bold and graphic, while her spirit is fun and full of color.


Archives

Categories

PRIVACY POLICY
Copyright © 2009-2019 Makely School for Girls | All Rights Reserved | Posts may contain advertising content or affiliate links