When the holiday catalogs began hitting my mailbox back in October (!), I eagerly poured through them looking for inspiration for my own holiday decor. One of my favorite selections was the Spruce Alphabet Wreath from Ballard Designs.
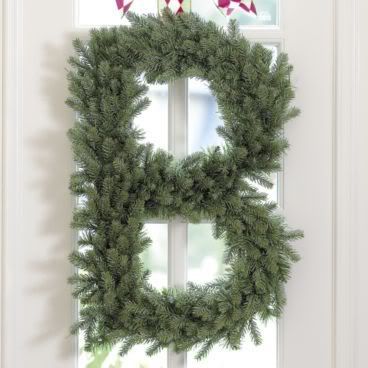
It wasn’t the wreath itself that I loved. In my opinion, it looks too tall and skinny, and I just couldn’t see paying $45 for it. I don’t think there’s enough heft in it to command enough attention for that price. ‘Cause I’m cheap. However, I was drawn to the idea of a letter wreath hung with a thick ribbon (the wreath in the catalog is hung with a yummy chocolate velvet ribbon).
I decided to make my own mini version of the letter wreaths to adorn my breakfast room chairs. In true Lindsay spirit, I found all of the supplies I needed at the Dollar Tree. Have I told you one just opened about a mile from my house? It’s dangerous, people.
What You’ll Need:
- Foam board – 1 sheet
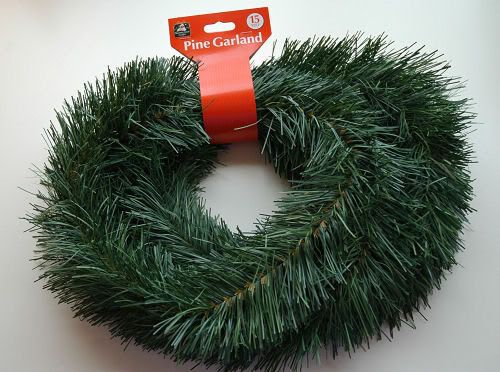
- Wired garlands – I used six total, but the number you need will depend on your letter and the number of wreaths you make. This is the type I purchased:
- Wired ribbon – I used 3 rolls total, but again, it will depend on what you do with this project.
- X-Acto or utility knife
- Wire cutters
- Scissors
- Glue gun and glue sticks (depending on your letter)
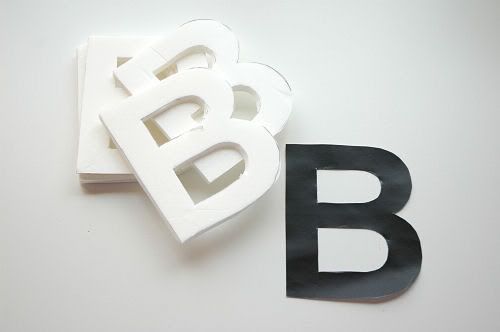
I began by printing out a letter ‘B’ from my computer. I chose a basic sans serif font and made it roughly the size I wanted my finished mini wreaths to be. I traced that letter onto the foam board and cut out the letters with my utility knife. I cut out six letters for my six chairs.
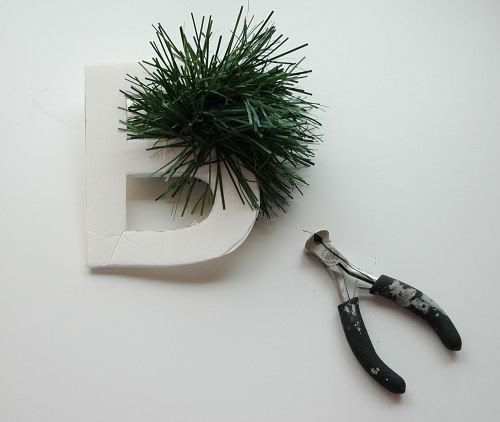
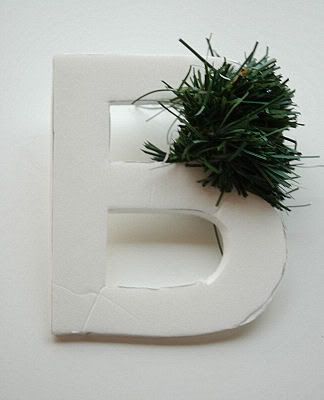
Keep cutting 12 inch sections, wrapping, and hair cutting. I recommend the 12 inch sections, because it’s much easier to work with than trying to wrap the entire 15 feet of garland.
If you break your letter, don’t worry. Just tape it or glue gun it back together. The wired garland will hide the break.
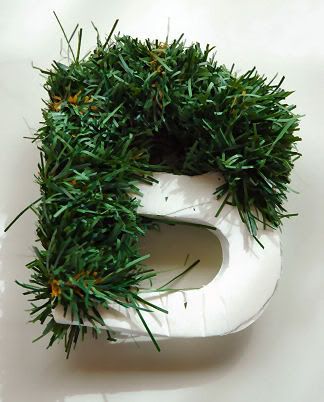
When you finish wrapping your letter, you’ll have a stunning wreath!

Just kidding. You’ll need to trim some more. And trim, and trim, and trim. Cut it as close as possible so that you can see the shape of the letter really well. If you are like me and are using a letter with “holes” in it, be sure you stick your scissors in there and really trim out that hole as best you can.
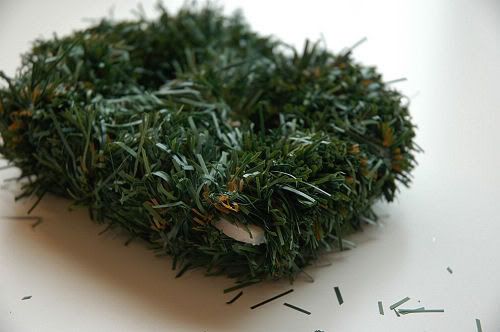
If you find that you have some of the foam peeking through, no worries. Cut a small section of garland (3 or 4 inches) and re-wrap that part of the letter. Don’t forget to trim the new section!

The last step is a simple one. Just thread a length of ribbon through a “hole” on your letter. If your letter has no “holes” and is not one you can hang well, like ‘S’ or ‘C,’ you can attach your ribbon with a glue gun on the back of the letter.
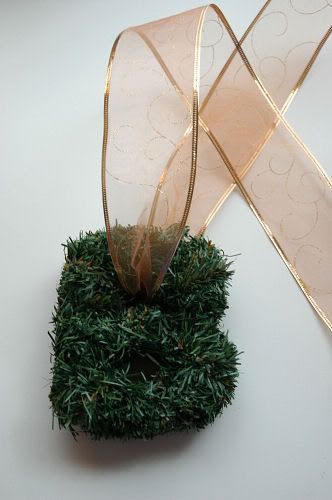
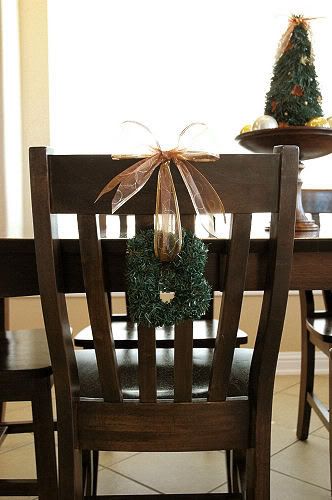
I hung one of my mini wreaths on the back of each of my breakfast room chairs by tying a bow on the top of the chair. I absolutely love the way it looks.

You could hang them just about anywhere – stair railings, lamps, or even on a nail in the wall. It would be pretty easy to make them in a larger version, too.
What do you think? Do you like the Ballard Designs wreath or the Lindsay Ballard Designs wreath better? You’ve been wondering what my ‘B’ monogram stands for, haven’t you?
For even more easy holiday DIYs, hop on over to Centsational Girl. I have a fun tutorial over there today featuring sequins. Sparkle, sparkle, sparkle! Thanks for having me, Kate!
I foresee a garlandy R replacing the mossy R on our front door in the very near future. Like tomorrow if I can get my act together. Thanks for sharing!
They look cute! I agree the ballard one looks a little skinny and scrappy.
What a great idea. I love the letter and hanging from the back of the chairs is so pretty. Great tutorial. Thanks for the inspiration. Hugs, Marty
Beautiful! I like the idea of simple mini wreaths hung from the back of chairs too. So pretty with that transparent ribbon! You ARE the master!
Donna
Oooo – I love the idea of a wreath in the shape of a letter!!!
This is soooo cute!!! I'll have to figure out how to hang one from my soon-to-be new monogram last name, an L.
So cute, Lindsay! Great ideas and I love, love the sequined trees you did over at Kate's. Great idea!
I've got one of these planned, too… Michaels has wooden letters for super cheap, so that's my plan! : )
I love love love this idea! I made some simple wrapping trees this weekend, but have those awesome dollar store cones and wreaths at home still. I see another project on it's way…
🙂
http://design-aholic.blogspot.com/2009/11/tinsel-garland-trees.html
How cute! I love the little wreath! I made an initial wreath last year. You can see it here:
http://myheelsarehigherthanyours.blogspot.com/2008/12/holiday-wreath-mcguyver-style.html
Very Cute! I collect the letter "E" (they are everywhere in my house) so this would be a great holiday addition to my collection.
Thanks,
Jane
I might have to make an 'H' wreath. Also, it's so cool that your surname is Ballard, like Lucille from 'Meet Me in St Louis'!
Such a great DIY project! I love that you tied yours to the back of your dining chairs. So festive!
This is such a cute idea! I'm lucky because the first letter of my name, S, would be very easy to do and it is also my boyfriend's (aka pretty much fiance just not official yet) first and last initials, so needless to say I'm going to be seeing a lot of S's in my future. Thanks for the tutorial!
I'm a "B" too & I want your mini wreaths! I think I see a Thanksgiving weekend project in the making – dollar tree here I come! I think I'd like to make a couple to hang on our door knobs in the front & back of the house?
I just found your blog and am in love! I too, like Jane, collect I's and I think, like Brittany, that an over-sized I on my front door would be perfect for the holiday/winter season.
I am just now making your book page wreaths (I am doing two) and should be finished tonight. This will be my next Living with Lindsay project!
Thanks for the inspiration!
Very cute! I'm assicted to Ballard Designs, so I love the idea of creating their designs on the cheap!
Can I tell you that my husband now thinks I'm crazy?! I read somewhere that you live in P'ville- I live in P'ville too! I started shrieking when I read that. I tried to explain to him that one of my favorite bloggers lives in the same town, and he didn't get it. He definitely thinks I've gone over the edge…
I drool over that wreath every time I see it but I never thought about making it smaller – so clever!!
very cute! I'm going to make one of these this year!
OMW! I loved this in Ballards, and love it more here!
Thanks for your ideas, Im thinking I should make a few!
I'm hosting Christmas this year and just LOVE this idea! Of course I'll have to recruit my Mom to help me make it a reality. Ah ha
Thanks so much for sharing! This is the perfect alternative to overpaying for cuteness. I will scour garage sales next summer for garland…I want to make these for everyone I know!!
So cute, Lindsay! I recognize those 15' greenery swags, too! 🙂
I LOVE THIS IDEA. I LOVE INITIALS. (ALL CAPS MEANS I REALLY REALLY LOVE WHAT YOU DID)
YOU DID A GREAT JOB!!
Great. First you made me make a million book wreaths and now I'm going to be making these!!!
You're the best. Thanks!
Totally cute. I love it.
so cute!! I saw your tutorial on CG and i love it!! Can't wait to give it a try.
Simply amazing, your creativity is endless and I am so thankful you share these wonderful ideas with us. I would have never thought to tackle this project in this way, pure genious!
I was inspired by the same wreath and just made my own this weekend. I used wire hangers and the same garland at the Dollar Tree. I think yours are cuter than mine!
So cute! I think I even have some extra garland in my Christmas stash. Think it's too early to ask my hubbie to pull it all out? 🙂
Too bad I can't loop ribbon around an "L" for my last name. I guess I could attach it to the back somehow. Cute idea though!
I love it! thanks for the idea and info!
Girl, slow down! I'm still working on an ornament wreath and book wreath. Now I have a boxwood letter wreath too? My husband has informed me I have nowhere else to hang a wreath, but I'm sure there's a flat space somewhere!
Just sharing the love. I think this one will be a hit with the family craftapalooza! Can't wait!
Love Love Love this project… but please don't call it boxwood. Its Pine… not even related.
Anon – I decided to call it "faux boxwood" because of the way it looks to me after it's trimmed – like a boxwood hedge. Thanks for your suggestion, though!
So cute! I love all your wreath ideas and am a sucker for monograms. Great work 🙂
It looks awesome. I wonder how one would look strung with white lights on the front door. Maybe I'll try it :). Thanks for the tutorial!
i left you something over at my blog…a little gift if you will :)…I still want your B wreath….double commenting on a post makes me feel creepy!
<3
Jen
I love it! I love your humor more. That first piece looked like the eyebrow of my 7 year old daughter as a newborn. It was the only hair on her — just a ffssfft! on her right eyebrow. 🙂
Love it! Now to find the time to make my own.
I'll have to come up with something else. I have a green front door. It makes wreath buying or making a challenge. Grrr!
A funny for you: My husband saw your post as a walked past my computer and cracked,"B careful when you decorate." LOL
K, here's my version! Faux Boxwood STAR wreaths, set of 3 🙂
http://design-aholic.blogspot.com/2009/12/boxwood-star-wreaths.html
Thanks again for the idea Lindsay!
Lindsay- I loved both of the projects you featured here! I made the boxwood "wreaths" into stars, and just last night, modified the sequin trees into Pearl ornaments:
Check out the pearl passion ornaments post:
http://design-aholic.blogspot.com/2009/12/pearl-passion-ornaments.html
🙂
-A
LOVE it! I'll be trying this idea tonight!
great job – LOVE it!! I thought those were so cute when I saw the Ballard catalog…great job!
Thanks for this useful information
Thanks for this useful information
Thanks for sharing such great article
Great content, it will help in my business Thanks for sharing useful information. Respectfully, David, author of the blog https://riewes.de/