Tom and I have running joke that he gets to be right about something once a month. It looks like he gets to claim his monthly victory in the Great Table Runner Debate.
Although there were a few comments and emails that were Team Lindsay (thank you!), the majority of you were on Team Tom. I love that you guys felt you could be honest with me about your hatred of the table runner, but all of the comments were still really nice at the same time. The Glue Gun Army rocks!
However, if you know me, you know I’m not going to give up on something that has the potential to be awesomesauce. Looking back, I know that Team Tom was right about it being too much. So drawing from some of your comments, I set out to make another knotted table runner for that piece of furniture.
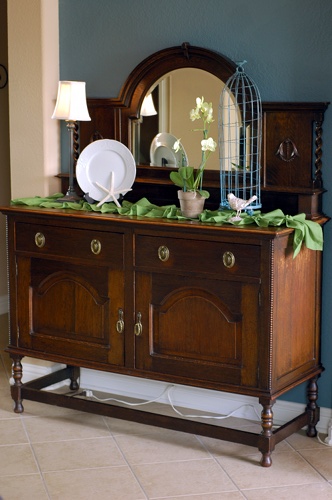
Much better, don’t you think? This time I REALLY love it! I had a green scrap left from the updated runner I did on my living room table (which is directly across from this piece), so I used the exact same knotting technique to remake this runner. This new one works for several reasons:
- The fabric color works better with the antique sideboard and the wall color;
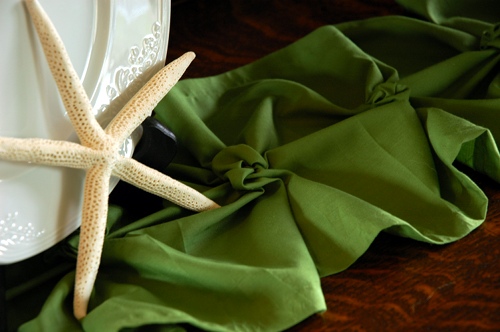
- The fabric is really thin, so it ruffles nicely;
- The fabric is a solid color, so it’s not too busy;
- It contributes to my need for color without being insane.
I know there was a lot of concern that you wouldn’t be able to accessorize due to the knots, but that’s actually not a problem at all.
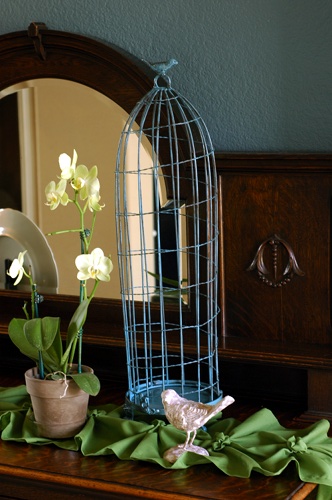
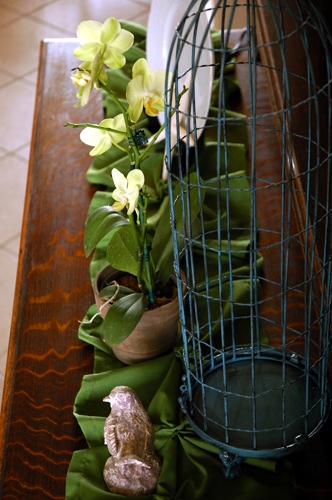
The knots are spaced far enough apart that you can put flat items in between or in front of them. Raised items, such as the birdcage and plate stand, can be placed right on top of them.
I guess I just had a crush on the previous runner, because this one I am full on in love with. Tom even walked in from work and said, “Oh, that’s much better!” Hooray!
Thank you for all of your comments about the crazy one. Without creating that one, I never would have created this one. Do you love this one, too? Or, do you still think it’s bad?
On second thought, don’t tell me if you don’t like it. I don’t think my ego could take it! 🙂


wow this is great!
Thank you so much!
This makes evhytreing so completely painless.
Love it!!
(and btw… while I was team tom, I never said I *hated* it before!)
i reserve hatred for bigger things than home decor, like, bananas.
Ha! What did a banana ever do to you?
Much better! I thought the technique was pretty neat but I think the fabric was a little busy for it and the sideboard. This looks gorgeous! And the little stone bird is cute! 🙂
wonderful!!!
LOVE the new runner!
A MILLION times better! The weight of the fabric used seems to make a huge impact. I was on team Tom; I didn’t want to hurt your feelings so I didn’t comment on the last post 🙂
While I was totally in love with that IKEA fabric, I do think the new green runner is PERFECT for that spot.
I love it Lindsay! I think it looks way better than the other! 🙂
I love it! I’m totally inspired to find a way to incorporate your knotting technique now. I’ve seen tutorials for the knotted duvet on a few blogs, but your directions seemed really simple and easy to follow. I agree that the green is better than the original. I guess a bold pattern like that just can’t handle that much texture. If you love the fabric maybe you could try using it somewhere else without knots or ruffles?
This is soooooo much better! I think the weight and pattern of the previous fabric were not right for the project. Glad that you can compromise! 🙂
I really love this one…..well green is my favorite color though so I’m a bit biased. The other one however, was super fun! Maybe reserve that one for outdoor summer dining or something 😉
I didn’t comment on the last one. It was one of those “he has a face only a mother could love” moments for me, and I’ve made it a point to not say super negative things on comments!
But this one . . . this one me likey! This one is something I could actually see myself using!
I haven’t looked at your first one yet, but I LOVE this! The color is perfect & the knot detail adds just the right amount of fun 🙂
Stellar work there evyreone. I’ll keep on reading.
You’ve hit the ball out the park! Incredible!
While I liked the other one, something about it was just off. After seeing this one I think it just didn’t go with that piece of furniture. This one? wow I really like! What a cool idea. Looks great with the tone of the wood and your wall color. Speaking of which, is there a post saying what color that is? Love it and have recently found your blog but didn’t notice how striking it was until today.
Perfection. I was on Team Tom, too but didn’t comment. I’m thinking I might try this one.
It’s so much nicer! While it’s still not my style (I am sooooo a ‘straight lines’ sort of girl!) it looks like it is supposed to be knotted and artistic, and I can see it fitting into many people’s homes.
Love this one. Just far too much going on with the other one!
A very clever design. I thought both runners were great.
I’m going to try one on my sideboard
Definitely awesomesauce. The solid color fits with the ruffles much better, and the whole set up really meshes. And I adore the green on that sideboard. Amazing. I’m glad kept going with the awesome idea. 🙂
Okay…I loved the other one… (that fabric would go fantastic in my house, hint hint) but this one does looks like it fits in better with your home (I think the more simple nature of this runner on the piece looks better). I love it, I just love how unusual it is, not just another flat table runner with rosettes on it. (I hope I didn’t just insult anyone, I love rosettes too)
Yes, yes. I like this one much better. I think the solid color tones it down enough so that it’s more comfortable in its environment.
Love. It. It is so creative – I will most def be trying this one out!!
I love This one but I also Really loved the first one!!
This one I totally love! Did you find a home for the old one though? I am feeling sad that it is a cast off. Make it into a throw pillow maybe.
Love the green version of the knotted runner. Found it on Pinterest and hope it can be my Christmas runner in a nice bright red! Thanks for the tutorial.
Love this one. Just far too much going on with the other one!
I want to make this, but I’m a definite beginner…what kind of fabric should I buy to have the correct weight like this one? I LOVE it!
Hi Amy! A quilting cotton would be just fine. That would give you a lot of prints and solids to look at using.
found your tutorial, love the look of the knotted fabric. I think that I will be making this for my wedding for the unity candle table. Instead of flowers up there, I think this runner with the great texture with my silver candle holders spread out will be simple and elegant. Thanks for the easy but pretty runner idea…