Makely

Let's Make Life Awesome

  • Home
  • Decorating/DIY
    • Create Your Decor
    • Decorate Your Home
    • Paint Your Walls
    • Transform Your Furniture
  • Healthy Living
    • Essential Oils
    • Family Wellness
    • Household Care
  • Project Gallery
  • Contact
You are visiting: Home » Archives for Lindsay Ballard » Page 153

Win a Copy of Ana White’s New Book, The Handbuilt Home

by Lindsay Ballard on October 26, 2012 521 Comments

This post is sponsored by Potter Craft.

Recently, I’ve come to the realization that I’m at the point in my blogging career that big things are happening for a lot of my friends.  We all began our blogs at generally the same period – some of us have been on TV, some of us represent major brands, and others are now published authors.  This blogging thing is a really wild ride, and I am so proud at the things my friends are accomplishing.

Not long ago, my friend Ana White reached out and asked if I would be interested in reviewing her new book, The Handbuilt Home.  Ana has become synonymous with the DIY, handmade furniture movement in the home decor world, and I am just thrilled that she was able to reach her dream of publishing a book so that she could bring her vision to a wider, possibly non-blog reading audience.  Obviously, I told her not just yes but, “Heck yeah!”
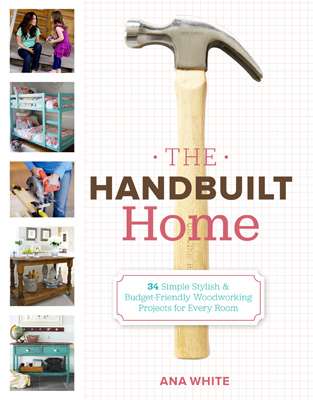
Before I considered Ana a sweet friend, I obsessed about her blog.  If you aren’t familiar with her website, Ana White, it’s the go-to site for free, easy DIY furniture plans.  These are plansJust 10 years ago, Ana didn’t have the skills or know how to re-create expensive furniture pieces that she saw in stores and catalogs.  There wasn’t much out there for novice DIYers back then, so Ana taught herself how to build through trial and error.

The first piece of furniture Ana built was the bed that she and her husband still sleep on today.  The funny thing is that it is also the bed that Tom and I sleep on – we used Ana’s Farmhouse Bed plan to build the bed in our master bedroom. She writes about that plan in her book.

If her website features hundreds of free plans, then why would you spend the money to buy her book?  Honestly, I had the same question until I received it in the mail.  After reading it cover to cover in one afternoon, I have to say that I have three reasons why.

1. Only a handful of the 34 projects featured in the book are on her website.  You’re getting new content with beautifully illustrated, step-by-step instructions.

2.  Ana details the tools you will need to make your DIY furniture dreams a reality.  She goes through each one and gives thorough information about what to look for when purchasing your own tools.

3.  She has an entire chapter dedicated to technique.  If you are nervous about selecting, cutting, sanding, or drilling Ana has you covered.  I wish I would have had this book as a reference when I first started building DIY projects.

So that you can get a taste for the feel of the The Handbuilt Home, Ana has provided an excerpt of her Farmhouse Bench project.  You can find that free project here.
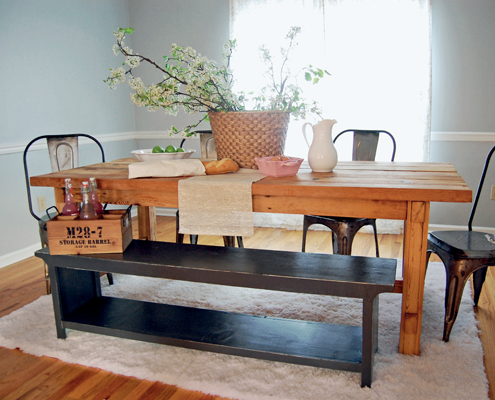
Here are a few other favorite projects from her book:
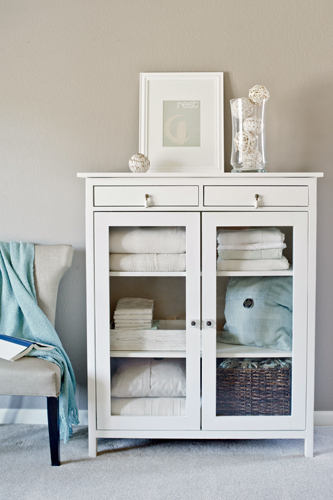
Armoire


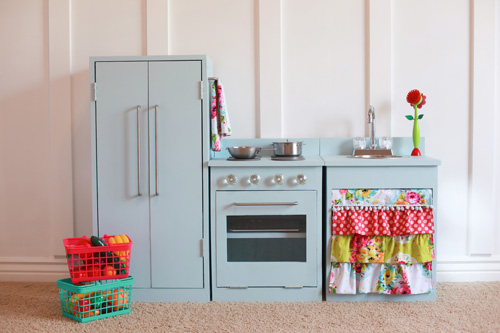
Play Kitchen

I have really enjoyed reading Ana’s book, and I know you will, too.  That’s why I’m so excited that she’s giving away a copy to one of you!  Fill out the form below and answer the question prompt to be entered.


a Rafflecopter giveaway
*This giveaway is in no way affiliated, administered or endorsed by Facebook or Pinterest. Winner will be notified by email on 11/01/12 and will need to respond within 48 hours to claim their prize or another winner will be chosen. Winner must be 18 years of age or older and a US citizen in order to win. Winners are responsible for paying any necessary taxes on winnings. Alternate entry: email Lindsay@MakelyHome.com with entry information. Prize will be mailed by the sponsor and this blog owner is not held responsible if the prize is not fulfilled. A list of winners may be requested after the giveaway has ended. Questions and additional information can be requested by emailing: Lindsay@MakelyHome.com.


Five Tips for Creating a Stylish Playroom {and My Playroom Sources}

by Lindsay Ballard on October 24, 2012 2,237 Comments

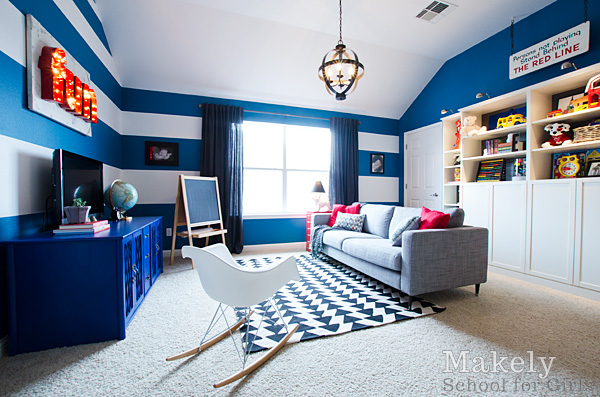
When I was putting our new playroom together, I put a lot of thought into what I thought a stylish playroom needed to have.  Obviously, I wanted it to be a space that would stand the test of time and really grow with my kids.  But, it was important to me that it was a space that I enjoy just as much as they do, even if we love the space for different reasons.

Once I stepped back to view the finished room, I felt like I was able to create a space that’s loved by both kids and adults alike.  If you have a playroom on your decorating agenda, consider these tips I put together on the subject.  I think they’ll help you to create a stylish space.

Five Tips to Creating a Stylish Playroom

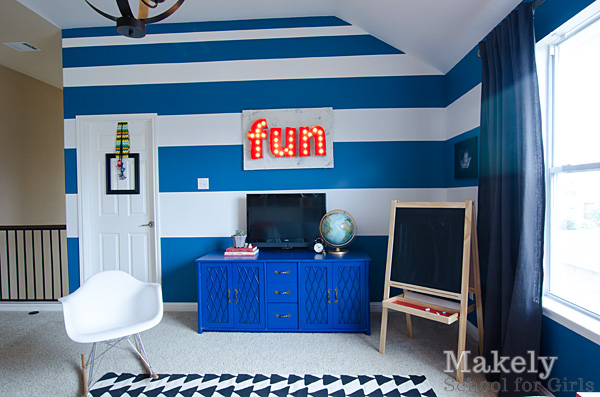
1.  Hide it.  Storage is king in a playroom.  If your kids are like mine, they probably have more toys than places to put them.  Adding additional storage to our playroom was the primary focus of my design.  We added “built-in” bookcases with doors to hide large, plastic toys and the books I knew would never be placed neatly on a bookshelf.  I rehabbed an old stereo cabinet that is now not only pretty, but it holds Lego, Little People, and puzzles.  I even added a side table that has six drawers to conceal remote controls and art supplies.

2.  Let them spread out.  Kids need lots of open space to play.  Make sure that whatever layout you choose has room for them to build Hot Wheels tracks or just lay down to read books.  My kids tend to fill whatever open space they can find, so I made sure there was plenty in the playroom so that it wouldn’t spill out into the rest of the house.

3.  Take a load off.  It was incredibly important for me to have adult seating in the playroom.  I wanted to be able to sit in the room with the kids while they were playing or have a place to enjoy with another mom while we supervise a playdate.  I know that I am lucky to have a playroom space as large as I do, but if you can fit a small sofa or a pair of comfortable chairs in the room I think you should.   I’ve even found myself sitting in there working on my computer when the kids are at school.  There’s no reason that a playroom can’t be multi-purpose.

4.  Give it grown up styling. The hardest part of the playroom redo for me was to style the room appropriately.  I definitely didn’t want to just put some toys on the bookcase shelves and call it a day, but you can’t really add your typical styling decor to a playroom – candlesticks, vases and decorative plates don’t exactly make sense in a playroom.  Instead, I added a mix of my kids’ toys, some vintage toys that adults would like, a few tschotskes that couldn’t be broken, and some books.  You’ll also notice that I used fixtures and furnishings that would work equally well in a typical adult room.

5. Let there be fun.  Color choices in a playroom are huge.  In this room, I mixed peacock blue, cobalt blue and fire engine red with charcoal gray, black and white.  Without the gray, black and white, the room would have been way too bright, even for me.  With the more neutral colors, the brights are able to be fun without looking like a Wiggles set.

More photos and the playroom reveal post here.

Playroom Sources

I put together a source list for the playroom’s furnishings, paint colors and tutorials.  If there’s something I forgot, please let me know!

Wall Color
Peacock Blue by Glidden
“Lindsay White” (ask the paint counter to add 1 oz into a can of bright white Glidden paint)

Furniture
Sofa: Ikea (I replaced the legs)
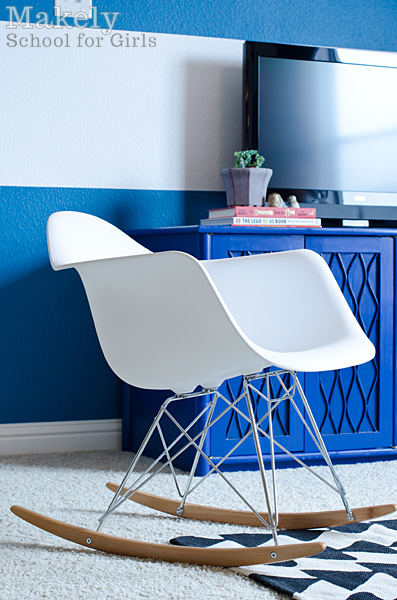
Rocking Chair: One Kings Lane
Side Table: Ikea
Stereo Cabinet: Vintage with new paint treatment
Bookcases: Ikea (“built-in” look tutorial here)

Lighting
Chandelier: Lowe’s
Dog Lamp: Target
Bookcase Lighting: Ikea

Accessories
Throw Pillows: Target and Ikea
Throw Blanket: Ikea
Rug: Urban Outfitters
“Fun” Sign: Custom (DIY tutorial here)
Curtain Panels: Ikea
Curtain Rod: Home Depot
Chalkboard Easel: Ikea

Books and toys are generally personal or vintage.

What are your thoughts?  Do you have any more playroom tips to add to my list?

« Previous Page
Next Page »
  • Email
  • Facebook
  • Instagram
  • Pinterest
  • Twitter

About Makely

Lindsay Ballard is a former college mascot turned political geek turned roller derby playing, DIY fanatic.

Lindsay chronicles her projects, design ideas, and lifestyle tips here at Makely, where she shares tutorials and inspiration. Her DIY designs are bold and graphic, while her spirit is fun and full of color.


Archives

Categories

PRIVACY POLICY
Copyright © 2009-2019 Makely School for Girls | All Rights Reserved | Posts may contain advertising content or affiliate links