Makely

Let's Make Life Awesome

  • Home
  • Decorating/DIY
    • Create Your Decor
    • Decorate Your Home
    • Paint Your Walls
    • Transform Your Furniture
  • Healthy Living
    • Essential Oils
    • Family Wellness
    • Household Care
  • Project Gallery
  • Contact
You are visiting: Home » Archives for Lindsay Ballard » Page 233

Win Shaw/HGTV Home Flooring Daily Just by Voting for Us

by Lindsay Ballard on September 1, 2011 59 Comments

Do you have a room in your house that could use some new flooring?  How about hand scraped hardwoods in the dining room?  Plush, stain resistant carpeting in the playroom?  An area rug under your coffee table?

How about winning it?  Yeah, I thought you’d go for that!

Today is the day that voting begins for the Shaw Floors/HGTV Home blogger challenge that Rhoda and I participated in.  If you’ll remember, we designed a room around a lovely Shaw area rug.
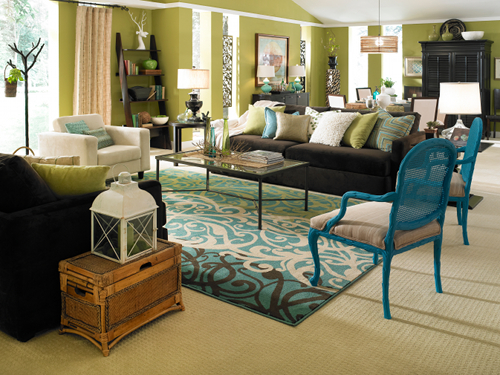
Every day in September (so for 30 days), you can visit Shaw’s Facebook page and vote for our room.  From each days voters, Shaw will randomly select one voter to win brand new flooring for a room in their home.  I am asking, begging, pleading for you to vote for Rhoda and I every single day. I would LOVE to find out that my readers are some of the ones who win the flooring for their own homes!  If our room does win, Rhoda and I will win a trip to tour the HGTV Urban Oasis luxury apartment recently unveiled in Chicago and designed by Vern Yip.

Here’s a breakdown of how you enter.  I pulled some screenshots to make it easier to know where to click.:

1.  Visit Shaw Floors on Facebook and “Like” them.

2.  Click on the 30 Days of HGTV Home tab on the left side of the page.
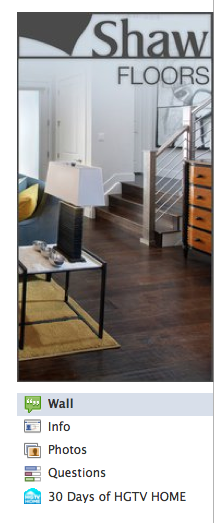
3.  Enter your e-mail address and click “Enter Now.”

4.  Fill out the form with your shipping information and click “Register.”


5. The “Thanks for Registering” page will pop up and you click “Get Started.”

6. On the next page, click on our team.  Rhoda and I are the ones on the far right side.

7.   Then, click “Vote for this room” on the blue arrow.  You can also click “Get the details” to see more photos and some videos of us.

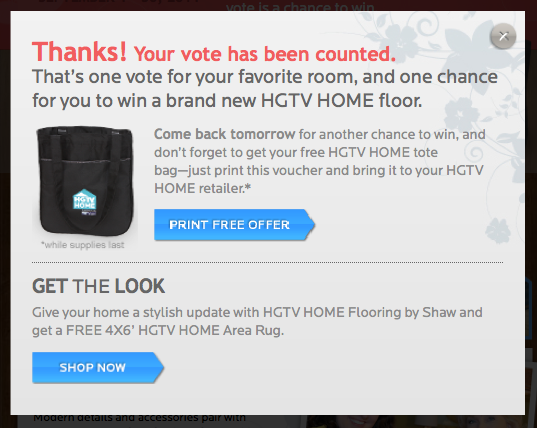
8. When you see this message, you’ll know your vote has been registered and you have been entered to win the flooring that day.
Thank you in advance for your votes, and I seriously hope I have some Living With Lindsay readers who win flooring for their homes! 

Will you vote for Rhoda and me?
DIY Ombre Striped Lamp Shade {ScotchBlue Painting Party}

by Lindsay Ballard on August 31, 2011 1,045 Comments

Today I’m joining a group of fantastic DIY bloggers in showcasing easy projects we’ve put together using ScotchBlue Painters Tape with Edge Lock Protector.  If you are a long time reader of this blog, you know that my husband and I use ScotchBlue Painters Tape for just about every DIY project – painting perfectly crisp lines on textured walls, caulking, holding together small components that we don’t want to get lost.  Just Monday, I saw that my UPS man was using it to hold one of the small side windows onto his delivery truck.  I’m sure that’s not an intended use, but whatever works, right?

This ScotchBlue Painting Party is actually a blog hop, so click around to the other bloggers to see what everyone created.  Other than myself, participants include Kristen F. Davis Designs, Maison Decor, House Bella, and Craptastic.

DIY Ombre Striped Lamp Shade

Supplies

  • Lamp shade – it’s best to have one that’s rectangular or cylindrical (same diameter across the top and bottom). You can do this project with a shade that’s more conical in shape, but it is difficult to tape.
  • Acrylic craft paint – choose a base color and a bright white.
  • Paint brush – I used a 1″ all-purpose artist’s brush found in the acrylic paint aisle, and it worked great.
  • ScotchBlue Painters Tape with Edge Lock Protector – I used 1.5″ width so I could be sloppy, but any width should work.
  • Ruler
  • Pencil
  • Disposable plastic lidded bowl
  • Teaspoon
  • Straw or something disposable you could use to stir

Directions

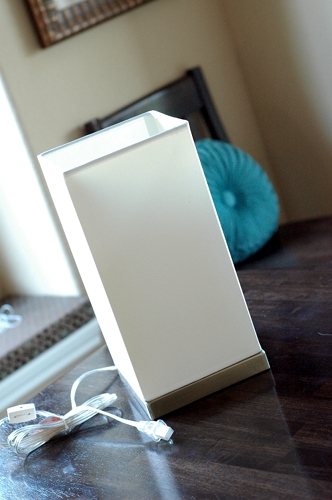
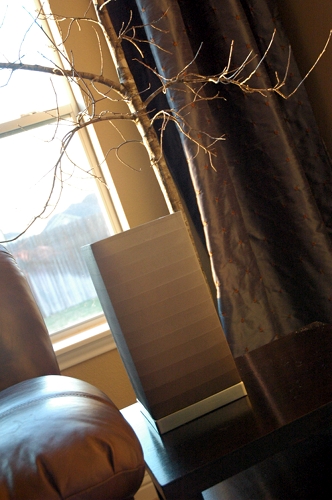
1.  I began with this little desk lamp I picked up at Target for around $15.  I loved its shape and size, but it screamed trying-too-hard-to-make-my-college-dorm-look-cool to me.  It needed a little update.

If you are going to complete this project, I definitely recommend using a shade that the top and bottom are the same widths.  It will make you life much easier when trying to tape off your stripes.

2.  Remove the shade from the base and mark little hash marks 1″ from the bottom of the shade.  Use the painters tape to tape off a 1″ width stripe.  Squeeze an entire bottle (generally 2 oz) of your base color into the plastic bowl and paint the stripe your base color with the paint brush.  I used Vanilla Bean from Martha Stewart’s new line of craft paints at Michaels because I wanted to try it, but any brand will work just fine.  You may also want to choose a lighter base color than I selected, since the light barely comes through the bottom of my completed shade (which could be fine with you, as it is for me).

Remove the tape while the paint is still wet.

Let that stripe dry completely.  It will take about 30 minutes indoors or 10 minutes if you stick the shade out in the sun.

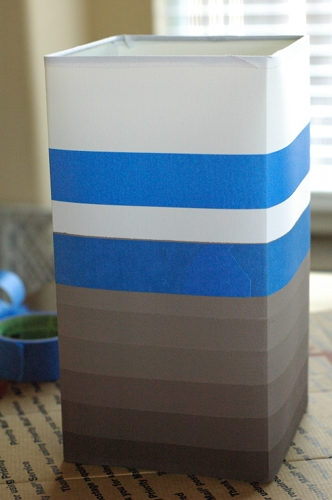
3.  Next, use your pencil and ruler to draw little hash marks 2″ from the bottom of your shade.  Use the painters tape to tape off that line, just like you did the first.  Add a second line of tape ever so slightly above your first painted stripe.  You want a little of your previous color to show under the tape so you don’t risk having any unpainted portions of the shade (see below photo).  Use your thumb to make sure the edges of both tape lines are pressed down well.

4.  Add 1 teaspoon of white craft paint (I used Martha Stewart’s Wedding Cake) to the bowl containing your base color and stir until it is completely mixed.  Use that mix to paint the second stripe on your shade and remove the tape while still wet.

Let that paint dry, as above.

Your lines will not be absolutely perfect if you are painting on a fabric shade (like mine), since the fibers cause the paint to wick a tiny bit.  It’s totally okay, though, because it gives it a bit of a fading effect.  The ScotchBlue Painters Tape with Edge Lock Protector rocks on hard surfaces, but it’s too much to ask for it to completely block fabric fibers.  🙂

5.  Continue the process of marking and taping lines and adding 1 tsp of white paint to your bowl for each stripe.  You will quickly see the ombre effect created by adding the same amount of white paint to each stripe.

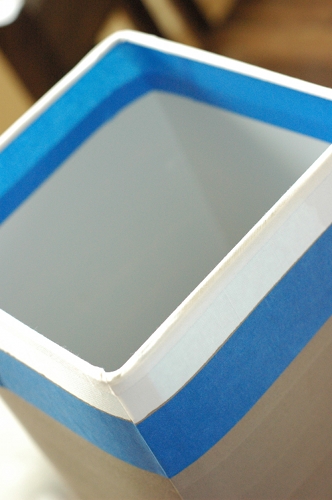
6.  Once you reach the top of your shade, tape off the last stripe as you have been doing.  You may want to also tape right under the bias tape trim on the inside of the shade.  That will keep that trim looking nice when you look into the shade.

7.  Once the last stripe is dry, you are ready to add the shade back to the base.  Your lampshade is now a piece of custom art!

Would you like to win some ScotchBlue Painters Tape with Edge Lock Protector to try this project or any other project you can dream up?  Three readers will win a sample from ScotchBlue!  You have three ways to enter (and please leave a comment for each way you enter):

  • Leave a comment on this post telling me how you would use your ScotchBlue Painters Tape;
  • Tweet @ScotchBlueBrand “I want #supersharppaintlines for my next project!”;
  • “Like” ScotchBlue on Facebook so you can see and/or participate in future painting parties.

Amy at Maison Decor is next on the ScotchBlue Blog Hop, so head over her way!

Disclosure: ScotchBlue Brand reached out to me to participate in the ScotchBlue Painting Party to celebrate the launch of their new ScotchBlue Painter’s Tape with Edge-Lock Paint Line Protector. My post represents my honest experience with ScotchBlue Painter’s Tape. I am not being paid for my answers, but I did receive ScotchBlue Painter’s Tape to assist in completion.

« Previous Page
Next Page »
  • Email
  • Facebook
  • Instagram
  • Pinterest
  • Twitter

About Makely

Lindsay Ballard is a former college mascot turned political geek turned roller derby playing, DIY fanatic.

Lindsay chronicles her projects, design ideas, and lifestyle tips here at Makely, where she shares tutorials and inspiration. Her DIY designs are bold and graphic, while her spirit is fun and full of color.


Archives

Categories

PRIVACY POLICY
Copyright © 2009-2019 Makely School for Girls | All Rights Reserved | Posts may contain advertising content or affiliate links