Have you wanted to add hardwood floors to your home but are scared to take the leap? Me, too! I just know my huge dogs would ruin my new floors and then I would cry. Hardwood floors really do change the look of your home, though.
You aren’t even going to believe the before and after pictures from my friend Fred at One Project Closer. He recently installed Brazilian Walnut in his home and the results are simply gorgeous. He put together a guest post for us to show us the amazing transformation.
Take it away, Fred!
Brazilian Walnut Hardwood Flooring Installation Before and After
When we purchased our house 5 years ago, we knew we wanted to convert the first floor to an open floor plan and put hardwood flooring throughout. It took us five (5!) years to get around to completing the project, which had so many dependencies it was hard to start on any one piece without needing to complete the entire project all at once. I’m really excited that we’ve (just about) finished it, and excited that Lindsay is letting us share it here!
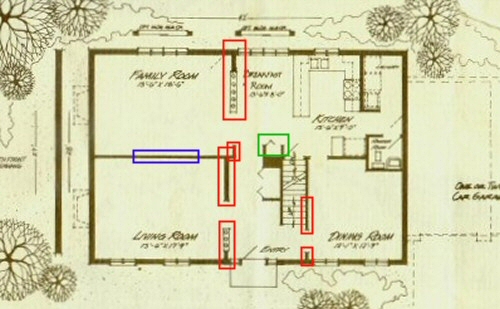
Here’s a picture of the original first floor layout of our house when we purchased it. All of those boxes in red… those are the walls that we removed on our own. The green box is a pantry that we had a contractor remove, and the blue box is where we had the same contractor cut a new doorway in a load bearing wall. While we would have been comfortable doing the plumbing work ourselves, we were tight on time… After watching the contractor do the load bearing wall, we felt like we may have been able to do it ourselves, but I’m still glad we had them do it.
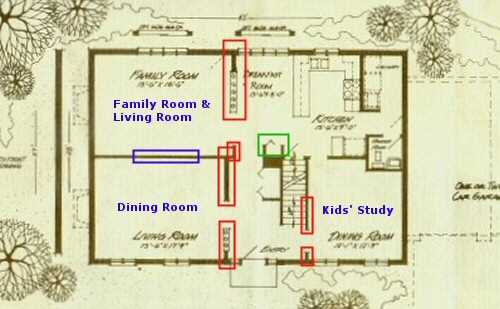
Also part of this remodel, we wanted to re-purpose the rooms. We like entertaining and having people for dinner, but the dining room was the smallest room on the floor. So we moved the dining room to the old living room, consolidated the living room and family room into a single room, and added a new office/school room area in the dining room.
So why did it take us 5 years to get started? It’s because every part of this project seemed intrinsically linked to the next step. And we had a few ‘life expenses’ come up, like completing the adoption of our twin boys a few years ago…
Here’s how we saw it…
- Once the non-load-bearing walls were removed, the flooring would have to follow quickly because the subfloor would be showing where the walls used to be… it would be ugly and it’s a tripping hazard! We wanted to have no longer than 6 months without the flooring done.
- We wanted to cut a hole between the dining room and living room, which would also leave a bare spot on the subfloor.
- Since we wanted to use the same flooring throughout the first floor, and we also wanted to revise the kitchen cabinet layout, the old cabinets would need to be removed before the new flooring could be installed. This would require new cabinets.
- The new wood flooring would also raise the surface of the floor because the subfloor was so uneven we had to level the subfloor using plywood and shingles first (a method we adapted from this article on AskTheBuilder if you’re interested). This required modifying the doors to raise them.
- Moving the dining room required a new light to be installed over the dining room table, and we wanted more overhead lighting in the family room… this ideally had to be done when the hole was cut between the family room/dining room, because access was available at that time.
- We wanted to remove the paneling from the family room and replace it with drywall, which ideally would be done when the hole was cut between the rooms.
Whew…. Basically, in order to remodel the first floor, we had to commit to completely tearing out everything on the first floor, moving it all to the garage, and then tackling the projects one at a time, in order…
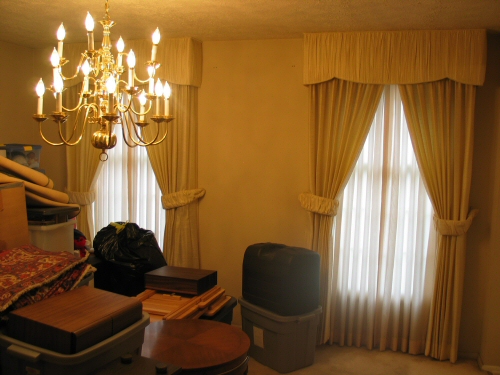
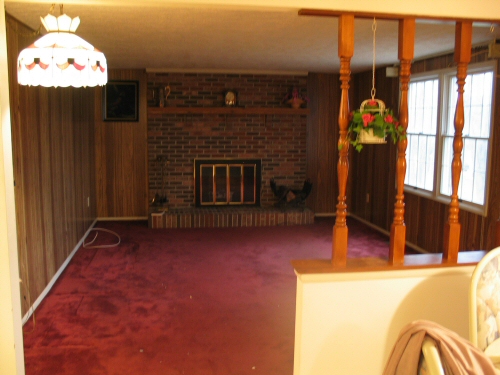
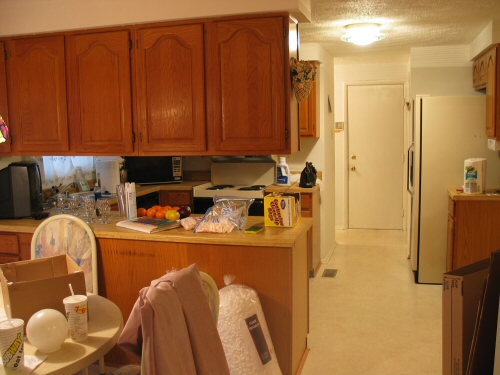
Here’s what the rooms looked like when we purchased the home, as we were moving in…
Living Room (original) (now the dining room in the new layout):
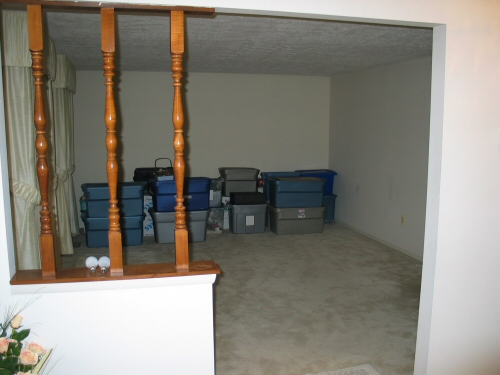
Dining Room (original) (now the school room):
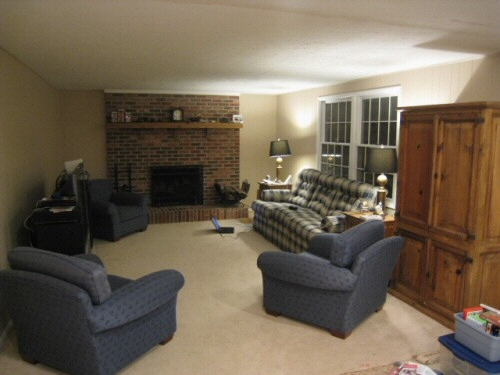
Family Room (original) (still the family room):
Kitchen (original) (still the kitchen, but not finished yet):
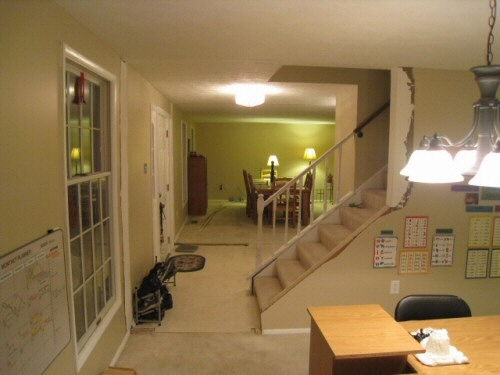
And here’s the pictures after we tore out all the non-loading bearing walls and painted the rooms a great Ralph Lauren tan color called Parchment, but before we started on the wood flooring. The rooms seemed so open and airy, even before we had put the same flooring surface everywhere. We did this work back in December of 2009, and then it took another 6 months before we started on the wood flooring in June, 2010.
This first picture is standing in the old dining room (now the school room) and looking all the way across the front of the house to the old living room (now the dining room). I love this picture because it shows how BIG the house felt after we tore down a few walls. It was so dramatic!
And here’s a picture of the family room.
Unfortunately, I don’t have a good “half way” picture on the kitchen… we had done some work to it, but these midway pictures did not include tearing out the cabinets, which we did later.
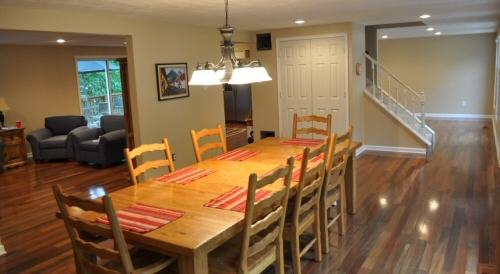
Then, in June, 2010, we installed Brazilian Walnut throughout the first floor. This was a HUGE job… took us 6 days straight to get it done. We wrote a whole series on how to install hardwood flooring derived from this work, but we are REALLY pleased with the results!
Here’s the front of the house, now looking from the new dining room (where the living room used to be) back into our school room / office (where the old dining room was):
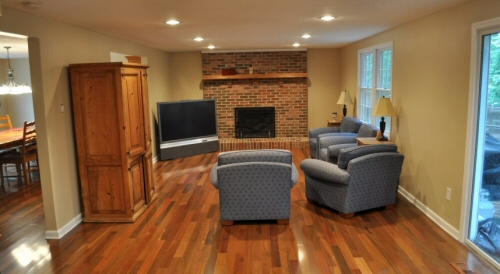
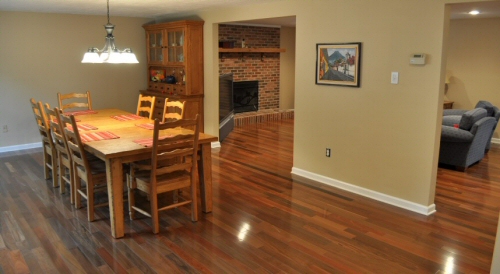
And just to prove this actually IS the same house, here’s the family room… notice we had that door cut between the dining room and family room. You can see that same brick fireplace, but now with the wood it looks like a stunning centerpiece that adds interest to the room.
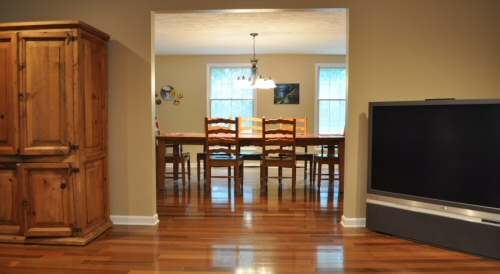
This is a shot that wouldn’t have made sense before that hole was cut in the loading bearing wall down the center of the house. This is a picture from sitting on a char in the family room looking into the new dining room.
And here’s a picture standing at the front door looking to the left…
Now, I *wish* I had a final picture of the kitchen to show you. Unfortunately, we haven’t gotten that far yet. We set the base cabinets and installed under cabinet lighting. We’re planning to install DuPont’s Zodiaq Countertops… but like most things DIY, this project has just cost more than we expected. Here’s a sneak peak shot of our new kitchen with the under cabinet lighting all aglow. Hopefully Lindsay will have me back to share the final results in a few months!

So what do you think?