Makely

Let's Make Life Awesome

  • Home
  • Decorating/DIY
    • Create Your Decor
    • Decorate Your Home
    • Paint Your Walls
    • Transform Your Furniture
  • Healthy Living
    • Essential Oils
    • Family Wellness
    • Household Care
  • Project Gallery
  • Contact
You are visiting: Home » Archives for Lindsay Ballard » Page 287

The Great Fabric De-Stash: A Primer

by Lindsay Ballard on April 30, 2010 1,844 Comments

I love fabric.  It’s a sickness for which I’m afraid there is no cure.

The problem is that I love fabric so much that it’s about to take over my sewing/craft room.  There was so much fabric jammed into my closet that I couldn’t even tell what I had stashed in there.

As I was working on turning the sewing/craft room into the sewing/craft/guest room now that baby is on her way (Sob! No more room just for me!), I decided that a huge fabric purge and de-stash was in order.  I couldn’t believe the stuff that I pulled out of that closet, and I really had to force myself to let it go.  “You are never going to use that,” I keep telling myself.

But do you know who is going to use it?  You are.
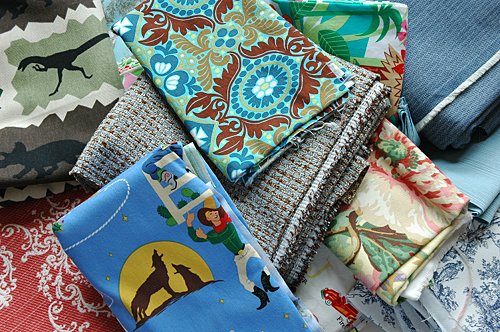
On Wednesday, May 5th at promptly 10:00 am Central Time, I am going to post pictures of my stash here on the blog and it will be up for grabs – FOR FREE.  I have cotton/quilting weights, decor weights, knits, corduroy, fleece, denim, and shirting.  The above picture only shows about 1/4 of what I’ve got coming to you guys.  Yards and yards and yards – some in full blown yardages and other in smaller, but still useful, pieces.  A lot of it you’ve probably seen used around my home, but most of it will probably be new to you.

The fabric will be first-come, first-served.  You will simply leave a comment telling me what you want me to send you, and I’ll do it.  If something that you want is already spoken for, go ahead and comment anyway, because that first person may fall through.  I’ll do my best to update the post and mark the ones gone that are truly gone.  I’m not going to let anyone claim all of it or most of it, so everyone will get a shot (if you are here when the post goes up, of course).

The only thing I ask of you is that you cover the shipping cost via PayPal ( I can fit about 4-5 yards into a USPS flat rate envelope for about $5) and maybe 50-cents or so to cover the Paypal fees.  If you want just a little bit of fabric (a yard or under), I can calculate shipping if it’s going to cost less than the $5 flat rate envelope.  I’m happy to ship internationally, too, and we’ll figure out together how much shipping would cost.

So, set your iPhone alarms, record it in your Blackberries, write it on your chalkboards and get ready to pounce on Wednesday morning.  It should be fun!
Adding Comfort to a Wooden Rocking Chair – Part Two

by Lindsay Ballard on April 26, 2010 45 Comments

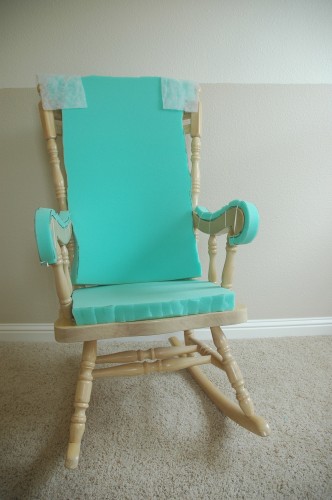
Last week, I left you with my rocking chair half-way finished and a bit scary looking.

If you missed Part One, click on over and read that before you finish this post.  If not, carry on.

Adding Comfort to a Wooden Rocking Chair – Part Two

After adding the foam cushioning to my chair, it was time to slipcover it.  I’ll admit, I have never, ever made a slipcover before, and I was really scared.  I was certain that I’d totally screw it up.  Luckily, I studied Pink and Polka Dot’s Laziest Slipcover Ever tutorial, and it answered so many questions for me.  As my usual luck would have it, she released an e-book about two days AFTER I finished tucking, pinning, and sewing.  I haven’t read the e-book yet, but she’s so great that I would highly recommend it if you are working on a slipcover.  I’m sure it will help immensely!

I chose linen for my slipcover.  I know, I know…it wrinkles like crazy.  I have always loved the look and feel of linen, though, and a natural linen is the perfect color for my room.  I bought about 5 yards of fabric and had about a yard leftover.

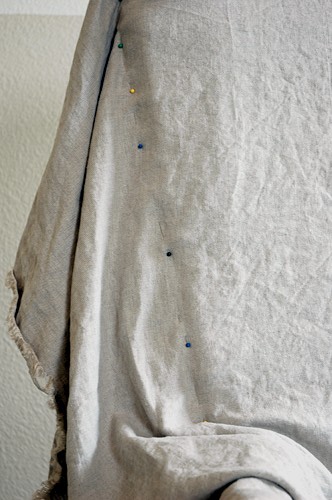
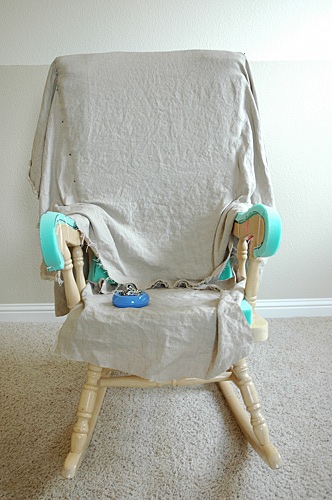
I started my slip cover by draping fabric over the back of the chair down to the arms in the front and down past the seat on the back.  I pinned it along the sides of the back to start making my slipcover shape.  I made the mistake at first of trying to make it too fitted, but then I remembered it was supposed to be loosey goosey.

Then, I cut a piece of fabric that fit the seat and pinned it to the piece that I had already fitted to the back of the chair.  I really didn’t want to have a seam at that location, but I couldn’t figure out how else to put it together due to the shape of the chair.

I then cut two pieces for the arms.  I pinned each one to the piece of seat fabric, to the big piece that covers the back of the chair, and in front of the arm pieces.

Then, following Pink’s direction, I basted the entire chair by hand, removing the pins as I went along.  She suggested it would be easier to sew on a machine without pins sticking you, and I think she was right about that.  I sewed it together on my machine and made sure it fit on the chair.  It did!

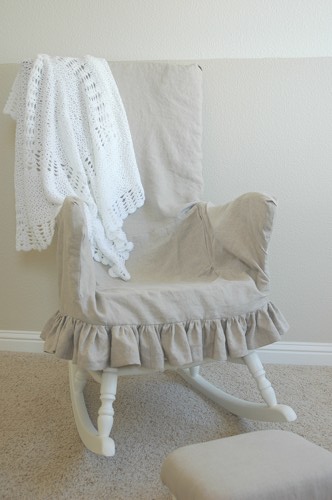
I trimmed the skirt so that it was the same length all around – just barely skimming the bottom of the seat.  I then added a 4-inch ruffle around the bottom.  I also painted white just the part of the chair that is visible from under the slipcover.  Yes, I’m that lazy – I only panted about 1/3 of the chair.

It’s definitely not perfect – far from it, actually!  But, do you know who’s not going to care?  Sweet Baby Emma.  🙂  It is now so comfy and wonderful to sit in.  I can’t wait to just sit and rock my baby girl (and her big brother, if he will still let me).

I’m adding this post to Kimba’s DIY Day, Gina’s Transformation Thursday, Kim’s I Made It! Party, and Traci’s Best DIY Projects of April Party.  Man, do I know how to party or what?

« Previous Page
Next Page »
  • Email
  • Facebook
  • Instagram
  • Pinterest
  • Twitter

About Makely

Lindsay Ballard is a former college mascot turned political geek turned roller derby playing, DIY fanatic.

Lindsay chronicles her projects, design ideas, and lifestyle tips here at Makely, where she shares tutorials and inspiration. Her DIY designs are bold and graphic, while her spirit is fun and full of color.


Archives

Categories

PRIVACY POLICY
Copyright © 2009-2019 Makely School for Girls | All Rights Reserved | Posts may contain advertising content or affiliate links