I have just ended the most frustrating and agonizing search for lamp shades that has ever been. And that was preceded by the most frustrating and agonizing search for table lamps that the world has ever seen. Yes, only *I* could create such agony over something so trivial.
Anyway, I found my mid-mod lamps at the famed Austin City Wide Garage Sale. They were exactly what I had been looking for – perfect shape and perfect color – if you could ignore the imperfect floral detailing.
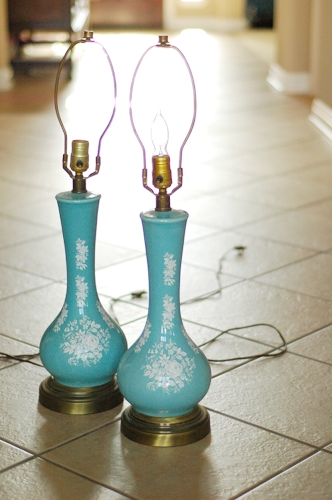
I figured I would just have to repaint them. But in the process of rewiring, I discovered that I could just turn the floral design around to the back of the lamp since the original back was just plain blue. Nice! I just sprayed the bases silver and thought all of the hard work was done.
WRONG! Do you know how hard it is to find shades for a lamp of this shape? Nearly impossible. A traditional drum shade was too wide if it was tall enough and too short if it was skinny enough. I looked at just about every store in town that sold lampshades, and must have brought home and returned half a dozen shades. I searched online and found one (ONE!) possibility, but it was going to be $35 for shipping alone for one measly shade – and I needed two. Yikes!
Out of desperation, I checked out the “self-adhesive” lamp shades that I had seen a while back in the fabric section of Hobby Lobby. I’ve never needed to use these DIY shades before because I’m a white lampshade type of gal. Lo and behold (and quite randomly, I’ll add), they had the exact shape and size of shade I was looking for. And then I went to 3 other Hobby Lobbys to find another, but a girl’s got to do what a girl’s got to do.
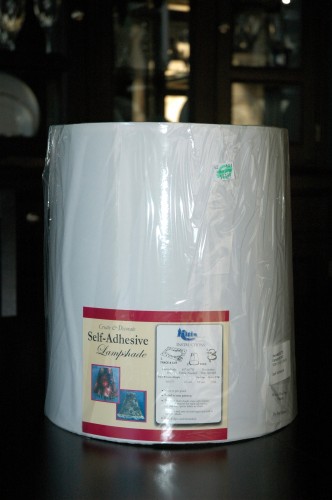
Have you used one of these self-adhesive lampshades before? They are quite easy to assemble and come in an array of sizes.
How to Cover a Self-Adhesive Lamp Shade
1. The label on the shade should tell you how much fabric and trim you need for your shade. I say should, because mine was actually labeled incorrectly. Regardless, it’s pretty easy to figure it out yourself with a measuring tape. I used a yard of fabric and about 6 yards of bias tape for 2 shades.
2. Unwrap the shade and carefully remove the waxed paper covering stuck to the sticky side of the shade. That paper serves as the pattern for cutting your fabric. Iron your fabric if it’s wrinkled, pin the pattern on top of it, and just cut it out.
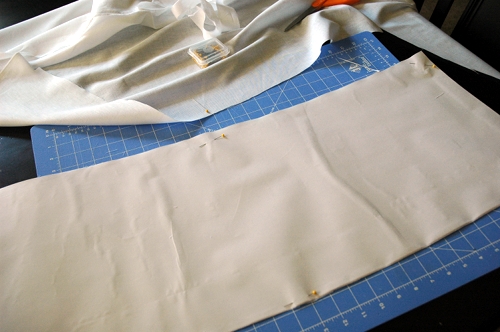
The instructions on the shade’s label say to add 1 inch all the way around, but you definitely don’t want to do that. If you do, you’ll have way too much fabric to trim off at the end.
3. I was using white linen, so I ironed my cut out piece (again) after I cut out the pattern. Then, I laid it flat on the table and centered the lamp shade on top of it with the seam of the shade facing directly up. If you are an OCD perfectionist, you’ll want to measure and find the exact center so that the 2 ends meet at the seam. If you are like me, you’ll realize that the back of the shade will face the wall and life’s too short to worry about stuff like that.
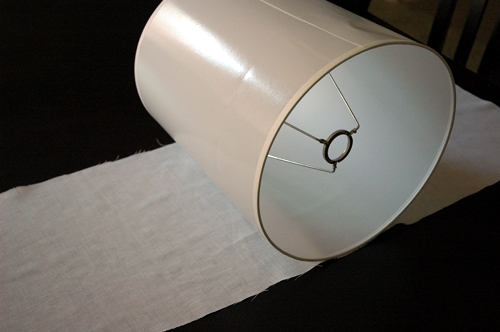
4. Use one hand to hold the end of the fabric taught, and gently roll the shade towards that hand. That side of the shade will stick to the fabric.
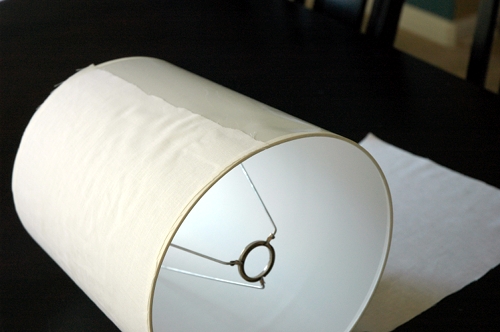
There may be some bubbles in the fabric at this point, but that’s okay. Reverse the process and roll the shade to the other side.
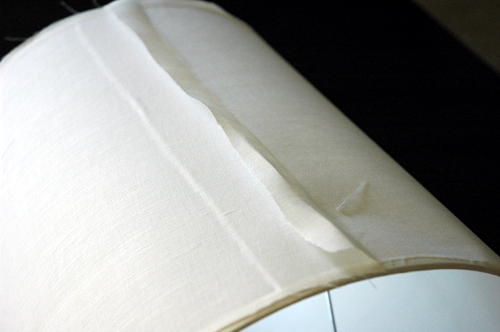
You can now take your hand and gently smooth out any bubbles in the fabric. You’ll also want to trim any excess fabric off the shade on the top, bottom and back.
5. Take a strip of bias tape close to the color of your fabric and use it to hide the seam on the back of the shade. You can just run a bead of hot glue down the seam line and attach it.
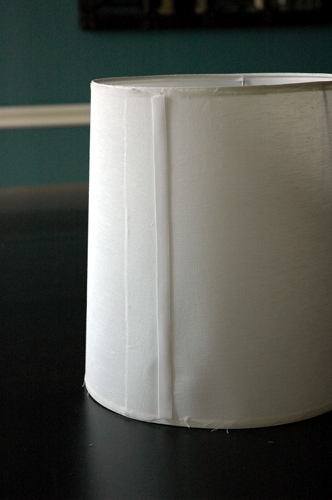
{Yes, I know the shade is dented. It’s on the back. THREE Hobby Lobbys to find this, folks. Desperation.}
Lastly, do the same thing around the edges of the shade. Unless your shade is the same width around the top and bottom, make sure you use bias tape instead of ribbon (which will pucker). You can buy packages of Wrights bias tape at most fabric stores, and it comes in an array of colors and widths.
I think my new custom shades look great on the vintage lamps. The gray trim is the perfect touch for the room.
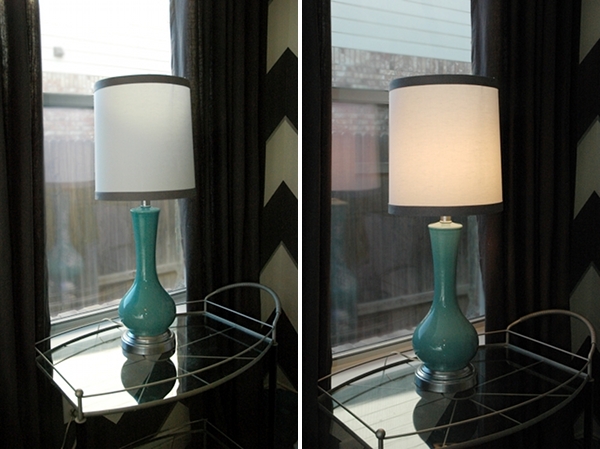
Have you used a self-adhesive shade before? Did it go off without a hitch or did you run into any problems?
Love the lamps! Thanks for the tutorial on the shade. I’ve always wanted to try this.
This came at a perfect time for me! I had no idea these existed and was planning on buying some plain drum shades at Target and using spray adhesive to cover them in fabric. Not only did you save me some extra work, but Target doesn’t put out weekly 40% off coupons! Now I just have to cross my fingers and hope my Hobby Lobby has them.
LOVE them! 🙂
Actually curious about the table / bar cart the lamp is on? Where is it from do tell. I’ve been searching for one for dining room for what seems like forever.
She’s a beaut! It’s a vintage bar cart I snagged at a local antique shop. I had searched for a while for one in good condition that was the right shape, and I was so excited to find it.
I simply MUST get out more.
I have never even heard of a self-adhesive lamp shade!
Looks very Super~Fabulous and the grey trimming is wonderful!
I love~love the lamps.
Lindsey, Great job……I love the self adhesive ones….I found one at HL about a month ago too! Thanks for “how to”.
Really nice! Actually, I like the white flowers on the lamps…. it’s Eclectic. 😉
Aren’t the self-adhesive shades the best?! I discovered them a couple months ago and was in complete awe. I called them “Magical Shades for Dummies.” 😉 Here’s mine:
http://his-and-hers-blog.blogspot.com/2011/08/yard-sale-lamp-makeover.html
I’ve never thought to use these before, but yours turned out so great! I’ll have to try this myself sometime!
Love how you added the trim around the shade:)
This is fantastic! I didn’t know there was such a thing! This will be very useful information! Great job–as always!
I’ve never seen these before! What a smart idea!
You make it look easy. I am all about the do-it-yourself method to save money for my travels 🙂
So cute! Great job!!
I’m kind of mad I didn’t know these things existed. Do you know how many trips I’ve made searching for the right shade? …okay, so maybe you do…
i am desperate…I like covering my own shades and have done so for a long time. Now I cannot find a source for the sizes I need…and I do not want the clip one. Can anyone tell me where to find the shades?
コメントを投稿されたものは、私が言う必要があります。本当にめったに私は教育的で楽しいの両方のブログに遭遇していない、と私はあなたを教えてみましょうか、あなたは頭の上に釘を打ってしまっています。あなたの思考が優れています。難易度が十分でない人が周りにインテリジェントに話している一つのことです。イム私はこれに関連する何かを求めるには、このつまずいていることを非常に喜んで。
Thanks for sharing. Lampshades are so expensive, and I prefer using my own fabric pieces when I re-decorate, so self-adhesive lampshades are perfect for me!
The sizes I need are usually bigger than what I could find at Hobby Lobby, but I did find a website offering lots of different shapes and sizes : http://www.fenchelshades.com/shop/self-adhesive-lampshades
If the standard sizes are not what you want, you can order any size you want and pick Self-Adhesive as the covering. http://www.fenchelshades.com/shop/custom-lampshades