Makely

Let's Make Life Awesome

  • Home
  • Decorating/DIY
    • Create Your Decor
    • Decorate Your Home
    • Paint Your Walls
    • Transform Your Furniture
  • Healthy Living
    • Essential Oils
    • Family Wellness
    • Household Care
  • Project Gallery
  • Contact
You are visiting: Home » Decorating/DIY » Create Your Decor » Page 108

Perfect Pottery Barn Inspired Peonies

by Lindsay Ballard on May 24, 2010 1,614 Comments

Some of the best things in the Pottery Barn catalog are not what they are selling, but what they are not.  You may remember last year that my love (and I mean LOVE) of Peonies drew me to this PB photo.
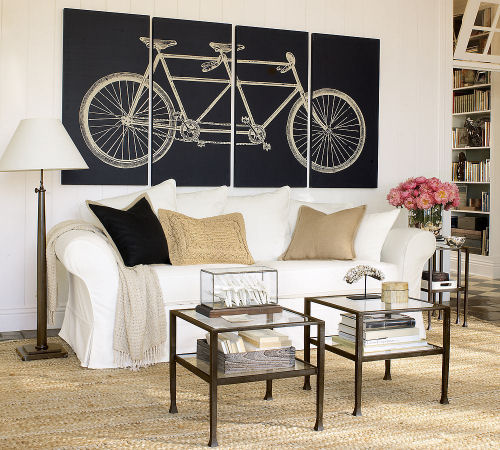
Pottery Barn

Do you see that arrangement far back in the right corner?  Let me zoom in.

If you look closely, you can see that the Pottery Barn stagers have added these gorgeous flowers to a big vase of seashells.  I was so in love with this arrangement, that I made my own mini-version last summer.

Here we are almost a year later, and I am still obsessed with that arrangement.  I’ve been patiently waiting for fresh cut peonies to come available in local stores this Spring.  Sadly, they do not grow well in my area, so I am unable to grow my own.

Imagine my surprise when I walked into Whole Foods last weekend and found tons of gorgeous Peonies waiting on me to take them home!  They were about $10 for a bunch of 5 (gasp!), but I’ve been waiting so long that it was worth the cost to me.

When I got home, I set out to put together a new and improved version of my Pottery Barn inspired Peony and seashell arrangement.  This most recent bunch of flowers had beautiful leaves and long stems, so I wanted to do something a little different.  After playing around for a few minutes, this is what I came up with:
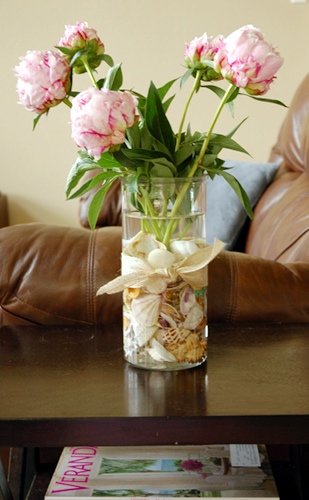
To create this arrangement, I filled the bottom of a tall, round vase with some shells.  I then added water and my Peony stems.  Next, I poured more shells into the vase so that they filled about 2/3 of the vase, making sure they covered the bottom of the stems.  Last, I tied a little piece of jute ribbon around the vase for a finishing touch.

I love this arrangement even more than I loved last year’s arrangement.  You can do this at home, right now.  Even if you don’t have a ton of shells laying around like I do or access to Peonies, you can use rocks and any sort of long-stem flower that’s cheap.  If you do use rocks that you collect yourself, just make sure you wash them really well so bits of dirt won’t be floating around in your flower water!

********************

I’m sure you have been anxiously awaiting the announcement of the winner of the Quality Custom Designs giveaway.  Well, if you are lucky commenter #94, then congrats!
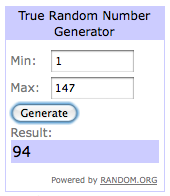
Congrats to Kimberly W!  I’ll be sending you an email later today so that you and Mandy can be in touch about your custom roman shade!

If you didn’t win, no worries.  I have a summer FULL of giveaways going on!  Check back each Thursday for something new and exciting from one of my fabulous sponsors.  You won’t want to miss it!


Pottery Barn Knock-Off Tutorial – Ribbon and Bird Chandelier

by Lindsay Ballard on May 3, 2010 1,121 Comments

It seems I’ve teased you long enough about the flock of 250 birds on my coffee table.  I’ve received a number of emails this week asking what I did with all of those little birds.

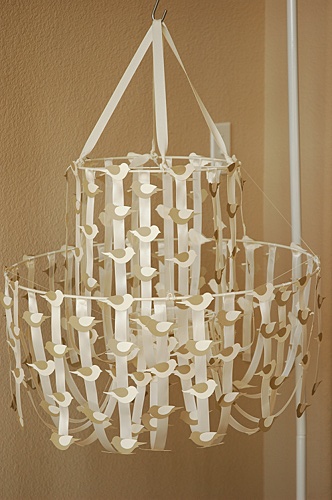
If you guessed that I put together a Pottery Barn knock-off with those little guys, using a glue gun, then you would be correct!

DIY Ribbon and Bird Chandelier

For some time, I have been inspired by this Paper Flower Chandelier from Pottery Barn.  I really love how the ribbon forms a clean chandelier shape.

However, once I decided on a color scheme for my baby’s nursery, I knew that this particular chandelier wouldn’t work in the room.  Never to let a little issue like that be a problem, I decided to recreate it using my colors and a different decoration on the ribbons.

Supplies

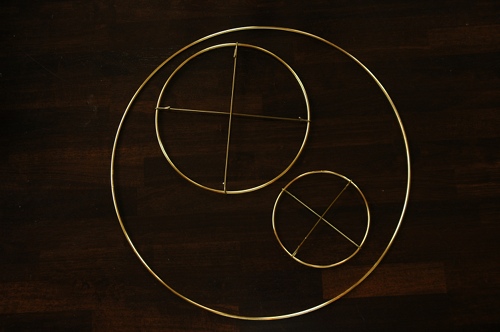
  • Three Macrame rings (available at craft stores) – Mine were 19″, 12″, and 6″.
  • Two wire coat hangers
  • Lower gauge craft wire (available at craft stores or home improvement stores)
  • Wire cutter and/or Dremel
  • Invisible thread or fishing line
  • Spray paint
  • Ribbon (mine was 5/8″ satin)
  • Glue gun
  • Cardstock
  • Paper punch or template in a shape you like

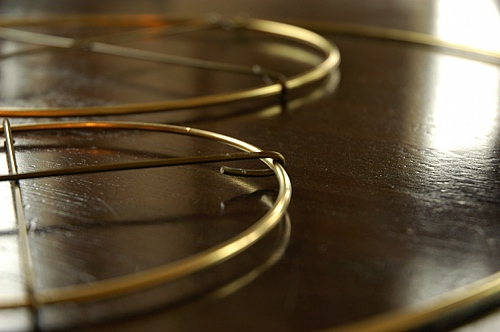
1.  I began by cutting the wire hangers into several lengths that would fit the diameter of the two smaller rings.  I actually used my Dremel to cut the hangers, but I’m sure you had a strong pair of wire cutters it would work, too (our wire cutters were somehow missing that day).

You can see that I just wrapped the edges of the hangers around the macrame loops.  I pinched the ends as close together as I could so that the hangers wouldn’t slide.

2.  With the low gauge wire, we twisted some little hooks evenly spaced around the large ring.  I forgot to take pictures of this part before I painted the rings, so you can see an example of them a little further down.

3.  The next two steps I performed backwards.  I’m going to tell you the way you *should* do it – not that way I did it.

Spray paint your rings so that they are the color you want them to to be.  You will probably want to use a piece of sandpaper to rough up the shiny surface a little bit before you paint.  I didn’t and they are holding up okay, but I do have a few little chips in the paint.

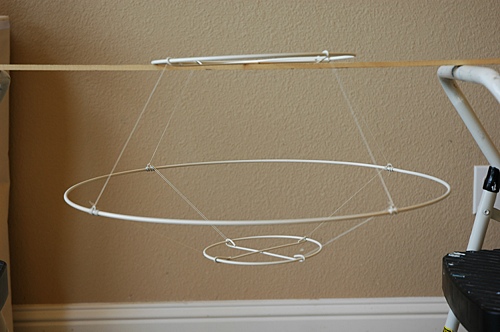
4.  Using your invisible thread or fishing line (the fishing line is stronger), thread together the rings into a chandelier shape.

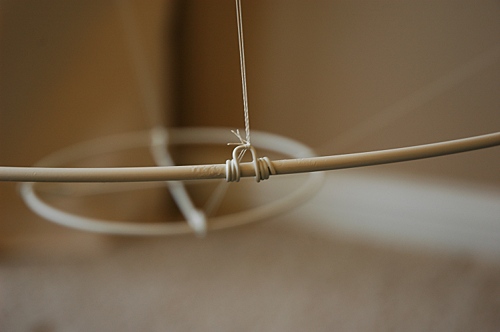
I began by tying the thread to the little hooks on the large ring, threaded it through the middle ring, back down to the same hook on the wire ring, and tied the thread in a knot.  I did that on all 4 sides, and then repeated the process going from a hook, down to the smaller ring, and then back up to the hook.

It took me a few tries and a lot of frustration to get this right to make sure that the hoops were balanced.  You’ll want to try it on your own to see what works best for you.  You just want to make sure that the hoops hang evenly.

You can see that I painted my hoops AFTER I had tied the thread, which made the thread white instead of invisible.  Live and learn (and think ahead)!

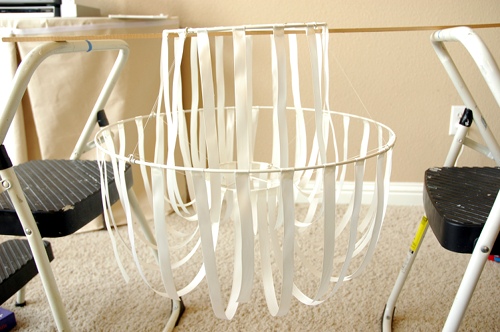
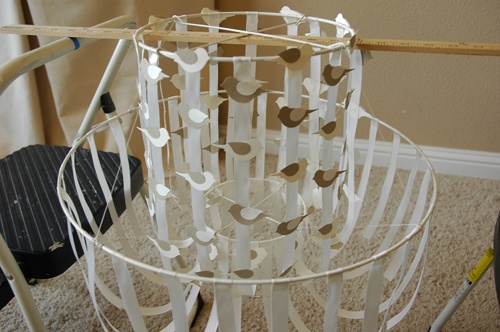
5.  Hang the top of your chandelier in such a way that you can work with it.  I put a yardstick across two step stools and it worked great for me.  It looks kind of like a little UFO!

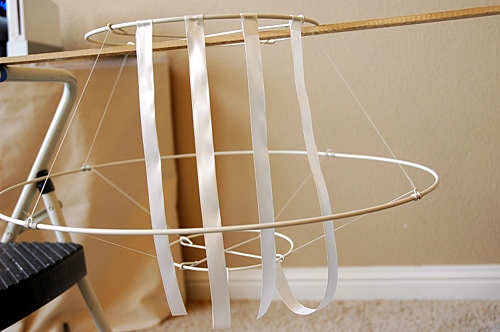
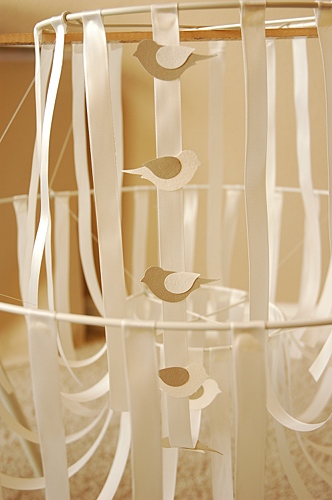
6.  With my glue gun, I attached a section of ribbon from the top ring down to the bottom ring.  I just looped a piece of ribbon around the hoop and used a touch of glue to secure it in place.

The next piece of ribbon I placed about 3 or 4 inches over.  You will see that it just hangs straight down to about the point where the first ribbon curved.

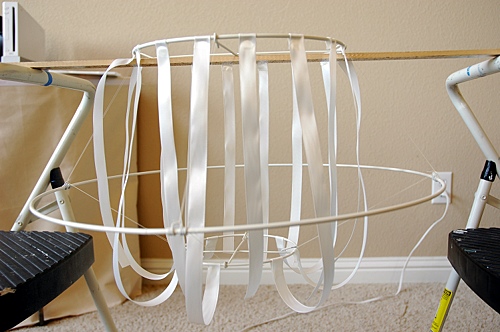
I alternated my looped and hanging ribbon all the way around, ending up with an even number of ribbons.

Then, I did the same thing with the middle hoop, alternating connecting the ribbon to the bottom hoop and letting the ribbon just hang.  You will want to let the loops hang kind of low to create the chandelier shape.

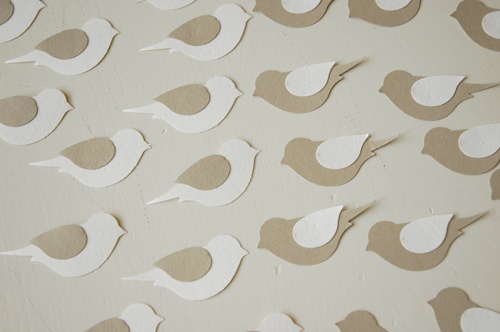
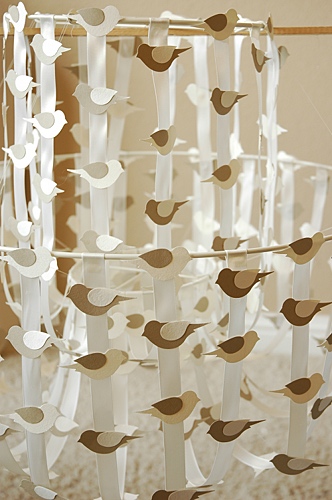
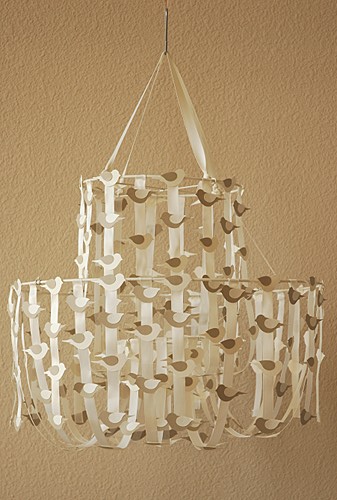
7. Next, I turned to my flock of birds!  My birds were actually cut from two colors of cardstock paper from the scrapbooking store using a paper punch from Stampin’ Up.  The bird and wing were two different pieces, so I actually had to glue all of those bad boys together.  I wanted the birds to alternate the side that they faced, so that’s why all of the cream birds face one way and the tan birds face another.

I cut 250 of them, and used just about every one.  I may have had 20 or so left over.

8.  With my glue gun, I started attaching birds to the ribbons.  I glued them to the inside once the ribbon looped.

I also alternated the height on each ribbon so that the birds formed an interesting pattern.  For the ribbons that were left hanging, I made sure the pattern ended up so that a bird would be glued to the very bottom of the ribbon to hide the raw edge.

Continue gluing the birds all the way around the top layer of ribbons.

9.  Next, I glued the birds around the bottom layer of ribbons.

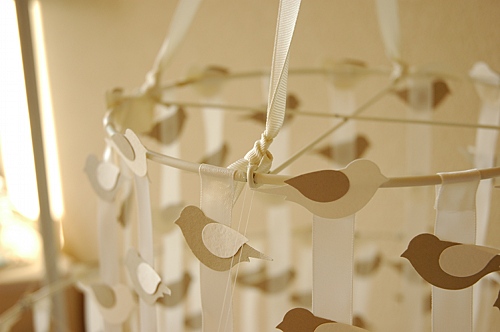
10.  The last step was to tie the chandelier hanger to the top.  I tried a few times with invisible thread, but it kept snapping off (maybe finishing line would have been better).  I ended up using ribbon instead.  I tied a knot through one of the bent wire hangers on the top loop and then tied it off on the bent wire directly across from it.  I repeated that step for the other two sides.  I just had to be sure that when the ribbons where held taught, they were both the same length.  It’s a lot easier to do than it is to explain.

Now, all you have to do is step back and admire your work!  Because this will probably be the very last thing we add to the nursery (once furniture is placed and drapes are hung), I have it hanging on my rolling laundry rack right now.

I couldn’t be more pleased with the way it turned out!  I’m thinking of hanging it near my recovered rocking chair, but we’ll have to see when I’m finished with the rest of the room.

Does this look like a project you may attempt for the little girl (or big girl) in your life?

This post has been added to Kimba’s DIY Day.

« Previous Page
Next Page »
  • Email
  • Facebook
  • Instagram
  • Pinterest
  • Twitter

About Makely

Lindsay Ballard is a former college mascot turned political geek turned roller derby playing, DIY fanatic.

Lindsay chronicles her projects, design ideas, and lifestyle tips here at Makely, where she shares tutorials and inspiration. Her DIY designs are bold and graphic, while her spirit is fun and full of color.


Archives

Categories

PRIVACY POLICY
Copyright © 2009-2019 Makely School for Girls | All Rights Reserved | Posts may contain advertising content or affiliate links