Makely

Let's Make Life Awesome

  • Home
  • Decorating/DIY
    • Create Your Decor
    • Decorate Your Home
    • Paint Your Walls
    • Transform Your Furniture
  • Healthy Living
    • Essential Oils
    • Family Wellness
    • Household Care
  • Project Gallery
  • Contact
You are visiting: Home » Decorating/DIY » Create Your Decor » Page 125

Easiest Design Transfer Method You’ll Ever Find

by Lindsay Ballard on July 15, 2009 4,275 Comments

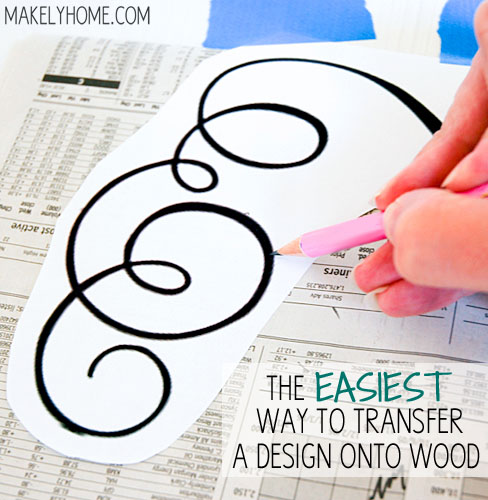
Easiest Way to Transfer a Design onto Wood via MakelyHome.com

In the middle of a new project that I was working on, I realized that I had a problem. I needed to transfer a very large design (think 4 feet by 4 feet!) than I want to paint onto a primed piece of wood, and I couldn’t figure out how to do it.

I laid the printed design out on the wood and thought I could just trace the design on the paper with firm pressure and a little impression line would be left on the wood that I could just go back and trace. Um, nope.

Then, I tried a ballpoint pen. Nada. How about the tip of a butter knife? Nah. A bamboo skewer? No way.

I was getting pretty desperate at this point. I knew I could run out to the store to buy transfer paper, but my son was napping and that’s prime crafting time as any of you other moms know. I had to use something I had on hand.

Then a light bulb went off in my head: Newsprint! It always rubs off on my hands, so maybe it would rub off on the primed wood. Egads! I was right!

This technique will be especially helpful if you have a very intricate design, a very large design, or you just don’t want to take the time to cut out your design and trace like a stencil. I think this is going to be my go-to tracing technique from now on. It is so easy.

The Easiest Way to Transfer a Design Onto Wood

1. Print out your design and cut away the excess white space. Tape the top of your design to the painted or primed wood in the location you want to transfer the design.
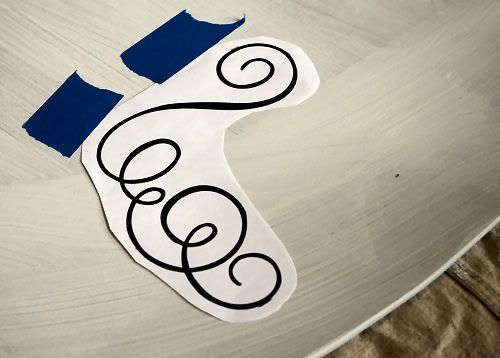
2. Lift up the design and slide a page of newsprint underneath it. The classified pages and stock market pages work best, as there is a lot of small newsprint all over the page. Make sure that the entire design is underneath the newsprint.

3. With a pen or pencil (preferably a pink one with your name on it like you are 6 years old) , trace the outline of your design directly onto the paper. Press firmly, but you don’t have to go overboard with the pressure.


 

4. Remove the taped design and newsprint to reveal a light transfer underneath! I have turned up the contrast on this photo so that you will be able to see the transfer.

5. With your pencil (or with a paintbrush if you are way more talented than me), trace the transfer directly onto the wood.
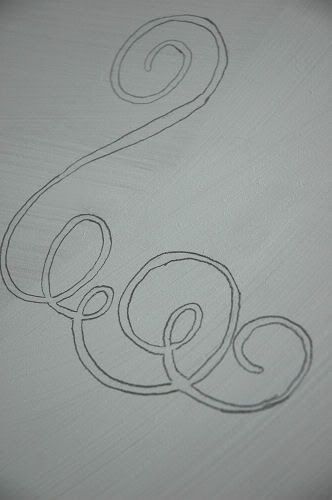
6. Admire the beauty of your transfer, and then get busy painting!
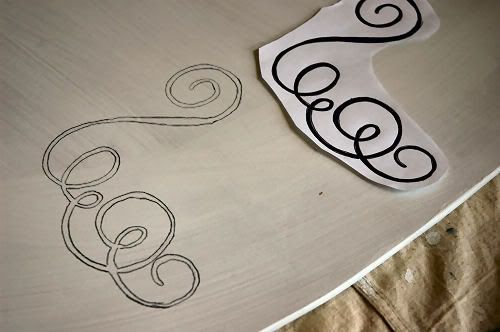
Try this technique the next time you want to transfer a pattern or stencil a word onto a piece of wood. I’m pretty sure this would work on your walls, too. You’ll be amazed at how quickly and easily you can transfer that design. I’d love to know how it works out for you!
Pottery Barn Style on a Grocery Store Budget

by Lindsay Ballard on June 24, 2009 133 Comments

Every time I open my mailbox and find a new Pottery Barn catalog waiting on me, I do a little happy dance right there at our neighborhood’s mail kiosk. I’m sure my neighbors think I’m insane, but I’m also sure it’s not the first time that they have thought that about me.

I never actually buy anything at Pottery Barn. In fact, I can probably count on one hand the number of items we have in our home from the store, and most of them were given to us as gifts. You see, my neighbors may think that I am insane, but I think the prices at Pottery Barn are what’s really insane.

Why do I get excited about the Pottery Barn catalog then? Well, because I use it as inspiration, of course! It’s easy to get Pottery Barn style on a much more reasonable budget. Starting today, I’m going to begin showing you how, and I’ll have more examples in the coming weeks and months ahead. I think I’ll even make a little series of it.

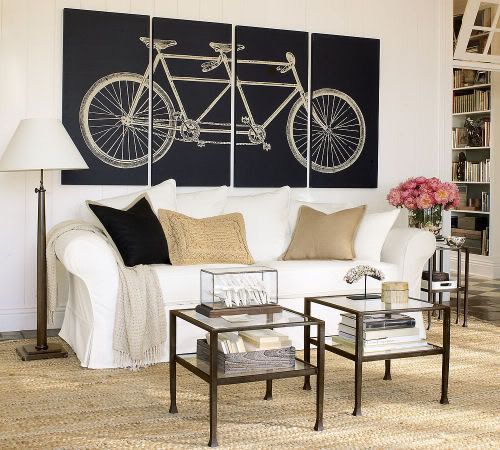
In the most recent issue, one of the layouts I was particularly drawn to was this one:

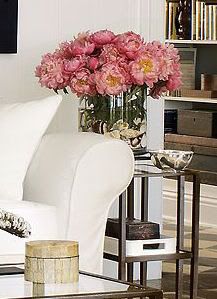
As a cyclist, I love the tandem bike stretched over the four canvases. As a starfish fan, I love the collection of white starfish in the glass display box. What I really love about this photo, though, is the floral arrangement.

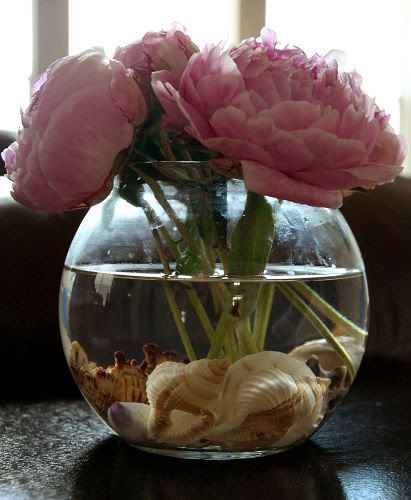
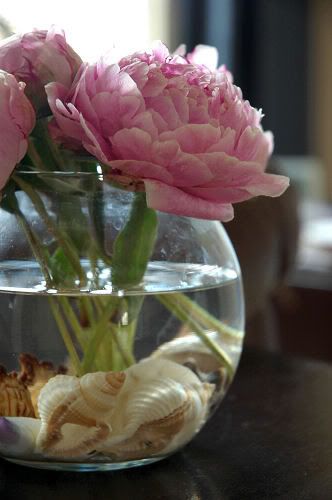
I might be biased as peonies are my favorite flower, but I absolutely love the combination of the flowers and the seashells at the bottom of the vase. How gorgeous! I knew I could easily put this arrangement together in my own home, and you can, too.

I found a small bouquet of freshly cut pink peonies at the grocery store. I just bought one small bouquet since I wanted to put together a smaller scale version of the Pottery Barn arrangement. Maybe one day, I’ll plant some peonies in my backyard and I won’t have to buy the blooms at the grocery store. Sigh…

Next, I added a few handfuls of seashells to the bottom of a small, fishbowl style vase. I have a ton of seashells lying around that I purchased at my last trip to the beach, but you can buy them at craft stores or even dollar stores if you don’t have any on hand.

I filled the vase about three-quarters full of water and cut my flower stems so that the blooms were just above the top of the vase.

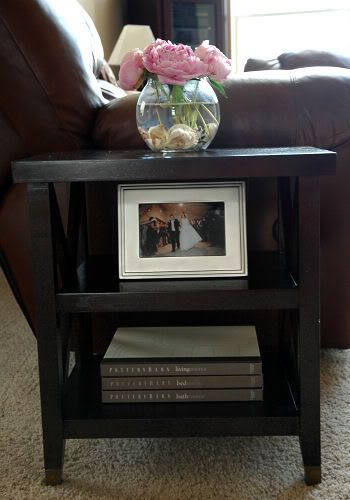
I added the arrangement to the top of one of the end tables in my living room. It looks very, well, Pottery Barn, doesn’t it?

I am absolutely in love. The peonies are very fragrant and fill the entire room with their deliciousness. I rarely treat myself to fresh flowers, but I think I may have to start doing so more often!

Inspiration is everywhere – even right there in your mailbox. You just have to know where to look!

« Previous Page
Next Page »
  • Email
  • Facebook
  • Instagram
  • Pinterest
  • Twitter

About Makely

Lindsay Ballard is a former college mascot turned political geek turned roller derby playing, DIY fanatic.

Lindsay chronicles her projects, design ideas, and lifestyle tips here at Makely, where she shares tutorials and inspiration. Her DIY designs are bold and graphic, while her spirit is fun and full of color.


Archives

Categories

PRIVACY POLICY
Copyright © 2009-2019 Makely School for Girls | All Rights Reserved | Posts may contain advertising content or affiliate links