Makely

Let's Make Life Awesome

  • Home
  • Decorating/DIY
    • Create Your Decor
    • Decorate Your Home
    • Paint Your Walls
    • Transform Your Furniture
  • Healthy Living
    • Essential Oils
    • Family Wellness
    • Household Care
  • Project Gallery
  • Contact
You are visiting: Home » Decorating/DIY » Create Your Decor » Page 127

Upgrade Your Store-Bought Window Treatments

by Lindsay Ballard on May 27, 2009 1,101 Comments

As much as I love the thrill of hunting for a great bargain at a thrift store, sometimes it’s just easier to buy something ready-made at a discount or department store. It’s very easy to embellish simple store bought designs to bring a custom-made feel to your home.

Take, for example, this window treatment I put together for my son’s playroom:
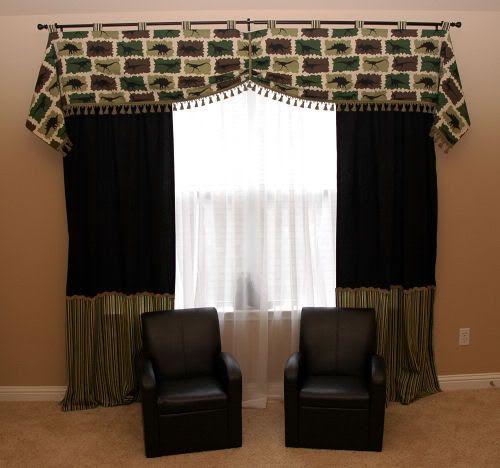
Although it looks lavish, it was very inexpensive and simple to put together. The combination of several layers of draperies, combined with added coordinating trims, kicks what would have been a very boring window treatment up to the next level.

To recreate this treatment, you will need three curtain rods: a spring-loaded tension rod, a single conventional rod, and a decorative rod. The decorative rod will need to have a longer return (i.e. the length the brackets hold the rod away from the wall) than the conventional rod. My decorative rod had a return of about 1/2 inch longer than my conventional rod.
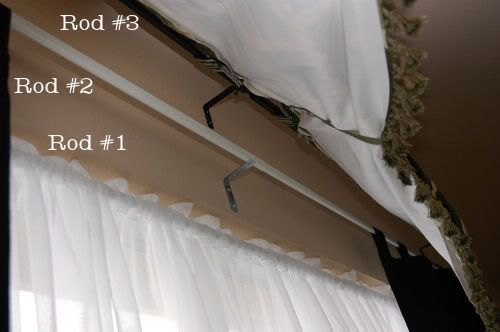
Another view of the three rods:
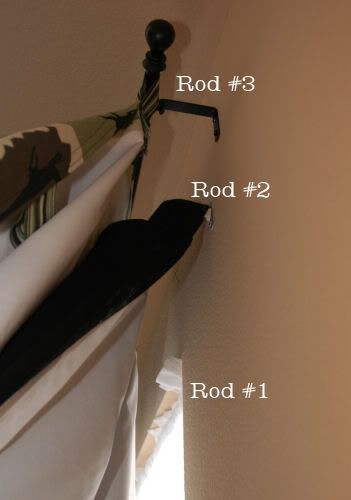
My tension and conventional rods cost just a few dollars each at Big Lots. The decorative rod I had leftover from a window treatment in our old house, but they can be purchased anywhere from Wal-Mart and Target to JCPenney and Goodwill.

Using the tension rod, I hung three white sheers inside the window. The sheers were $5 a panel at Big Lots (Notice a theme here? Big Lots is a GREAT place to buy basics like this.). I used the chart on the back of the curtain package to figure out how many sheers I needed to hang according to the width of my window. I thought I could get by with two since the measurements were close, but ended up having to go back to the store to pick up another one. I swear, this type of thing happens to me with every project.

Next, I hung the conventional rod about 3 or 4 inches higher than my window and about 6 inches wider than my window on each side. I purchased a set of solid black tab top curtain panels at Target, although you can choose rod pocket panels if you would like. I measured from the top of my conventional rod down to the floor (plus about 4 inches, since I like my panels to ‘pool’ on the floor), and divided the length into thirds. I added some striped fabric to the bottom of the black panels and cut off the excess black fabric (and saved it to use for another project). I hemmed the edges and the bottom of the striped fabric and sewed a strip of jumbo ric rac across the seam where I joined the two pieces. I sewed the seams on my machine, but you could definitely just glue gun this all together if you were so inclined.
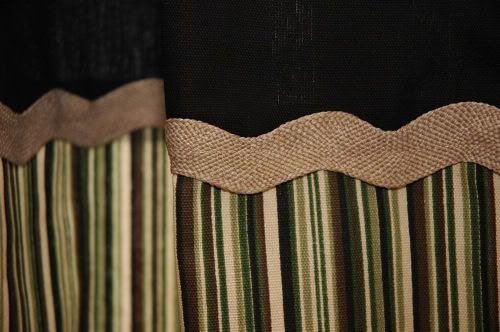
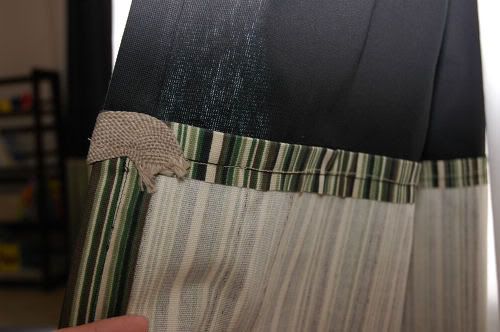
I also added a layer of lining to the black panels because I really hate the way it looks when the sun shines through dark fabric. Yes, I know I’m a bit crazy.

To fully cover the window with the black panels, I would have needed more than two of them. However, I only wanted to layer them over the sheers as static panels, not sue them as actual window coverings. If I ever wanted to, I could close the black panels, but they wouldn’t be as full as they should be.

Next, I sewed the tab top valence to hang on the decorative rod out of some fun dinosaur fabric my son picked out. Your valence should be as long as 1 1/2 times the width of your window. You can create your own with a glue gun using a fabric you love with these directions, or you can purchase ready-made valences and join them together with pins, a glue gun, or a sewing machine. If you make your own valences, remember that the tabs are usually spaced about 8 inches apart with a two inch drop. The window treatment police aren’t going to arrest you if you don’t do it that way, but at least keep them all spaced the same distance apart as it will make it easier to work with.

After sewing (or glue gunning) some cute trim to the bottom of your valence, hang it on your decorative rod as high as you can. I also hung mine a little wider than the conventional rod I used to hang my black panels. Center your valence on the rod, letting the “extra” fabric hang off the ends.
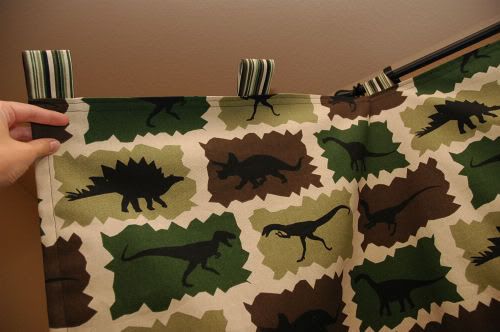
You can “fluff” the hanging fabric using these instructions, but it should pretty much hang naturally.

For my curtains, I didn’t want to leave the valence just hanging straight across the window, because I thought it made it look too boxy. I pinned and fluffed the valence for a few days before I settled on this solution. I pinned a piece of trim to the top back of the valence, ran the length of trim over the top, down the front, under the bottom of the valence, and pinned that piece back up to the top. I pulled the trim up enough to make a nice little gather on the center of my valence. Think of your trim as a little pulley system and this may make a tiny bit of sense.
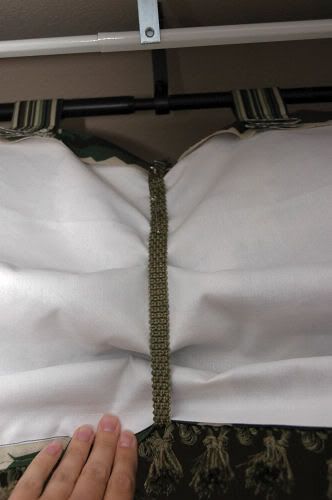
From the front of the valence, I folded the bottom half in little accordion folds until it laid nicely on the trim. I wanted it to look like the trim was actually pulling the valence up in the center, so I pinned it from the back a few times to make sure the it all hung right. It takes some time to get it looking just right, but it’s definitely worth the time spent “fluffing.”
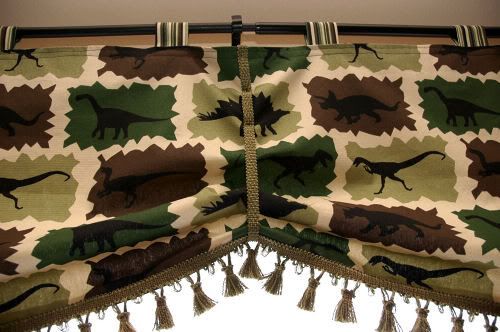
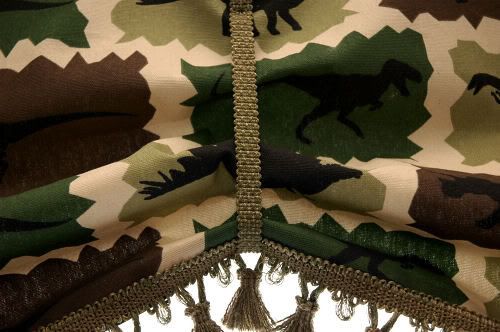
Now, you’ll have a completely custom-looking window treatment made from mostly store-bought panels. Don’t you love that? A little fluffing, some added trim, and hanging several cheap rods helps to upgrade a boring window treatment to something much more exciting.

Please let me know if you have any questions on how to put any piece of this together. This is certainly one you can do in your own home! This style is perfect for both casual and formal rooms – just choose a nicer fabric for the formal window treatments.

Oh, and the random shoe behind my sheers that you totally think I hid there to get it off my floor when I was taking pictures? That’s Wall-E’s Growing Shoe, of course.


How To Add Beveled Matting to Your Framed Artwork

by Lindsay Ballard on May 25, 2009 811 Comments

Have you checked out the prices on custom framing these days? Holy cow! Even with the 50% off coupons that are always running at JoAnn, Hobby Lobby, and Michael’s, it still costs a pretty penny.

Want to know how to get the custom framed look for less? Of course you do!

About a month ago, I won blog a contest over at Songbirdtiff to receive a free 16×20 poster-sized print from UPrinting.com (Thanks, Tiff!). I decided that I wanted a print to hang in my son’s dinosaur-themed playroom.

I searched the Creative Commons licenses on Flickr for a good quality photo I could print. I came across this one in Catchpenny’s photostream and knew it was the one:

(The Creative Commons license allows artists to copyright their work through methods other than full copyrights. For instance, the photograph above was designated free to share and transmit as long as you give credit to the artist and do not alter, transform, or build upon it. You may read more about Creative Commons here.)

There are many digital photo printing services online, and you can even upload to Walgreens.com and pick them up at a nearby Walgreens location in about an hour. You can’t beat that!

After I received my print from UPrinting.com (I was very impressed with their quality and service), I was ready to frame it for Zack’s playroom. I already had a frame on hand that I wanted to use from a previous poster we had made for his nursery.

If you don’t already have a frame in the size you want to use, check thrift stores for a frame you can reuse or repaint. For an even more custom look, you can purchase one of the fancier open back frames sold at many craft stores and get glass cut at a home improvement store to fit inside the frame.

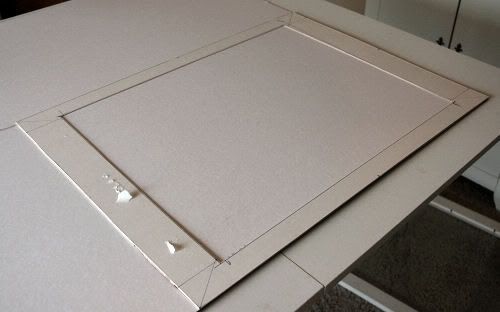
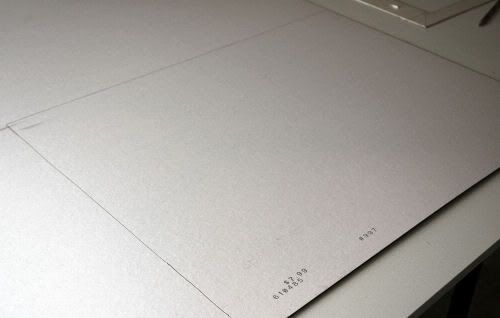
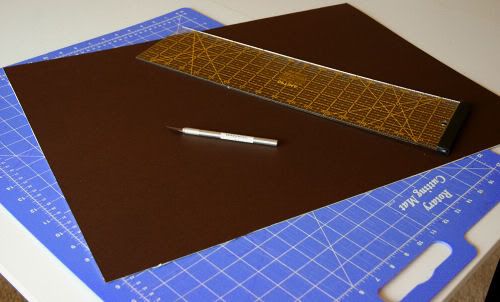
In order for the poster to look custom framed, I wanted to add beveled matting. I purchased a sheet of 32×40 mat board at Hobby Lobby to coordinate with my print. The mat board normally runs $7.99, but HL often puts it on sale for 50% off (so I got that huge sheet for $3.99). I chose a chocolate brown mat for this print, but the mat board comes in a rainbow of colors. I will also have enough left over to frame some smaller prints in the same color.

How to Cut the Beveled Mat:
1. Using the mat that was formerly cut for my frame, I traced the size I needed onto the back of my new mat board. If I didn’t have an old mat for this frame, I would have used the backing cardboard or the glass as a template.

2. I cut out the piece of mat board using an X-ACTO knife and a straight edge.

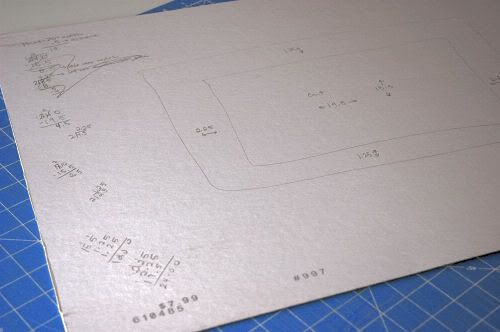
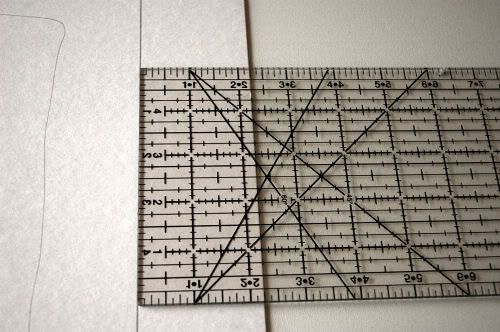
3. Next, I worked out the dimensions of how large an opening I needed to cut in the mat for the poster. I like to cut the opening about half an inch smaller than my print. In this case, my poster is 16×20 and I wanted to my opening to be 15.5×19.5. Then, I worked out what the margin should be on each side, making sure my opening would be centered. I drew out a rough sketch with the measurements listed on the back of my mat, because I’m one of those people who needs to “see” what I’m doing.

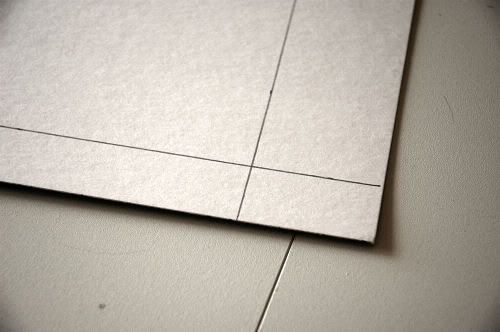
4. I drew out the opening on the back of the mat, making sure the lines intersected.

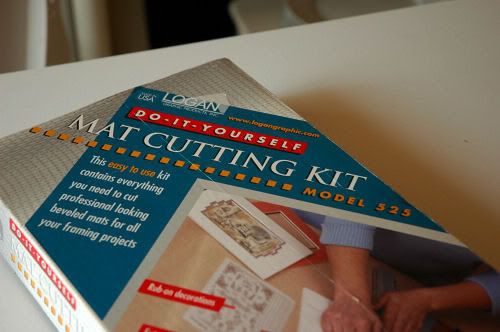
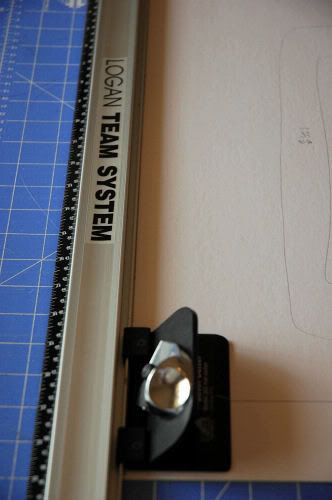
5. To get the professional beveled look, you will need a mat cutter. A mat cutter is basically a blade that cuts a 45-degree angle, instead of a 90-degree angle like an X-ACTO knife. We have long had a DIY Mat Cutting Kit that we bought for $35 (at half off) from Hobby Lobby about 5 years ago. The kit has a straight edge that the mat cutter hooks on to. We have used the kit a ton (we matted and framed dozens of family wedding photos to display at our wedding), so we didn’t mind spending the $35.

If I had to do it over again, I would have just purchased the stand alone mat cutter and used it with my own straight edge. Stand alone mat cutters can be purchased for under $20 at full price. I even found this one on Ebay for $12.95 (with free shipping), which is a steal.

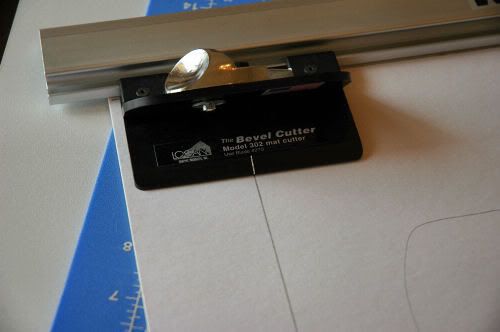
6. The mat cutter will have a little mark on it so you can line it up with the lines you drew on the back of your mat. That way, you will be able to line up the blade so that the corners will be nice and neat.

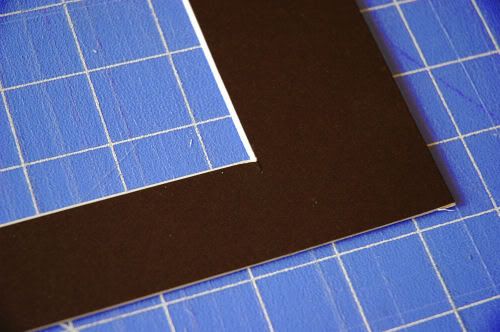
7. Okay, this is when you do as I say, not as I do. Do you see how I have the mat cutter lined up facing the inside of the mat? Yeah, that’s wrong. You want to do it the other way (mat cutter facing the outside of the mat) or else your bevel will be cut the wrong way. To cut the mat, you simply push down the thumb lever and slide the mat cutter up the line while applying pressure. Stop when the mark on the mat cutter reaches the next line. Your mat cutter will come with directions if what you just read makes absolutely no sense at all.

I had to re-cut mine about five times since I cut the bevel the wrong way and had to correct it, but it ended up coming out pretty good. Who is it that says that it doesn’t have to be perfect to be beautiful?

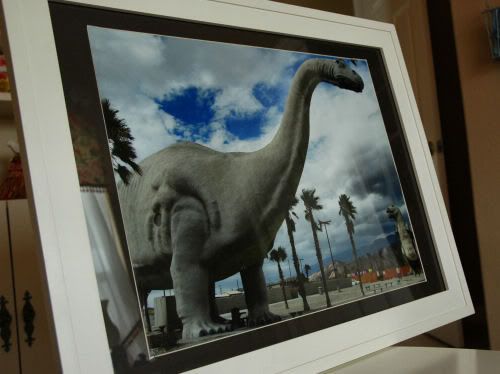
8. I taped the top of the poster to the mat and added it to my frame.

Ta Da! I have a custom matted print for much cheaper than I could have gotten at one of the framing stores. This is also a great way to frame your children’s artwork or those college diplomas that have been sitting in a closet for years.

Now, you can just laugh to yourself every time you see one of those “Save 50% off Custom Framing” coupons in the store circulars. You know how to do it for much cheaper than that!

« Previous Page
Next Page »
  • Email
  • Facebook
  • Instagram
  • Pinterest
  • Twitter

About Makely

Lindsay Ballard is a former college mascot turned political geek turned roller derby playing, DIY fanatic.

Lindsay chronicles her projects, design ideas, and lifestyle tips here at Makely, where she shares tutorials and inspiration. Her DIY designs are bold and graphic, while her spirit is fun and full of color.


Archives

Categories

PRIVACY POLICY
Copyright © 2009-2019 Makely School for Girls | All Rights Reserved | Posts may contain advertising content or affiliate links