Makely

Let's Make Life Awesome

  • Home
  • Decorating/DIY
    • Create Your Decor
    • Decorate Your Home
    • Paint Your Walls
    • Transform Your Furniture
  • Healthy Living
    • Essential Oils
    • Family Wellness
    • Household Care
  • Project Gallery
  • Contact
You are visiting: Home » Decorating/DIY » Decorate Your Home » Page 65

Modern Vintage Powder Bathroom Reveal

by Lindsay Ballard on March 12, 2012 6,974 Comments

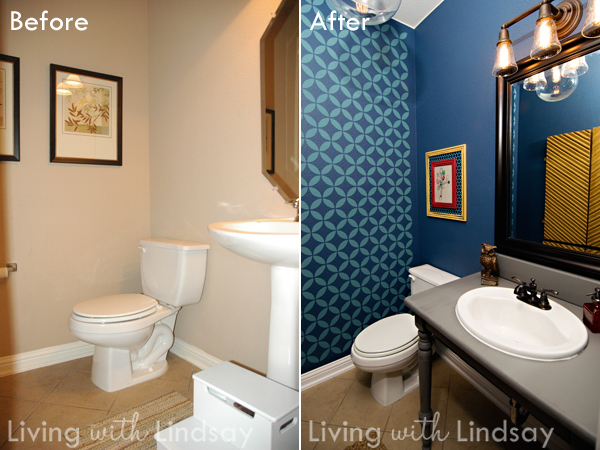
Today, I’m finally unveiling the transformation of our powder bathroom!  This poor, mistreated little bathroom was beige and boring and blah before I focused my attention on it.  Perhaps you remember me showing a “Before” photo back in November.
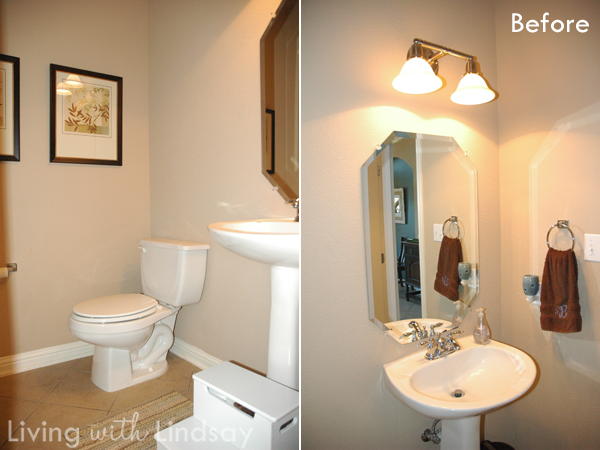
It’s okay if you feel a little frightened.  I certainly did.  That unframed mirror – ack!  The builder’s beige walls – no!  The horrible lighting – ahhh!  The toilet and toilet paper holder that greeted every guest that walked through our front door – yikes!  Obviously, something drastic had to be done.

So, I started by painting and stenciling the walls.  Then, I made a new rug.  I painted a vanity light fixture and my husband installed wiring for a gorgeous pendant fixture in the ceiling.  And then, well, you’ll see.
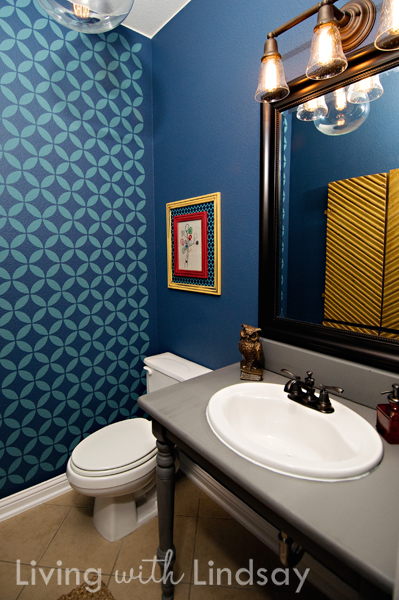
Wowzers, huh?

Other than the paint colors – proof that paint can completely transform a room – the biggest change I made was the sink.   We ripped out the builder installed pedestal sink and replaced it with a vanity/sink combo that I created myself.  I don’t have any particular hatred towards pedestal sinks, but I do have a hatred towards seeing a toilet from my entry way.  The new vanity is really funky and does a nice job hiding the toilet from public view.  Any guesses as it what it’s made from?
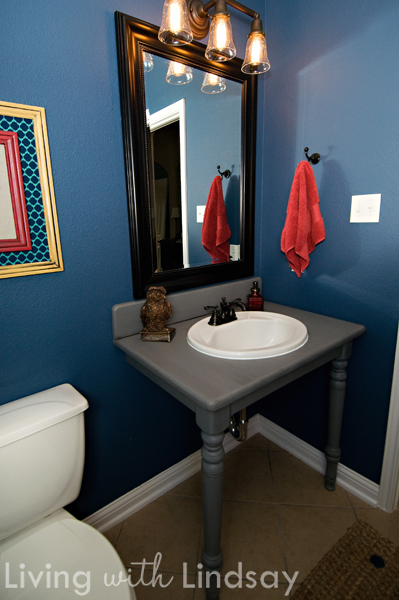
Who guessed that the vanity is made from my friend’s old kitchen table from the days before she was married?  How fun is that! I will put together a tutorial on it shortly, because it was an extremely simple project that turned out to be such a great statement piece.  You really won’t believe how easy it was.
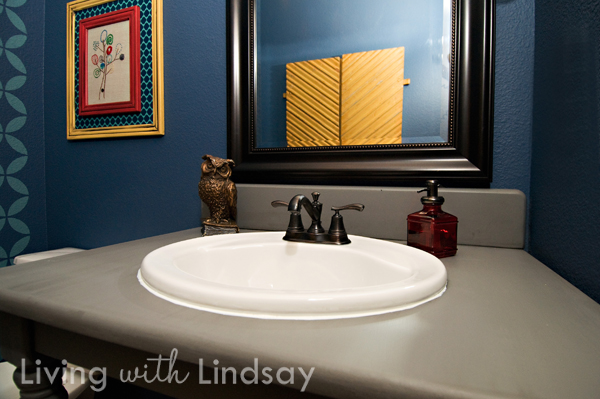
On the sink sits a vintage-looking soap dispenser and a sweet little vintage owl statue.  Also, I’m so glad my friend Pam from Retro Renovation talked me out of putting a vessel sink on top of the vanity.  That would have been a mistake in this room, and I was so glad to have her guidance on that.

Oh, do you see that yellow artwork reflecting in the mirror?  What is that?
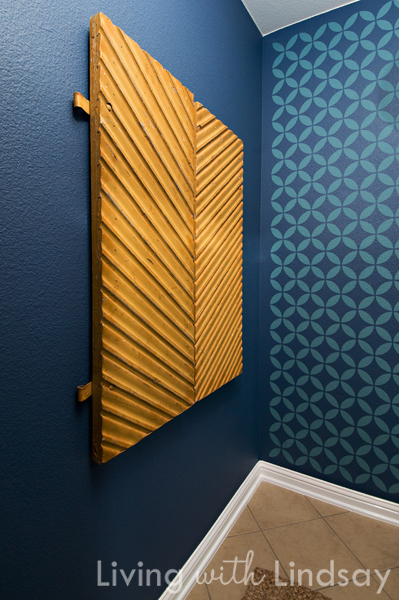
Simply the most amazing pair of vintage shutters I have ever seen.  I saw them at local antique and vintage show, and I fell in love.  They were a little pricey, but my mind kept wandering back to them as I browsed the rest of the show.  After I had checked out every other vendor, I went ran sprinted back to them and they were still there.  Vintage.  Chevron-y.  The perfect color.  And I needed artwork for that wall.  SOLD!

The color of those shutters was the inspiration behind the framed crewel work that I hung above the toilet.  I needed something to bring more of the yellow into the room, I was working on the needlepoint sampler, and things just sort of fell into place from there.  My plan was always to have some red in the room, but the yellow was a surprise – even to me!
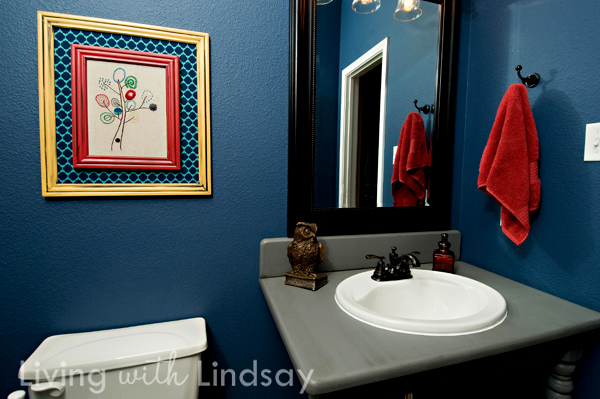
I will put together a source list to give to you guys in the near future.  Other than the vintage shutters, there’s virtually nothing in this bathroom that you couldn’t replicate yourself with a few little tutorials and some free time.

In the meantime, “WHO” is in love with this bathroom as much as I am?  Raise your hand!
How to Replace a Ceiling Fan {Part II}

by Lindsay Ballard on March 5, 2012 2,177 Comments

Happy Monday, friends!

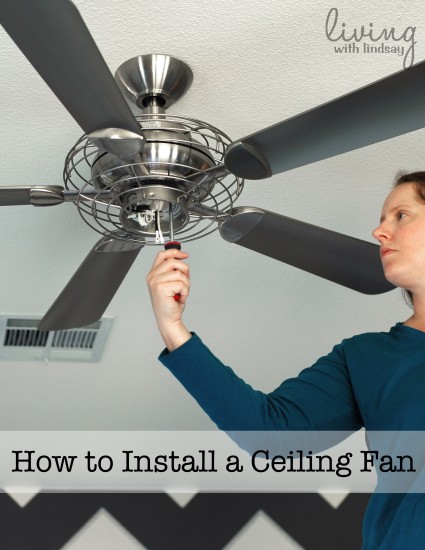
Today I’m back with Part II in my series on how to replace a ceiling fan.  For the first part of the tutorial (the removal of the existing fan), please see Part I here.  We’re now going to talk about how you install your new fan.  Please note that this tutorial is for a ceiling that has already been blocked and wired for a fan.

How to Install a Ceiling Fan

1.  Turn off the electricity to the fan at your breaker box.  You will likely find your box in your garage, a closet or your utility room.  All you need to do is flip the breaker (the switch) that powers your fan.

2.  Install the ceiling hanger that came with your new fan.  There are several different types of these hangers, and some are easier to install than others.  You simply screw it into the brace that’s already in your ceiling.

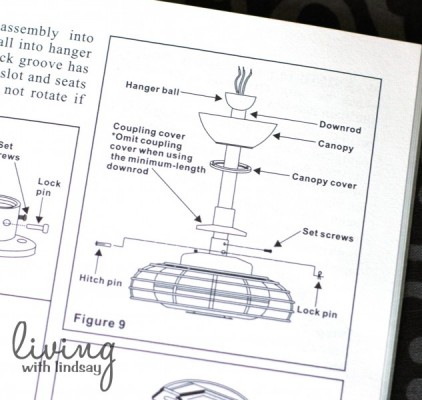
3.  Assemble the fan (minus the blades and light kit).  Each fan is made up of some of the same parts, including a downrod, canopy and canopy cover.  If you need to, refer to the instruction manual to make sure you put together the parts in the correct order.

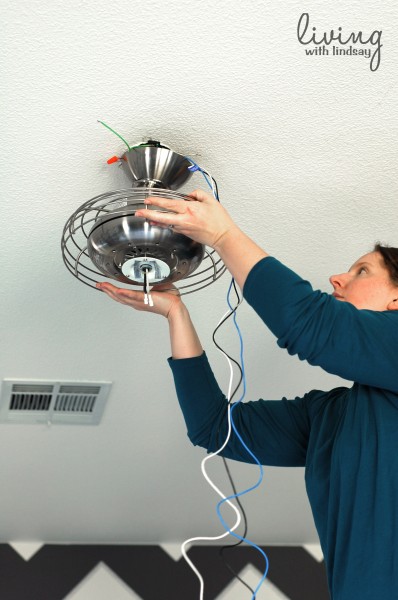
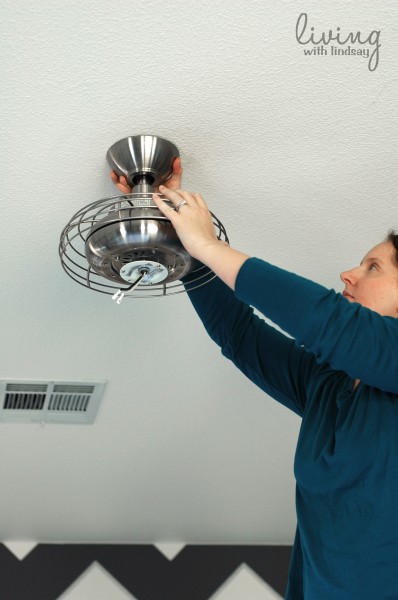
4.  With the fan assembled, hang it on the ceiling hanger while letting the wiring hang out.  This fan is easy to hang, as there’s a ball at the top of the downrod that just fits into place.  The old fan was a bear to install, as you had to hang the heavy thing on a little hook to hold it in place.  For your own sanity, I hope that you don’t have one like that.

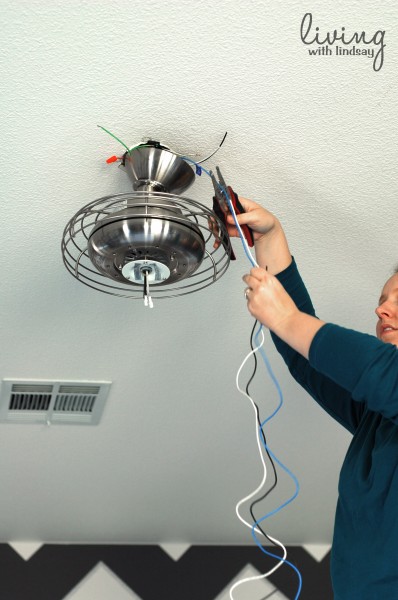
5.  Next, you will need to cut the length of the fan’s electrical wires.  Use a wire cutter/stripper and cut them so they are about 6ish inches long.  Then, you’ll use the stripper to strip about 1/2 of an inch of the end of each wire.  Home Depot has a tutorial for stripping wire if you’ve never done so.  I was nervous the first time I did it, but it’s very easy with the right tool.

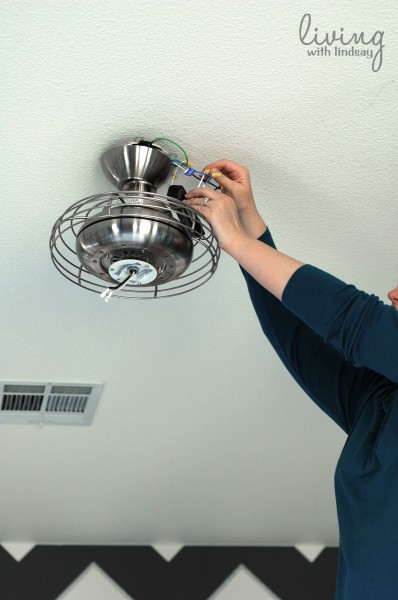
6.  Now is the time to wire the fan to the ceiling.  You will essentially twist the like colored wires together with a wire nut.  However, if you have never wired anything, please read the directions that came with your fan.  Once the wires are twisted together in the nut, pull each wire of a pair to make sure they don’t slip out of the nut.

7.  Push all of the wires up into the ceiling and place the fan’s canopy on the ceiling.  Twist it until it locks into place.  Do the same thing with the canopy cover, if your fan has one.

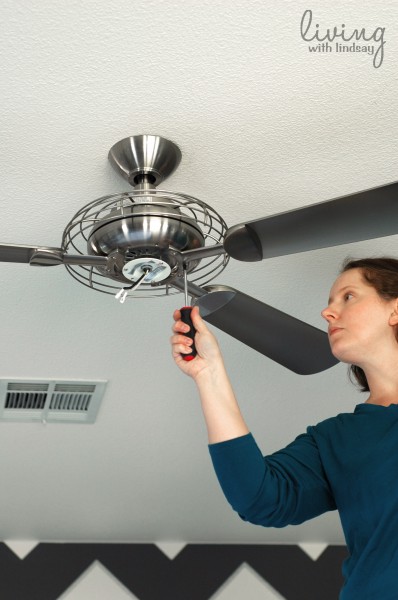
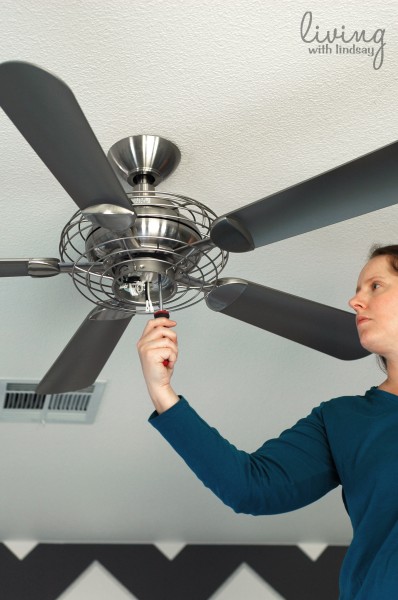
8.  Attach the blades to the blade arms and then the blade arms to the fan.  In order to better balance the fan (and not knock yourself out with a fan blade), attach them to the fan in a star pattern.

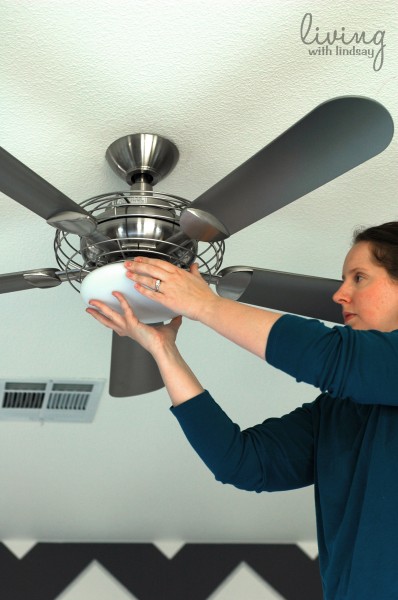
9.  Once your blades are installed, you can add the light kit or light kit cover.  We decided to attach the light kit on our fan, because it gives off nice light.  I simply screwed the light kit “innards” into place and then put the light bulb in the socket.

10. All that’s left is to attach the bottom of the fan.  Some fans have a finial that goes on the bottom.  Because of the style of our new fan, I only had to attach the globe by just twisting it into place.

Voila!  You have now installed your ceiling fan!  Turn your breaker back on and flip the switch on the wall that powers your fan.  Hopefully (fingers crossed!), it will be spinning and you can bask in your glory.

I am so pleased to finally have my new fan installed after waiting all of those months for it to arrive.  I think it fits the room perfectly.

Do you feel ready to replace a ceiling fan if you want/need to?  You can do it!

« Previous Page
Next Page »
  • Email
  • Facebook
  • Instagram
  • Pinterest
  • Twitter

About Makely

Lindsay Ballard is a former college mascot turned political geek turned roller derby playing, DIY fanatic.

Lindsay chronicles her projects, design ideas, and lifestyle tips here at Makely, where she shares tutorials and inspiration. Her DIY designs are bold and graphic, while her spirit is fun and full of color.


Archives

Categories

PRIVACY POLICY
Copyright © 2009-2019 Makely School for Girls | All Rights Reserved | Posts may contain advertising content or affiliate links