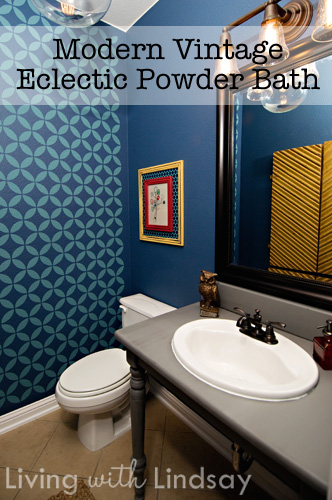
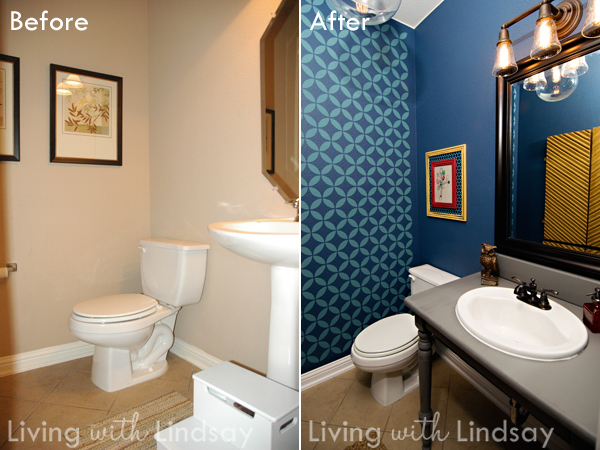
Today, I’m finally unveiling the transformation of our powder bathroom! This poor, mistreated little bathroom was beige and boring and blah before I focused my attention on it. Perhaps you remember me showing a “Before” photo back in November.

It’s okay if you feel a little frightened. I certainly did. That unframed mirror – ack! The builder’s beige walls – no! The horrible lighting – ahhh! The toilet and toilet paper holder that greeted every guest that walked through our front door – yikes! Obviously, something drastic had to be done.
So, I started by painting and stenciling the walls. Then, I made a new rug. I painted a vanity light fixture and my husband installed wiring for a gorgeous pendant fixture in the ceiling. And then, well, you’ll see.
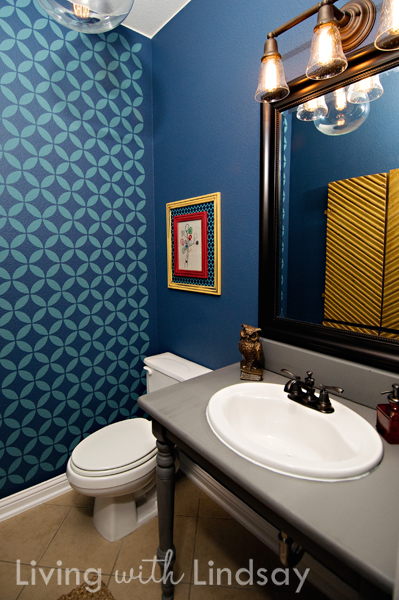
Wowzers, huh?
Other than the paint colors – proof that paint can completely transform a room – the biggest change I made was the sink. We ripped out the builder installed pedestal sink and replaced it with a vanity/sink combo that I created myself. I don’t have any particular hatred towards pedestal sinks, but I do have a hatred towards seeing a toilet from my entry way. The new vanity is really funky and does a nice job hiding the toilet from public view. Any guesses as it what it’s made from?
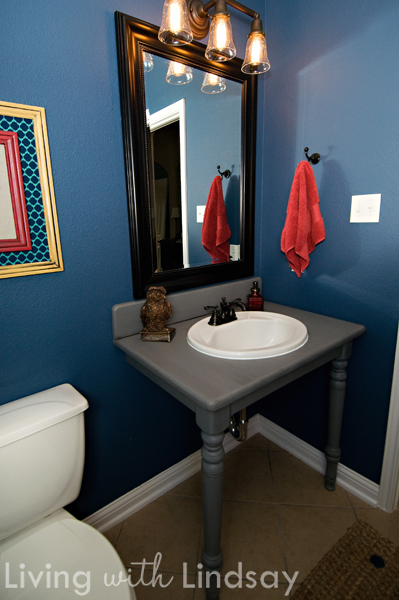
Who guessed that the vanity is made from my friend’s old kitchen table from the days before she was married? How fun is that! I will put together a tutorial on it shortly, because it was an extremely simple project that turned out to be such a great statement piece. You really won’t believe how easy it was.
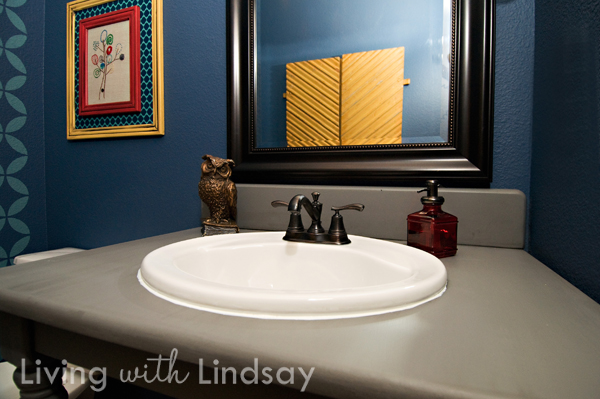
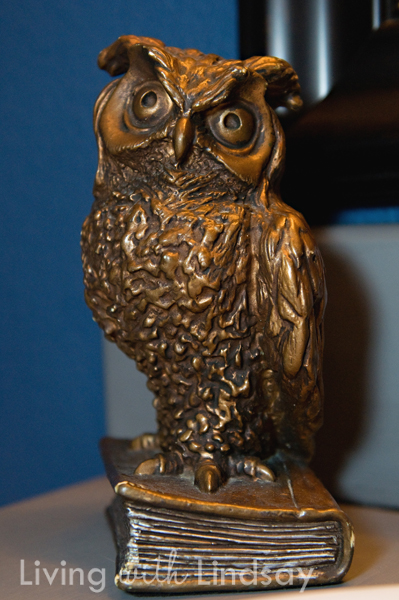
On the sink sits a vintage-looking soap dispenser and a sweet little vintage owl statue. Also, I’m so glad my friend Pam from Retro Renovation talked me out of putting a vessel sink on top of the vanity. That would have been a mistake in this room, and I was so glad to have her guidance on that.
Oh, do you see that yellow artwork reflecting in the mirror? What is that?
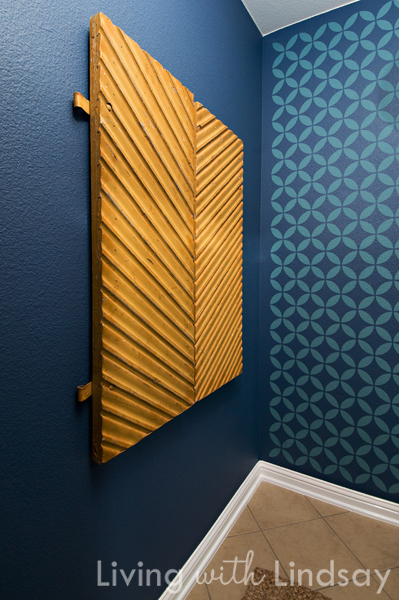
Simply the most amazing pair of vintage shutters I have ever seen. I saw them at local antique and vintage show, and I fell in love. They were a little pricey, but my mind kept wandering back to them as I browsed the rest of the show. After I had checked out every other vendor, I went ran sprinted back to them and they were still there. Vintage. Chevron-y. The perfect color. And I needed artwork for that wall. SOLD!
The color of those shutters was the inspiration behind the framed crewel work that I hung above the toilet. I needed something to bring more of the yellow into the room, I was working on the needlepoint sampler, and things just sort of fell into place from there. My plan was always to have some red in the room, but the yellow was a surprise – even to me!
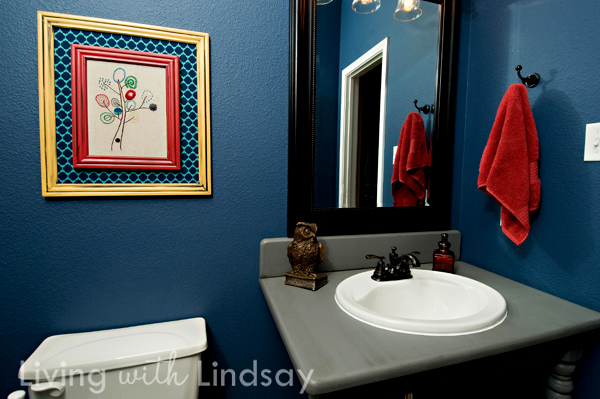
I will put together a source list to give to you guys in the near future. Other than the vintage shutters, there’s virtually nothing in this bathroom that you couldn’t replicate yourself with a few little tutorials and some free time.
In the meantime, “WHO” is in love with this bathroom as much as I am? Raise your hand!
Oh I love it! We are moving this summer and I can’t wait to work on my first house. I have all these ideas. Your bathroom is lovely! I love the little owl.
Thanks, Lesley!
Very nice transformation! Love the blue!
Congratualtions! You did GOOD!! It looks really nice,such attention to detail. I love the owl too, I,m totally into owls right now, you should see the cute owl checks I just ordered!! Be proud!!
Thank you, Danna!
I love it. It looks so collected. The stencil is bang on and that DIY vanity is uber-sneaky 🙂 Nice job lady.
I appreciate it, Dharma!
The vanity looks AWESOME! Great transformation, friend!!!
Thanks, JJ! 😀
Awesome! xoxo
And thanks again for your guidance!
Those shutters… oh my word! Love everything about the room! That blue is amazing!
Thanks, Jennifer! Those shutters make my heart flutter.
*Raises Hand* — Okay, this is seriously amazing. You did a fabulous job! I love the new sink and the accent wall. A-ma-zing. Thanks for sharing!
Thanks so much, Maria!
That came out so wonderful! I love it.
Thanks, Erin!
WOW E ZOW… SO COOL!!
Aww, thanks!
I guessed that it was a table…but I never would have guessed that those were shutters! They’re so fun! Actually, the whole bathroom is fun. 🙂
Well, you are the smartest girl in class! 😀 Thanks so much!
Wow! What a difference! Lame question: Where’s the toilet paper?
We don’t use toilet paper.
Just kidding!
I actually have a free standing holder/storage thingy that I got from Marshall’s. It looked kind of tacky for the photos, so I took it out of the room. Maybe it was my own personal thing, but I felt like it was all “Hey! Look at me! I’m some toilet paper!”
Oooo, LOVE the blue! It looks similar to what we’re considering for our master (we’ve had 3 giant swatches on the walls since I was pregnant – DD is 10 months old now), but I’m not sure I want it on all the walls just yet. What brand/shade is yours?
Disregard – found it in the stencil post. 😉
It looks a lot darker to me in person. We had to light the room to shoot it, and I think it brightened the paint up a bit.
Oooo-la-la me like! Paint can make such an impact. All of my bathrooms are still blah beige. You’ve inspired me to get the wheels turning.
Paint is definitely my very favorite DIY tool!
I love it! That console is to die for and the diy art and rug really set it off.
Thanks, Meg!
FABULOUS!!!!!!
Thanks, Haley!
That is amazing! I just love how it turned out. As I was reading, I realized that I’d seen all the little pieces as it came together; that made me smile.
You’ve given me hope to work on my mostly white bathroom. It’s so plain and boring, but I was afraid to paint because I’ve always read (erroneously, apparently) that a color would make the room feel much smaller.
A dark color CAN make the room look much smaller. I think this room looks larger because of the lens I had to use on my camera to shoot the room. But, I decided to play into the smallness by adding dark color instead of trying to make it look larger. The patterned wall definitely helps, because it draws the eye to the back of the room.
Wow. It’s all my favourite, but my most favourite is the sink counter, amazing. Like the owl but maybe a bear might be more appropriate 😛 Good work.
Thanks, Christina!
Why no vessel sink?
Remodeling that bathroom really transformed that space! I think the shutters are my favorite part – especially the way they pop against that blue background.
I am in love with it Lindsey. Your bathroom looks fantastic. You know how to make excellent use of a can of paint. Have a great 2018.