Makely

Let's Make Life Awesome

  • Home
  • Decorating/DIY
    • Create Your Decor
    • Decorate Your Home
    • Paint Your Walls
    • Transform Your Furniture
  • Healthy Living
    • Essential Oils
    • Family Wellness
    • Household Care
  • Project Gallery
  • Contact
You are visiting: Home » Decorating/DIY » Decorate Your Home » Page 89

Your Advice Needed: Creative DVD Storage Solution

by Lindsay Ballard on April 12, 2010 32 Comments

I love it when you guys email me with questions about dilemmas you are having in your home.  I always try to offer suggestions as to what I would do if I were in your situation, but sometimes the questions leave me completely stumped!  Take this question from Sarah, for instance:

Hi, Lindsay! My name is Sarah… I’ve been reading your blog for quite a while now, and I was just wondering if I could perhaps take advantage of your creativity and ask you a question… I have a fairly large DVD collection, and I have found that the best way for me to store them is to take them out of the cases and move them to a big ole honkin black DVD “wallet.”  Although this is extremely convenient, as there’s really nowhere in my apartment I can store them in the cases without having to dig when I want to watch a particular one, it’s not very aesthetically pleasing. I’ve looked for cute patterned cases and the only ones I’ve been able to find hold about 30 or less– and calling them “cute” is a stretch– which won’t cut it for my 400+ discs. SO I was just wondering if you had any sort of solution!

So, Sarah has a huge DVD collection, but no where pretty to store it.  She lives in an apartment without a lot of space, so a huge DVD storage tower is not really in the cards right now.  Her “big ole honkin'” DVD wallet is convenient, but it’s an eyesore in her living room.   She needs a solution to store her 400+ DVD collection (either in or out of the cases) that makes them easy to find and doesn’t take up much space.  And of course, a solution that won’t break the bank is what we are always after!

One solution I have is that Sarah could put her current DVD wallet inside something like a storage ottoman.  That way, she’ll be able to have the DVDs easily accessible (just pull the wallet out of the ottoman when she wants to watch one).  The storage ottoman could double as extra seating for when she has friends visit her apartment, or even as a coffee table if it was large enough and she had the space.  A quick search on Target.com for storage ottomans reveals about 200 different options.

If she wants to leave her DVD wallet within view, Sarah could put together a binder cover, like the one featured in this tutorial from WhipUp.net, using a fabric choice that coordinates with her living room.

WhipUp.net – Beat-Up Binder Makeover

Short of starting her own Netflix service (which I think she should!), what ideas do YOU have for Sarah?  Leave them in the comments and let’s see if we can help her out!
Crown Molding on Angled Ceilings

by Lindsay Ballard on April 5, 2010 104 Comments

Our nursery project is coming together very nicely.  Most of the painting is finished, and we’re moving on to the molding phase.

I would love to install both crown molding and chair rail in our daughter-to-be’s room.  We have installed both types of molding ourselves, so we know that it won’t be much of a problem – except for the two pesky angled ceilings in her room!

I’ve researched the dilemma online a few times, and it seems that most home purists think that crown on an angled ceiling is a big no-no.  However, if you’ve been around here long enough, you know that I’m never  one to listen to how it “ought” to be done over how I “want” to do it.  Just ask Tom – it’s one of the things that makes living with Lindsay so fun!

RegalMoldings.com

From what we can tell, we have three options for crown molding:

1.  Don’t install any crown at all as to avoid the problem – but where’s the beauty in that?

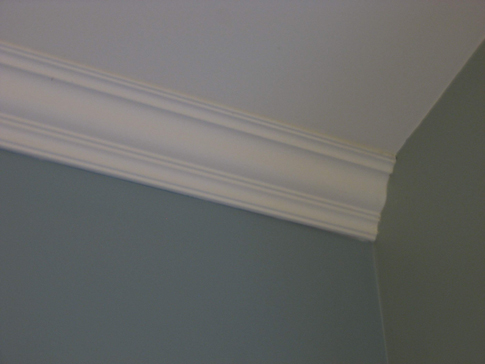
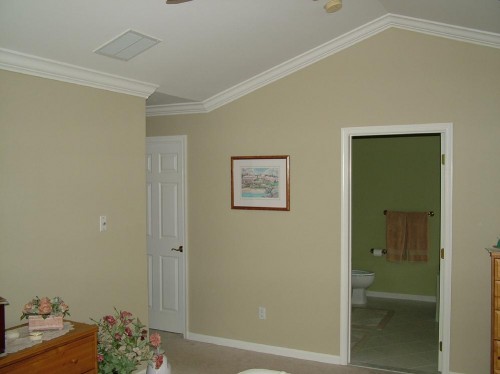
2.  Only install crown on the two walls that have flat ceilings. We would have to run the molding straight into the angled ceiling’s wall, as was done below.

WallStatments.Com

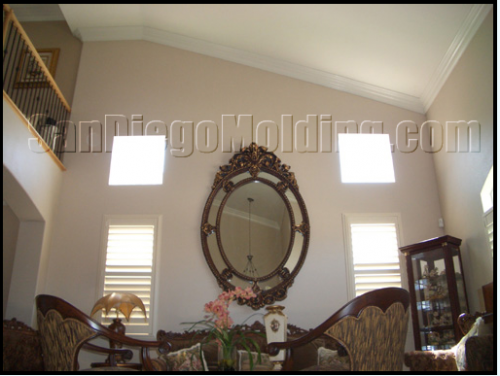
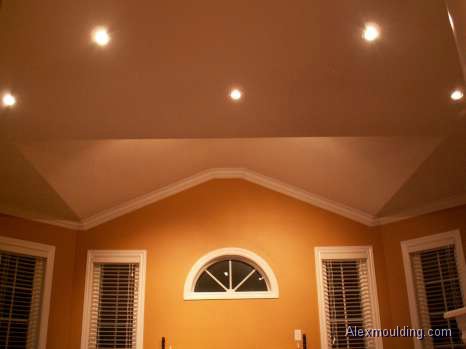
3.  We could build-up the crown a bit to install a flat tray-type piece of wood on top of it, so there would be something to nail the crown to on the top of the ceiling.  You wouldn’t be able to see the flat piece of wood, but it would ensure that there was some stability in the crown.  I’ll be honest that I don’t really understand the engineering in this (I probably will once I see it come together), but Tom tells me this is how we’ll have to do it to prevent it from sagging.  He has a bad habit of over-engineering things, but I’d rather it be over-engineered than the molding fall down on top of my sleeping baby!

SanDiegoMolding.com

AlexMoulding.com

It seems more and more likely that we’ll attempt #3, and if it doesn’t work out, we’ll fall back on #2.  I consulted with my friends at One Project Closer, and they suggested that Tom just get out his protractor and start measuring angles.  I love those guys!  I’m sure Tom does have a protractor somewhere out in the garage.

Have you ever run into a similar situation in your home?  What was your solution?

« Previous Page
Next Page »
  • Email
  • Facebook
  • Instagram
  • Pinterest
  • Twitter

About Makely

Lindsay Ballard is a former college mascot turned political geek turned roller derby playing, DIY fanatic.

Lindsay chronicles her projects, design ideas, and lifestyle tips here at Makely, where she shares tutorials and inspiration. Her DIY designs are bold and graphic, while her spirit is fun and full of color.


Archives

Categories

PRIVACY POLICY
Copyright © 2009-2019 Makely School for Girls | All Rights Reserved | Posts may contain advertising content or affiliate links