Makely

Let's Make Life Awesome

  • Home
  • Decorating/DIY
    • Create Your Decor
    • Decorate Your Home
    • Paint Your Walls
    • Transform Your Furniture
  • Healthy Living
    • Essential Oils
    • Family Wellness
    • Household Care
  • Project Gallery
  • Contact
You are visiting: Home » Decorating/DIY » Page 224

Testing the (Paint Color) Waters

by Lindsay Ballard on November 26, 2009 34 Comments

Happy Thanksgiving to all of my American friends! I hope that you are able to spend your day with friends and family and bask in the warm glow of laughter.

But, after you have eaten all of the leftovers you can stand, lost a football game (sorry Texas A&M; fans!), and listened to the cousins argue about whose turn with the Wii it is, you may be ready to think about something more fun. If you are anything like me, that fun thing to think about will be your home.

I’m in the beginning stages of re-painting our powder bath. It’s a forgotten room, although one frequently visited by guests. And it’s just bor-ing. I’m embarassed to even show you how boring it is. But, I’ll do it, because I apparently have no shame.
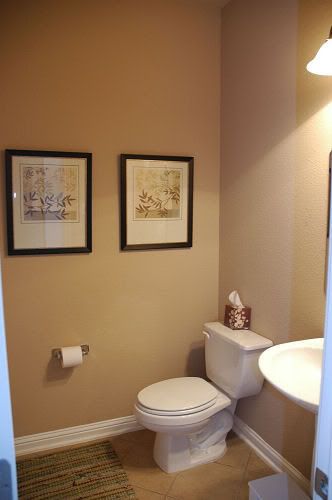
Yikes.

Are you thinking of repainting a room in your house right now? Do you want to show your Mom the color you are thinking of for your bedroom walls? Want your Aunt’s opinion on that new color you are considering for your son’s room? Well, this is a great time to do it, folks.

If you are ready to try out some paint colors but not ready to actually pull the trigger on painting the room, I have a great way to show you how to hide test paint.

Now you see them…
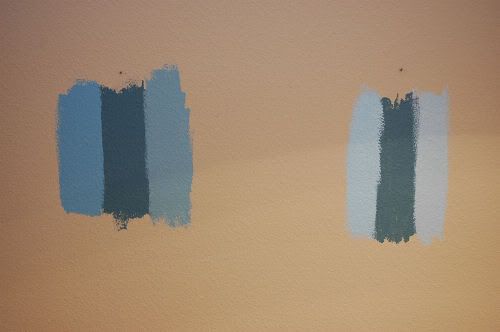
Now you don’t…

When I’m painting test colors, I like to hide them behind pictures hung on walls or pieces of furniture. There’s no reason to live with test stripes on your walls if you can figure out a great way to hide them! In a room where you have a variety of lighting throughout the day, make sure you test your colors in enough areas to get a sense of what the paint will look like as the light changes.

********************

Incidentally, I received my Farrow and Ball colour card (with THE Tori Spelling ‘Parma Gray’ paint chip) in the mail this week. I almost immediately rushed out to Home Depot to pick up a color match test sample of paint. As much as I know (or really, assume) that the F&B; paint is far superior in color depth and quality, I couldn’t pay $125 for a gallon of paint unless it was made with 24-karat gold. And maybe not even then.

My paint guru at Home Depot reminded me that the color match wouldn’t be absolutely, 100% perfect due to the base shade and pigment content, but since I was buying a $2.97 jar of test paint, that didn’t really matter to me. I slapped the test paint on my bedroom wall (behind my framed bridal portrait, if you most know), and it seems like a pretty dang good match to me! It may be slightly more blue than the Parma Gray chip, but the chip looks slightly more gray in person than it does to me on my computer screen.

Several of you had asked me to pass along the Home Depot formula if I was able to get a good match. For those of you, here it is:

BEHR
Base: Premium Plus Ultra Pure White (PP100)
Type: Interior
Sheen: Flat, Matte
Colorant for 8oz:

  • B- Oz (0) 384th (30)
  • D- Oz (0) 384th (7)
  • E- Oz (0) 384th (4)

DIY Faux Boxwood Letter Wreaths

by Lindsay Ballard on November 23, 2009 1,529 Comments

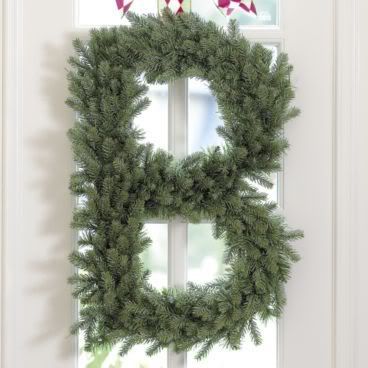
When the holiday catalogs began hitting my mailbox back in October (!), I eagerly poured through them looking for inspiration for my own holiday decor. One of my favorite selections was the Spruce Alphabet Wreath from Ballard Designs.

It wasn’t the wreath itself that I loved. In my opinion, it looks too tall and skinny, and I just couldn’t see paying $45 for it. I don’t think there’s enough heft in it to command enough attention for that price. ‘Cause I’m cheap. However, I was drawn to the idea of a letter wreath hung with a thick ribbon (the wreath in the catalog is hung with a yummy chocolate velvet ribbon).

I decided to make my own mini version of the letter wreaths to adorn my breakfast room chairs. In true Lindsay spirit, I found all of the supplies I needed at the Dollar Tree. Have I told you one just opened about a mile from my house? It’s dangerous, people.

Mini Faux Boxwood Letter Wreaths

What You’ll Need:

  • Foam board – 1 sheet
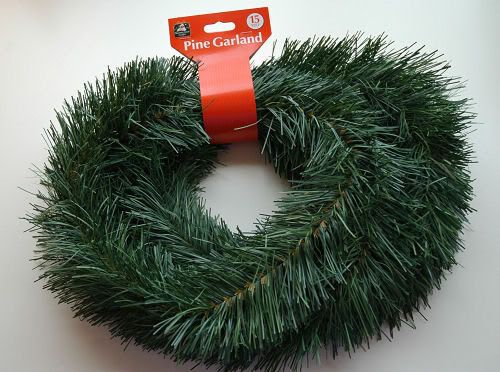
  • Wired garlands – I used six total, but the number you need will depend on your letter and the number of wreaths you make. This is the type I purchased:
  • Wired ribbon – I used 3 rolls total, but again, it will depend on what you do with this project.
  • X-Acto or utility knife
  • Wire cutters
  • Scissors
  • Glue gun and glue sticks (depending on your letter)

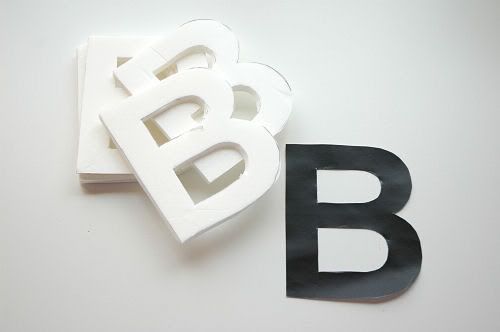
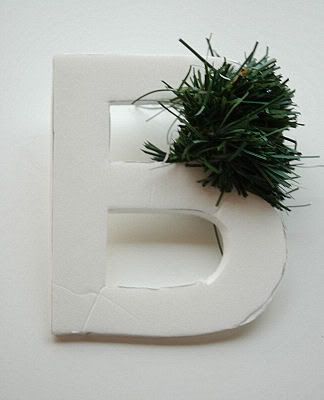
I began by printing out a letter ‘B’ from my computer. I chose a basic sans serif font and made it roughly the size I wanted my finished mini wreaths to be. I traced that letter onto the foam board and cut out the letters with my utility knife. I cut out six letters for my six chairs.

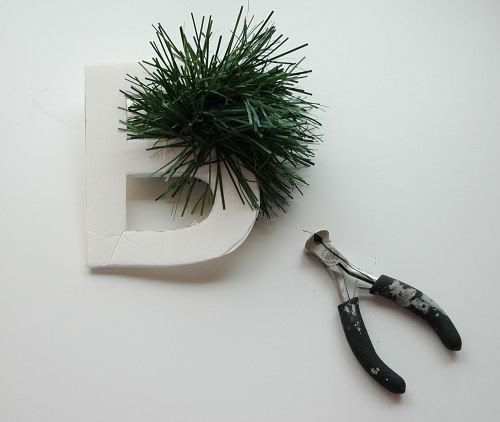
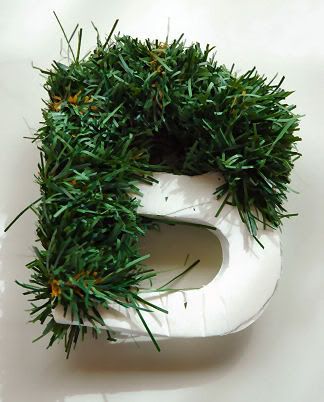
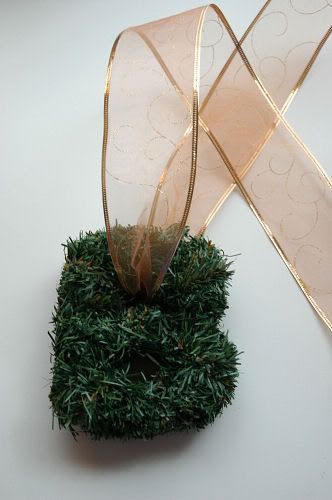
Then, I cut a roughly 12 inch section from one of my garlands with the wire cutters. Starting from the back of the letter, I wrapped that section around part of my letter.

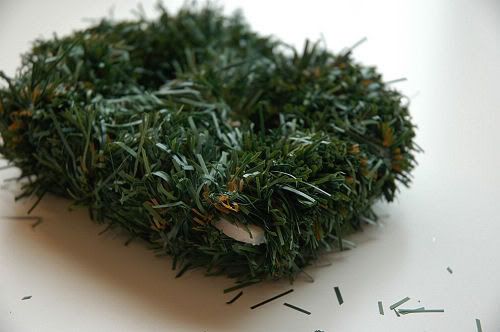
My letter looked like it had crazy professor eyebrows (you know the ones), so I just gave it a haircut, cutting as closely to the letter as possible. If you are smart (unlike me), you’ll hold it over a waste basket to collect the trimmings. I, on the other hand, now have a green shag rug on my craft room floor.

Keep cutting 12 inch sections, wrapping, and hair cutting. I recommend the 12 inch sections, because it’s much easier to work with than trying to wrap the entire 15 feet of garland.

If you break your letter, don’t worry. Just tape it or glue gun it back together. The wired garland will hide the break.

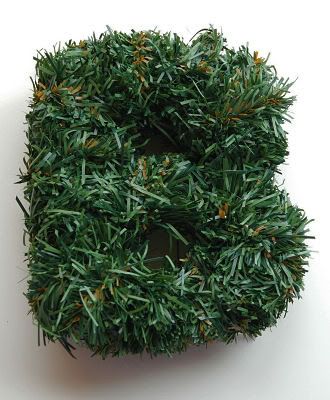
When you finish wrapping your letter, you’ll have a stunning wreath!

Just kidding. You’ll need to trim some more. And trim, and trim, and trim. Cut it as close as possible so that you can see the shape of the letter really well. If you are like me and are using a letter with “holes” in it, be sure you stick your scissors in there and really trim out that hole as best you can.

If you find that you have some of the foam peeking through, no worries. Cut a small section of garland (3 or 4 inches) and re-wrap that part of the letter. Don’t forget to trim the new section!

The last step is a simple one. Just thread a length of ribbon through a “hole” on your letter. If your letter has no “holes” and is not one you can hang well, like ‘S’ or ‘C,’ you can attach your ribbon with a glue gun on the back of the letter.

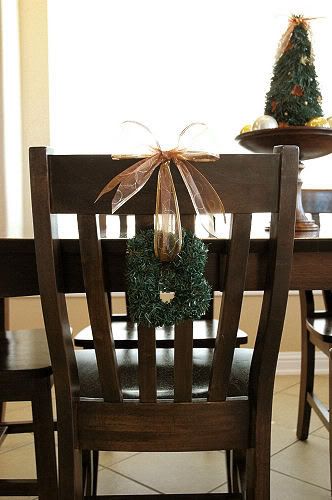
I hung one of my mini wreaths on the back of each of my breakfast room chairs by tying a bow on the top of the chair. I absolutely love the way it looks.

You could hang them just about anywhere – stair railings, lamps, or even on a nail in the wall. It would be pretty easy to make them in a larger version, too.

What do you think? Do you like the Ballard Designs wreath or the Lindsay Ballard Designs wreath better? You’ve been wondering what my ‘B’ monogram stands for, haven’t you?

********************

For even more easy holiday DIYs, hop on over to Centsational Girl. I have a fun tutorial over there today featuring sequins. Sparkle, sparkle, sparkle! Thanks for having me, Kate!

« Previous Page
Next Page »
  • Email
  • Facebook
  • Instagram
  • Pinterest
  • Twitter

About Makely

Lindsay Ballard is a former college mascot turned political geek turned roller derby playing, DIY fanatic.

Lindsay chronicles her projects, design ideas, and lifestyle tips here at Makely, where she shares tutorials and inspiration. Her DIY designs are bold and graphic, while her spirit is fun and full of color.


Archives

Categories

PRIVACY POLICY
Copyright © 2009-2019 Makely School for Girls | All Rights Reserved | Posts may contain advertising content or affiliate links