Makely

Let's Make Life Awesome

  • Home
  • Decorating/DIY
    • Create Your Decor
    • Decorate Your Home
    • Paint Your Walls
    • Transform Your Furniture
  • Healthy Living
    • Essential Oils
    • Family Wellness
    • Household Care
  • Project Gallery
  • Contact
You are visiting: Home » Project Gallery » Page 59

Mastering the Master Bedroom {the Reveal!}

by Lindsay Ballard on January 23, 2012 2,061 Comments

Nearly one year after I began the process of transforming our master bedroom into a unique and inspired space, I’m happy to {finally} report that the transition is now complete.

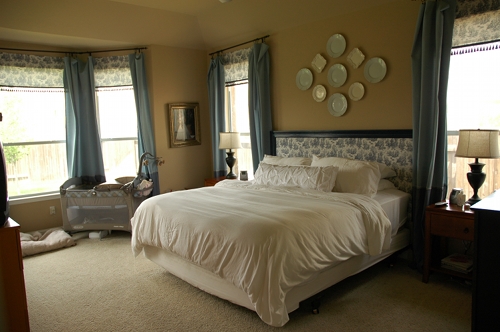
If you will remember, my master bedroom used to look like this – plates, toile and all.  It was a nice space, but it was safe, unfinished and certainly didn’t scream Lindsay.
The new room is a 180-degree turn from the previous.  It may be too bold for some.  It may be too busy for others.  But for me?  It’s just right.

It’s hardly recognizable as the same room, don’t you think?  It took what seemed like a million years to complete, but I made each (and sometimes agonizing) decision in a thoughtful manner, making sure that each item placed in the room was one that brought a smile to my face and joy to my heart.  Every thing has a purpose.

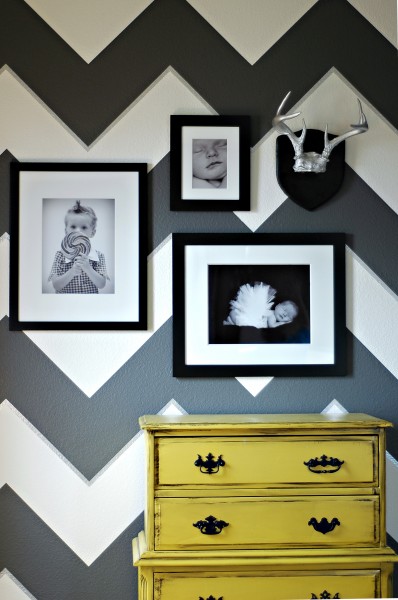
One of my favorite views is the one of the bed, where I can see the wonderful gallery of photos of my little family.  Our family photographer had them printed on metallic paper for me, so they shimmer in the sunlight.
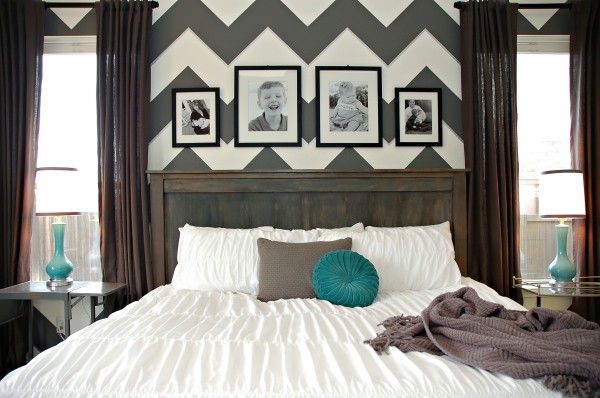
On my side of the bed, you’ll find the mid-century modern bar cart that I defiled updated to use as a nightstand.  You’ll also see my bright yellow dresser and more black and white photos of my kiddos.  I picked up the silver and black antlers at the Round Top Antique Show.  My husband isn’t a fan of them, but I’m a big enough fan for the both of us!
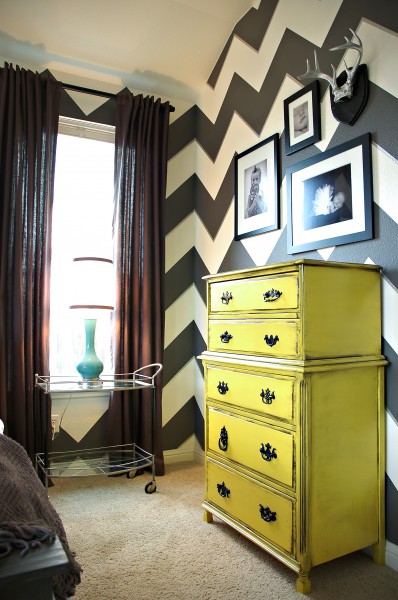
The chevron walls are a surprise shock to some, but we love them just the same.  Two of our walls are painted with bold gray chevrons underlined in a thin silver, metallic stripe.  The other two walls are just solid gray.  I’ve had some readers say to me, “I could never sleep in a room with such busy walls,” but it doesn’t bother us in the slightest.  After all, our eyes are closed when we sleep. 😉 Instead, we feel like we are falling to sleep in the pages of a magazine, and that’s a pretty cool feeling.
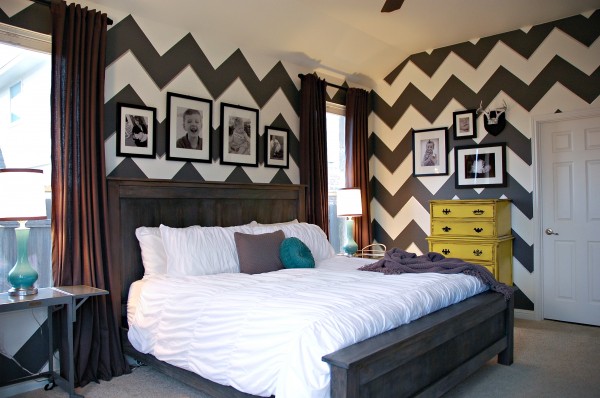
My husband’s side of the bed features a great typing cart I found at a local antique store.  It’s the perfect color, perfect size, and perfect story – the label on the front of it says that it is from the Tiffany Stand Company in Saint Louis, Missouri.  So is he.  Well, he’s not from the Tiffany Stand Company, but he is from Saint Louis.
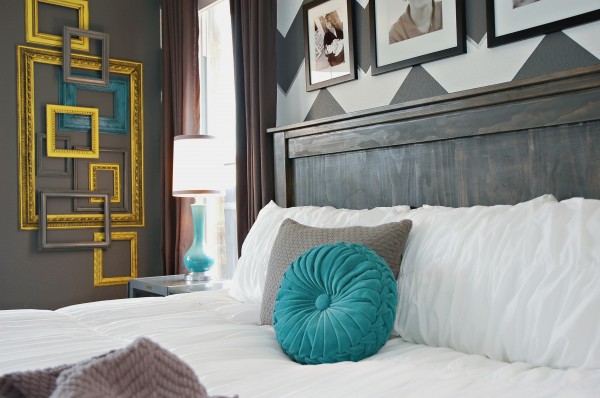
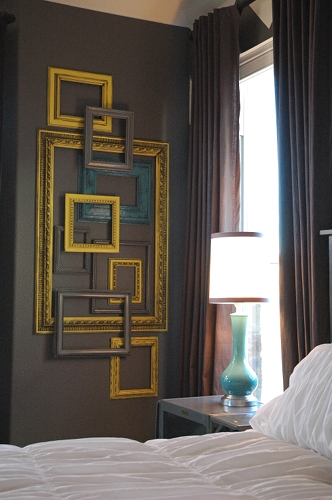
He also gets an up close and personal view of my layered, open frame collection.  Lucky him!
Of course, I can’t leave out my little thrift store cast-off dresser.  It’s proof positive that you CAN turn something ugly into something beautiful.
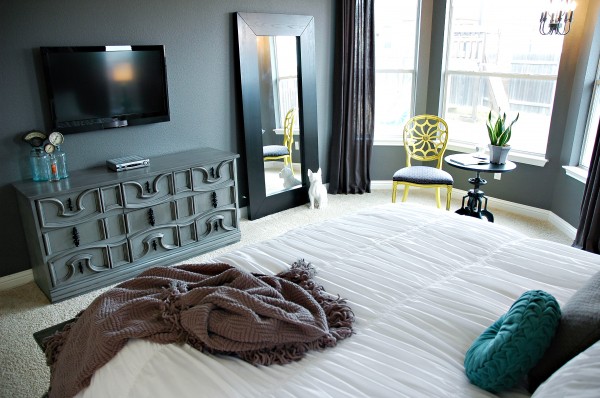
I installed white bottom up/top down cellular shades in all the windows.  They are perfect for the room because we generally only have them cover the middle of the windows for privacy (they are fully raised in the photos), and we get tons of bright sunlight in the room.  I added an industrial crank table, yellow chair and a ReStore restored chandelier to create a little sitting space.  It’s perfect for having a cup of coffee or tying your shoes.

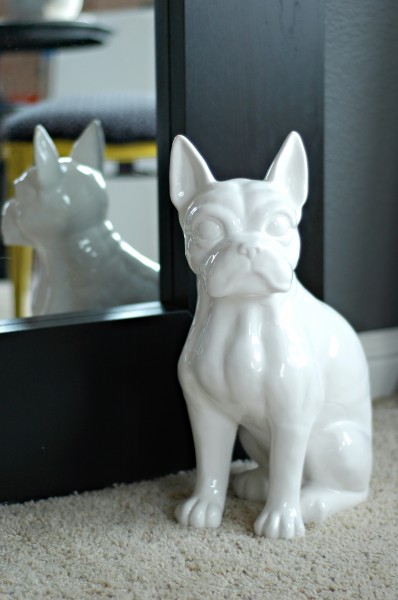
Next to the sitting area is my leaning mirror and Brutus, the cute white French Bulldog statue I found at one of those stores where you never really find much of anything good.  My husband and son delight in dressing him up in silly outfits, and I make a big production of being put off about it.  🙂
I am so happy to share my completed room with you.  It is everything I imagined…and more.  A bunch of thrift and antique store finds can certainly come together in a modern, eclectic fashion.

I’ll put together a tutorial and source list and post that in a few days.  Until then, here’s to me finally getting it finished!  (Update: Here’s the list of sources and tutorials.)
Mastering the Master Bedroom {Layered Frame Gallery Wall}

by Lindsay Ballard on January 9, 2012 2,752 Comments

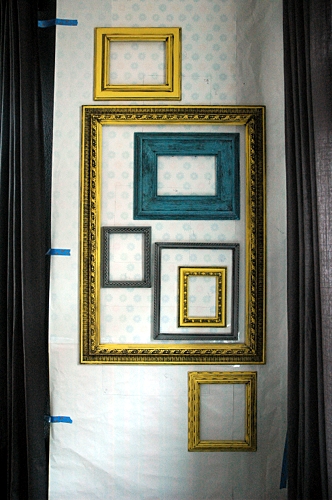
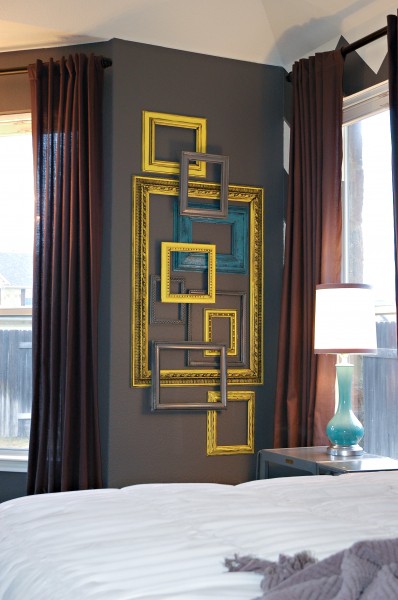
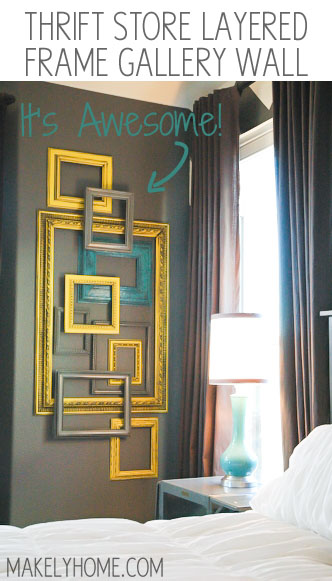
The very last project I had to complete in the master bedroom was to come up with something to fill a blank corner wall between two sets of windows.  The wall is one that you see when you walk into the room, so I wanted it to make a big visual impact.  Because I felt that little space was so important in setting the tone of the room, I also wanted it to be something unique.  After much consideration, I ended up with a wall of colorful, layered open frames.

This is such an inexpensive way to create art in a big space - Thrift store frames used to make a layered frame gallery wall via MakelyHome.com

Bestow my little thumping heart!  Every single thing I’ve placed in the bedroom brings me so much joy, and this wall is no exception.

It took me a bit of trial and error to figure out exactly how to hang the layered frames.  There are great tutorials for hanging filled frames in a layered fashion, but the open frames presented a unique challenge because you have such a small area from which to hang since there is no back on the frame.  Since I was finally able to figure it out, I’m happy to walk you through the steps in case you’d like to create a similar wall of your own.

How to Create a Layered, Open Frame Gallery Wall

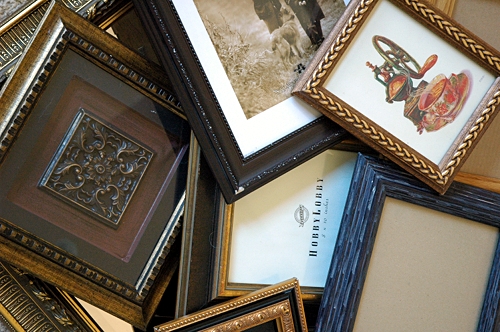
1.  Gather a good number of frames in various sizes and designs.  You will want one very large frame, some medium ones and some small ones.  The amount you need will vary depending upon the size of your wall, but I used a total of 10 frames.  I found all of mine while making two different trips to Goodwill.  Look for frames with a lot of detailing.

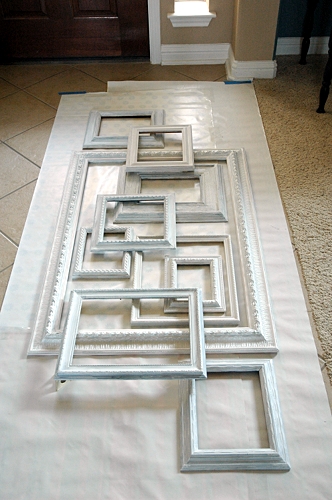
2.  Next, measure the length and width of the space on the wall you would like to fill.  Since my wall was on the small side, I took the measurements of the entire wall.  Then, lay out paper the size of your measurements on your floor.  Butcher or brown kraft paper is often used for this purpose, but I taped together a few rolls of old wrapping paper that I knew I’d never use on gifts.  You’ll want to mark eye level on the frames and use this as a “center” point, as you traditionally want to hang framed art at eye level.

Take the old artwork and glass out of your frames, prime them (I used Kilz latex and a Purdy brush) and arrange them on the paper until you find a pattern that you like.  Use a pencil to trace the outline of each frame. I labeled each outline and frame with a corresponding number so that I could more easily replace the frames.

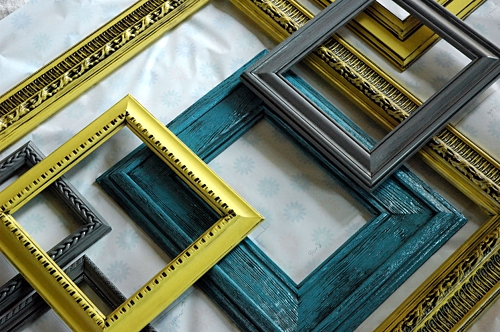
At this point, I decided which of my three colors – yellow, light grey or teal – to paint each frame.  I also labeled each with the color.

3. Next, you will paint your labeled frames.  You can use either spray paint or a brush – just make sure you get good coverage on each frame.  I used leftover latex paint from my yellow dresser (Sherwin-Williams Decisive Yellow), matching spray paint from my gray dresser (Krylon in Classic Gray), and a lovely teal spray paint that I found in my garage from another project (American Accents in Lagoon).  After painting, I used my trusty Ralph Lauren glaze tinted to Black Silk.  Really work the glaze into the detailing with a cheap, chip brush.  Work a section at a time and wipe the glaze off of the high spots with a wet cloth, wipe with a dry cloth to remove the bulk of the glaze that’s not down in the detailing, and then wipe with another wet cloth to make sure the frame doesn’t look dingy.  Mandi at Vintage Revivals has a great tutorial on this technique.

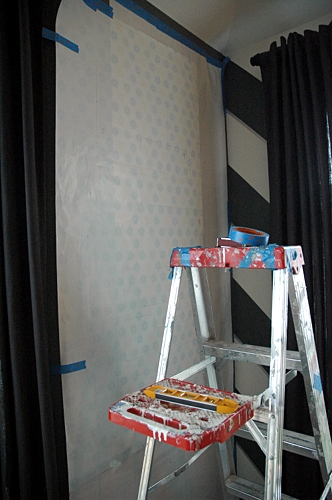
4.  Hang your paper template on the wall.  I just held mine in place with painter’s tape.

5.  Now, go ahead and hang your frames that will be directly against the wall.  I put two nails into the wall and hung them on the lip of the frame where the glass would usually go.  I used a level to make sure that the nails for each frame were level.

6.  Here was the tricky part for me.  I tried to use several types of construction strength adhesives to attach the 2nd level of frames to the first.  Perhaps it was they were painted, but nothing would adhere!  So, I ended up going the old fashion route – a drill and hammer.  The instructions make it sound a lot more complicated that it really is.

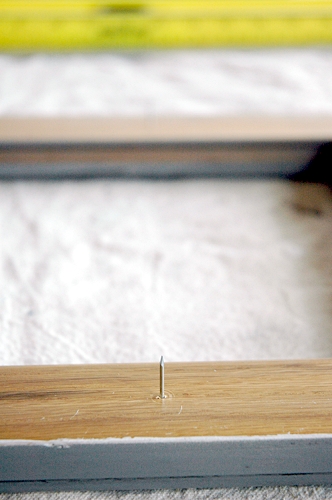
Take the first of your frames that would be on the top layer, and figure out where it would overlap the bottom frames.  On the back of the top frame, drill a small hole just large enough for a tiny wire nail to fit into.  Snip the head off of a wire nail with snips and put it upside down in the hole, so the pointy side up.  I did this in two places – you’ll want your frames to attach in at least two places.

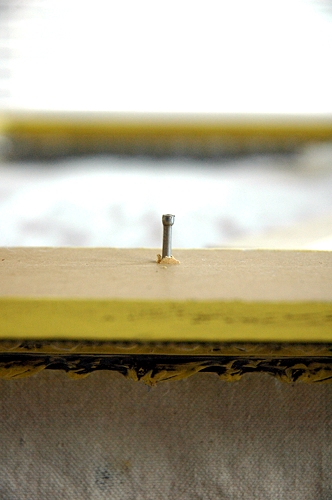
7.  Take your bottom layer frame off the wall and lay it flat on a table, fancy side up.  Position your top layer frame (the one with the nails) where you want it on the bottom layer frame and push down.  The two nails will create little holes on the front side of the bottom layer frame.  Use your drill to drill those holes all the way through to the back of the frame.  In those locations, hammer finish nails in far enough so that the points start to come through the front of the frame.

8.  Take the little wire nails out of the top layer frame and position the tips of the nails from the bottom frame into the little holes where the wire nails used to be (both sides will now be fancy sides down).  Hammer the finishing nails in so they go about half way into the top frame.  Be careful that you don’t go all the way through!

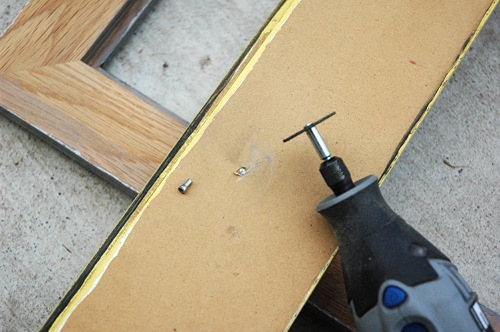
You will likely have some of the nail head sticking up on the back of the bottom frame.  Just use a Dremel to cut the nail down flush with the back of the frame.

9.  Repeat that process for your other layered frames.

When you are ready, tear down the paper template and hang the bottom layer on your wall.  The top layer frames will hang with no problem and will be sturdy enough.  As long as you don’t decide to swing from them, they will hold on just fine.  I put 3M Command Poster strips on the bottom of each frame so they would stick to the wall and not shift.  Love those things!

The friends who have been to my house since I hung these layered frames have been blown away.  It’s an easy and cheap way to take up a lot of wall space, and the result looks incredible.  Do you think you have a spot in your home for something like this?

The reveal of the complete master bedroom is coming up next week.  Did you EVER think it would be finished?  I was beginning to have my doubts!  😀

 Linking up this post with Beth’s Tutorials & Tips Link Party at Home Stories A to Z.

« Previous Page
Next Page »
  • Email
  • Facebook
  • Instagram
  • Pinterest
  • Twitter

About Makely

Lindsay Ballard is a former college mascot turned political geek turned roller derby playing, DIY fanatic.

Lindsay chronicles her projects, design ideas, and lifestyle tips here at Makely, where she shares tutorials and inspiration. Her DIY designs are bold and graphic, while her spirit is fun and full of color.


Archives

Categories

PRIVACY POLICY
Copyright © 2009-2019 Makely School for Girls | All Rights Reserved | Posts may contain advertising content or affiliate links