Makely

Let's Make Life Awesome

  • Home
  • Decorating/DIY
    • Create Your Decor
    • Decorate Your Home
    • Paint Your Walls
    • Transform Your Furniture
  • Healthy Living
    • Essential Oils
    • Family Wellness
    • Household Care
  • Project Gallery
  • Contact
You are visiting: Home » Project Gallery » Page 58

The Evolution of a Light Fixture

by Lindsay Ballard on February 15, 2012 1,276 Comments

As the days pass, I become more and more in love with interesting light fixtures for my home.  So often I feel like lighting is overlooked when a simple change to an existing fixture would make a tremendous impact in a room.

Enter the sad, builder’s grade vanity fixtures that we have in every bathroom of our house.
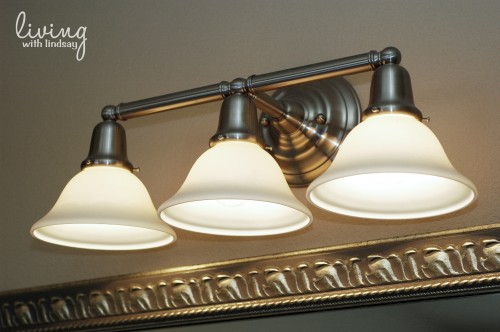
There’s nothing particularly wrong with the vanity fixtures, but they are boring and cast all of the light downwards.  I’ve long thought that their days were numbered, so I spent a lot of time shopping for a new fixture to put into the powder bath I am redoing.  Unlike the one shown above, the original fixture in that bathroom only had two lights, so that room could have a whopping two, 60-watt light bulbs.  Since it was the only fixture in the room, you can bet that the light in there was very depressing.

Because I am going to replace them all eventually, I decided to play musical light fixtures.  I swapped the fixture above my sink in the master with the 2-light model from the powder bath.  I spray painted the 3-light fixture flat black (Rustoleum Universal Flat Black), bought clear, seeded glass shades, and put in those Edison bulbs I love so much.
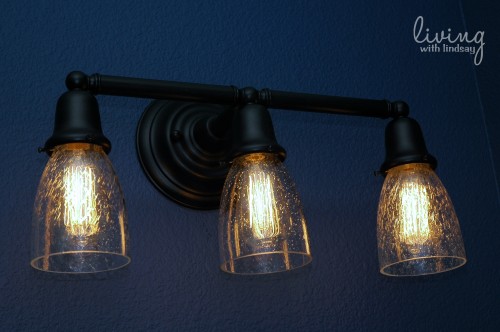
And it was a big, fat negatory!  The color was wrong with the other fixture we were installing in the ceiling to add more light, the shades were too wimpy, and the heavily seeded glass greatly distorted the look of the bulbs.  It was time to go back to the drawing board.

I took the fixture down and sprayed it in a Rustoleum Oil Rubbed Bronze finish, but it really didn’t look too different than the flat black.  So, I sprayed it again (by now, this is it’s 3rd coat of paint) in a Rustoleum Antique Copper finish.  Closer, but still not right.

So, what did I do?  Well, I got artistic.  I grabbed a can of Krylon Leather Brown that I had in my garage and gave it a quick once over to darken the copper.  I essentially just misted it instead of coating it.  Then, I did the same thing with a mist of the Rustoleum Metallic Oil Rubbed Bronze that I had used before.
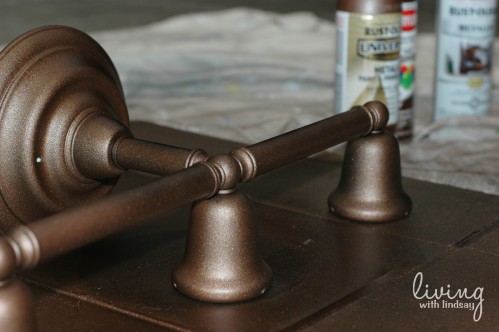
It was much better, but it still wasn’t exactly what I wanted.  So, I did just as you would expect and glazed it with my beloved Ralph Lauren glaze tinted to Black Silk.  I swapped the shades for a larger, less seeded bell shape.  It was suddenly perfection and coordinated so well with our newly installed overhead lighting.
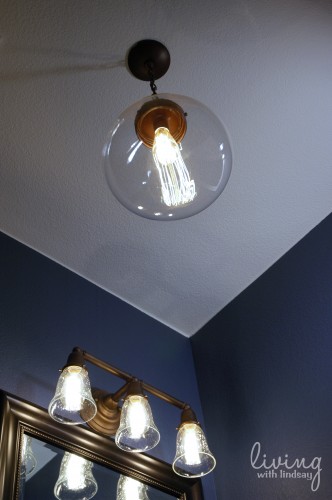
The moral of this story is not to be afraid to try to change the look of something in your home that you were planning on getting rid of anyway.  I saved myself a great deal of money by not having to buy a new fixture, and with my layering and misting of different paints, I was able to customize the finish to fit my room.  Always remember that if you don’t like it in the first place, no harm can come from trying to change it.  <–Tweet This.

The rest of the bathroom reveal is coming soon.  I had some friends over for a little girl time this weekend, and they were all blown away by seeing it in person.  Maybe I can figure out how to fly each of you down here for the grand tour.  🙂

Do you have anything original to your home that you hated but now love thanks to a simple update?  If not, grab those spray paint cans and get to work!
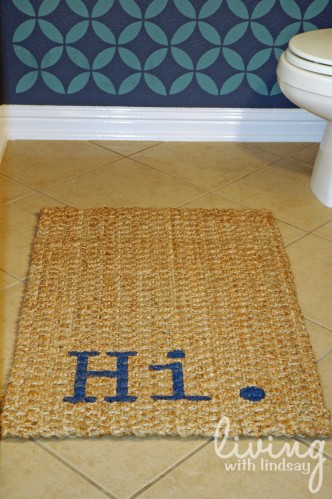
Hi. I’m a New Rug.

by Lindsay Ballard on February 2, 2012 1,913 Comments

Over the last few weeks, I’ve been working on updating the powder bath in the entryway of our home.  It’s always been unremarkably boring, but since it’s the bathroom that a) you see when you walk into the house and b) our visitors always use, it was overdue for a little revamp.

I have a few more things to finish before I can reveal the entire room to you, but I must say that it is pure bold, vintage quirk.   Oooooh, that sounds like a perfect eclectic style mix, doesn’t it?  However, I do want to show you a fun little piece that can be completed in under 15 minutes.

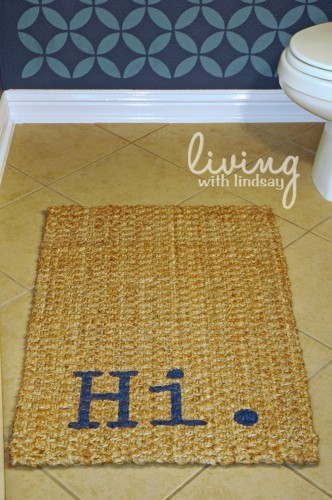
Well, hello to you, too!

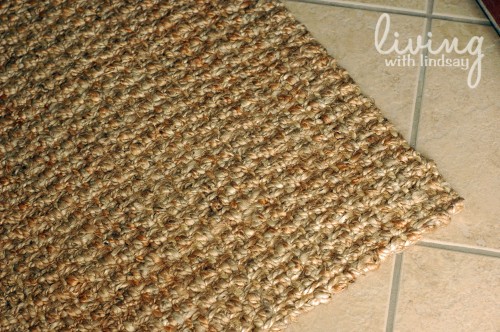
The floor needed a small, textured rug, but necessity didn’t mean that it had to be plain and boring.  The simplest process ever yields a “talking” rug.  Besides, who wouldn’t want a little greeting when they walk into a room?

How to Paint a Talking Rug

1.  Find a natural fibered rug, such as jute or sisal.  The rug I used is a 2 x 3 jute rug that I picked up at Cost Plus/World Market for $16.99.  As a side note, they have really great natural rugs for reasonable prices, so make sure you check them out when you are in the rug market.

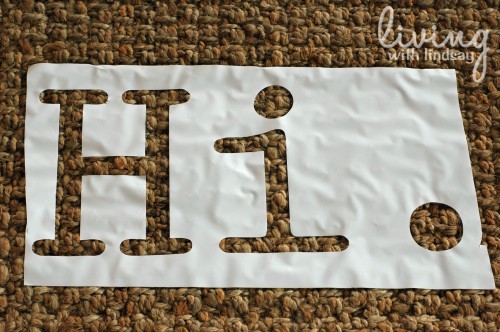
2.  Cut your word out of vinyl and position it on your rug.  I used my Silhouette SD to cut out the word, but you absolutely do not need to have a craft cutter to do this.  You could trace your word onto a piece of sticky vinyl shelf paper (i.e. Contact paper) and cut out the stencil by hand.  The font I used can be downloaded here for free.

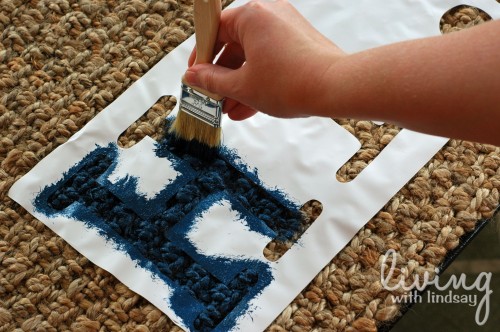
3.  Dab your paint onto the rug with a cheap chip brush, using a up and down motion.  The vinyl won’t stick incredibly well to the rug, so I wouldn’t brush the paint on to ensure that your brush won’t slip under the vinyl.  Any craft paint would likely do, but I am using Martha Stewart craft paint because it is really thick and creamy.  The color I chose is Wild Blueberry, which looks like a dark navy under the light in my room (remember that your lighting will effect your color choice!).

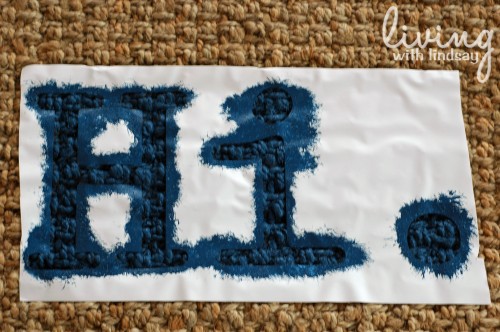
4.  Keep dabbing until your stencil is completely filled in and only solid color shows through.  For reference, it took me under 5 minutes to fill in my word.

5.  Carefully remove the vinyl and put your rug in a place where it can dry.  If you are in a hurry, you can use a hairdryer and it will dry more quickly.

I love my little “statement” piece and the fun that it brings my tiny bathroom.  If the paint comes off after a lot of wear, I could easily touch up the paint.  Or, for only $16.99, maybe I’ll buy a new rug and give it a new voice.

What say you?  Could you use a little unexpected greeting somewhere in your home?


« Previous Page
Next Page »
  • Email
  • Facebook
  • Instagram
  • Pinterest
  • Twitter

About Makely

Lindsay Ballard is a former college mascot turned political geek turned roller derby playing, DIY fanatic.

Lindsay chronicles her projects, design ideas, and lifestyle tips here at Makely, where she shares tutorials and inspiration. Her DIY designs are bold and graphic, while her spirit is fun and full of color.


Archives

Categories

PRIVACY POLICY
Copyright © 2009-2019 Makely School for Girls | All Rights Reserved | Posts may contain advertising content or affiliate links