Makely

Let's Make Life Awesome

  • Home
  • Decorating/DIY
    • Create Your Decor
    • Decorate Your Home
    • Paint Your Walls
    • Transform Your Furniture
  • Healthy Living
    • Essential Oils
    • Family Wellness
    • Household Care
  • Project Gallery
  • Contact
You are visiting: Home » Project Gallery » Page 73

DIY Rosette Embellished Pillow

by Lindsay Ballard on March 2, 2011 1,880 Comments

Technology is an amazing thing. Last week, I spied a Dwell Studio for Target pillow I loved, only the colors were wrong for my home. I tweeted the picture asking for ideas on how to replicate it, and I had several replies within minutes saying it would be easy to do.
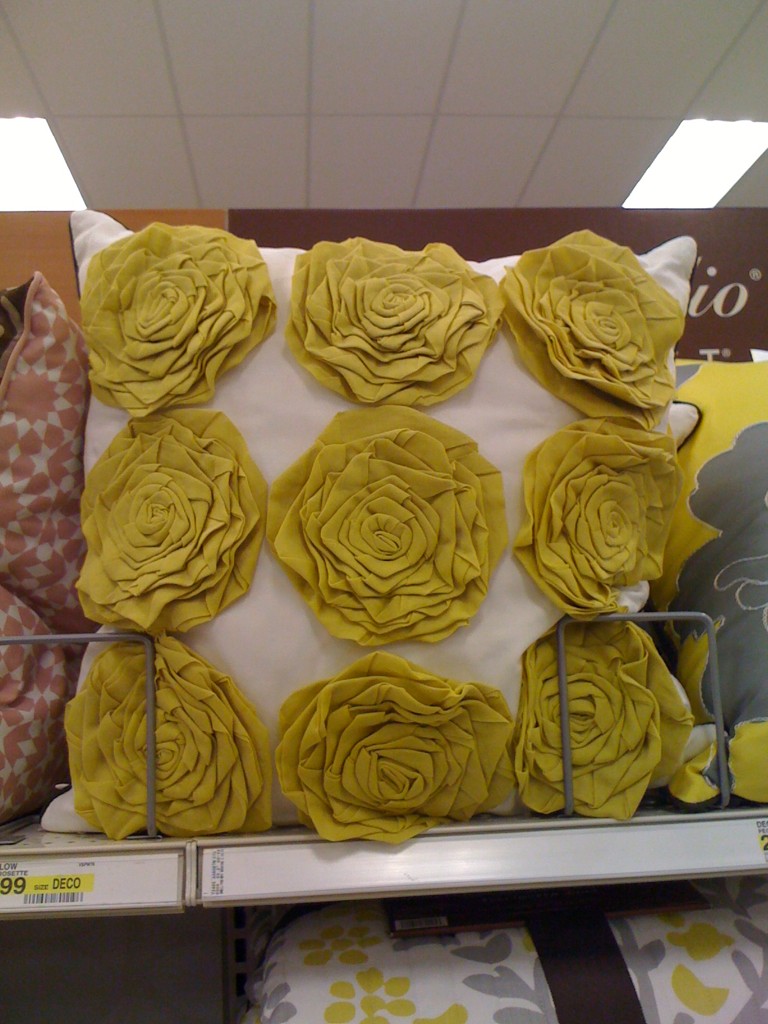
One such reply came from Gina @ Stampin’ with Gina.  She sent me a few pictures of different rosettes she made, and when I told her which one I liked the most, she even wrote a tutorial for me on her blog – all by that evening.  That’s technology at work, my friends!  {I have since found a nearly exact replica of the Dwell Studio pillow in a tutorial over at Crazy Wonderful!}

Since I figured out how to make the rosettes (with Gina’s guidance), I could go crazy and create my own design inspired by not only the Dwell Studio for Target pillow but also this amazing Ankasa ($540!!!) pillow I spotted in the March edition of House Beautiful:
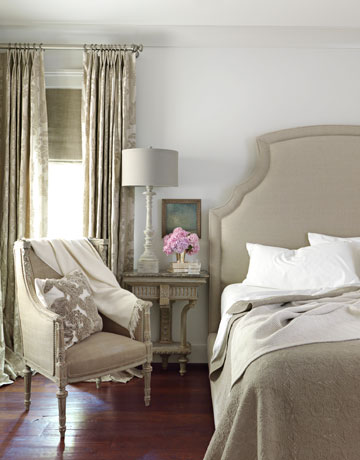
House Beautiful

I put together a tutorial of the process I used so that you can put your own twist on the rosette embellished pillow.

Rosette Embellished Pillow

Supplies:

  • Pillow cover (mine is a 20 x 20 ivory “Aina” from Ikea)
  • Pillow insert (I used a down “Fjädrar” insert, also from Ikea)
  • Fabric for rosettes (any fabric will work – I used 1 yard of cotton gauze)
  • Felt
  • Glue gun w/ glue sticks
  • Straight pins
  • Aluminum foil
  • Fabric glue (permanent)

Directions

1.  I began by cutting my fabric into 2 inch wide strips, per Gina’s instructions.  I just sort of eyeballed it because they don’t have to be perfect.  Because I was using 1 yard of fabric, my strips were 1 yard long and 2 inches wide.

2.  Next, I put a dot of glue…oh, wait.  Just see for yourself.  Here’s the video I put together on making the flowers, which is slightly different for this project than Gina’s technique:


3.  After I made all of my flowers, I laid them out in a design on the pillow cover WHILE the pillow insert was inserted.  You will want to see how it looks with the dimension of the pillow in the cover, not just with the cover lying flat.  After you have arranged your flowers in a fun design, pin them in place as best you can with the straight pins.
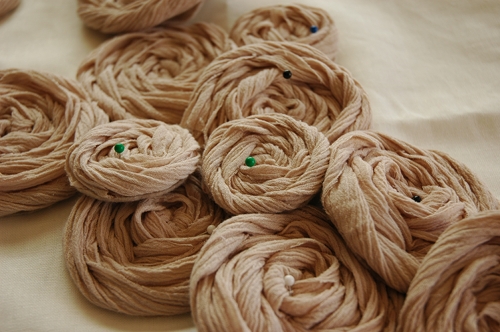
 

4.  Slide the pillow insert out of the cover and insert some aluminum foil in its place.  This will keep the fabric glue you are about to use from gluing your cover shut.

5.  On the felt side of the rosettes, apply a good amount of fabric glue.  I applied the glue in a circle around the edges and then made an X in the center.  If your rosettes are layered in your design, work from the bottom up.  It helps to take a quick photo of your arrangement in case you have to move them around when gluing.
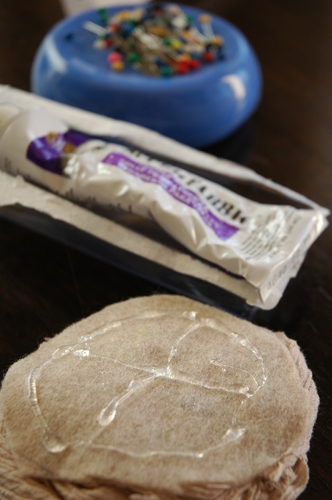
6.  Once your rosettes are glued to the pillow cover, find something heavy to lay on top of them while the glue dries.  I used a few heavy books and left them there for a few hours.  Then, I removed the books and let the glue set overnight.

7.  The next morning, the pillow was ready to go in the insert, and I was ready to have a gorgeous designer-inspired throw pillow!
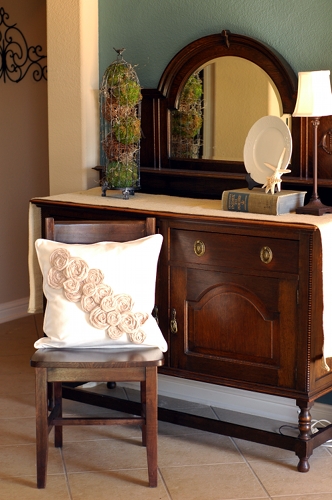
Want to add some color to your decor?  Look beyond my beige flowers and try some in brightly colored fabrics.
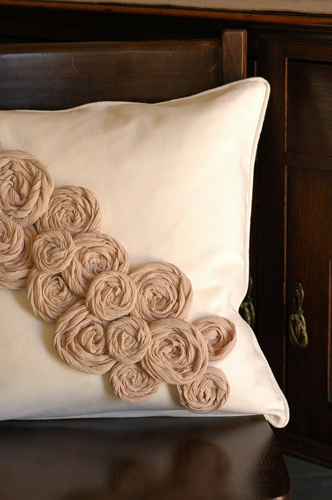
Seems like an easy weekend project, huh?  Get to it!

P.S. My pillow and I are partying at Gina’s Transformation Thursday at the Shabby Chic Cottage.
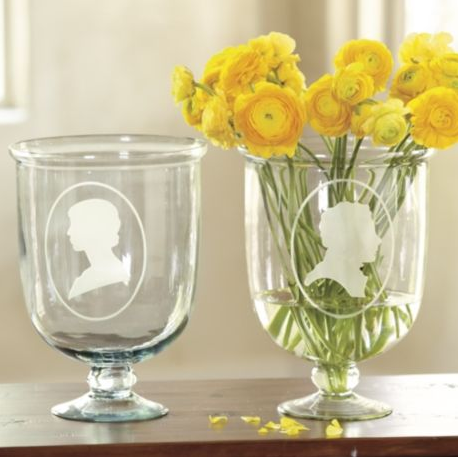
Ballard Designs Knock-Off: Etched Silhouette Glassware

by Lindsay Ballard on January 17, 2011 1,292 Comments

When the February issue of Country Living arrived in my mailbox, I was happy to see it was the white issue. I had just completely undecorated my home, and the fresh, clean white designs in the magazine where just what I needed.

Country Living highlighted a few of their very favorite white accessories, and these etched silhouette hurricanes from Ballard Designs certainly caught my eye. I am obsessed with silhouettes, so when I love something, it becomes all I want until I get sick of it. Wait until you see what I’m going to show you in the next week or so…

Anyway, I only wanted the male version of the vase, but at $49, I really couldn’t justify it. Then, I remembered that I had my Silhouette machine and etching cream. I’ll be the first to admit that I’ve totally screwed up glass etching before (just ask my friend Kelly why she doesn’t have a full matching set of monogrammed glasses I gave her when she got married), so I was a little concerned about messing up a hurricane.

Well, Silhouette America came to my rescue! They now offer frosted vinyl that looks exactly like etched glass when you put it on clear glass or a mirror. I love that I can apply the frosted vinyl to get the look I want, and then remove it when I’m ready for a change.

I set out to make my Ballard Designs knock-off with a large hurricane that Tom and I had received as a wedding gift. It wasn’t footed like the Ballard hurricane, but it was free, so it was good enough. I googled “Victorian Man Silhouette” – lo and behold I found the EXACT same silhouette Ballard Designs used to make their etched version. Score!

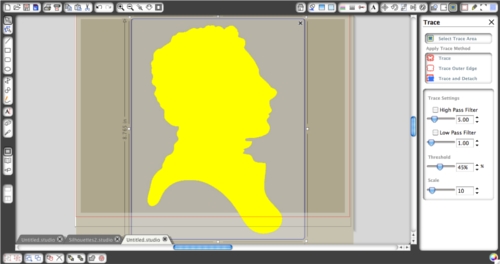
With the Silhouette software, it’s easy to make a vinyl (or paper) cut out of a silhouetted shape. You simply open the picture in the software, open the trace window, and select the silhouetted shape as the area to trace. Then, uncheck “High Pass Filter” and select “Trace Outer Edge.” It’s really that easy.

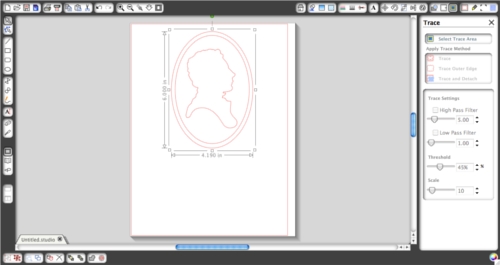
Now that I had my outline, I added two ovals with the Ellipse Drawing Tool and I was ready to cut.


I didn’t realize that applying vinyl to such a large curved surface would be so difficult, and it was a miserable failure. I cut it 2 or 3 times and tried different application techniques, only to get folds in my vinyl. I’ll have to work on figuring out how to do that.

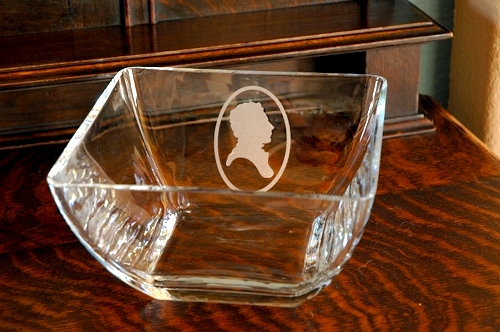
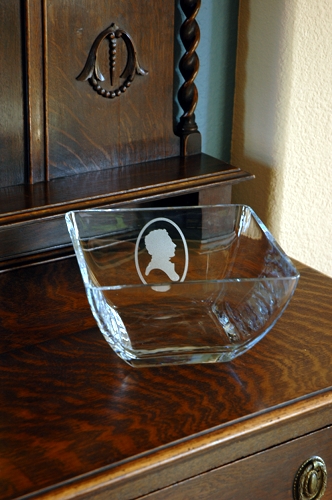
So, I went back to the drawing board and remembered that I had a lovely square glass bowl that we also received as a wedding gift. I cut two smaller versions of my silhouette design (since I figured I’d screw one of them up!) and applied only one on the inside of one of the bowl’s sides.

I am really happy with the way it turned out. I think the juxtaposition of the vintage-themed silhouette with the modern lines of the bowl is really fun. What do you think?

P.S. Silhouette is running a great promotion this month! If you go here and use the code LINDSAY, you can purchase your very own Silhouette SD machine package that includes 2 rolls of premium vinyl, 1 roll of transfer paper and a CD of Home Decor designs. This is a $395 value, but the code lets you grab it for $225!  This promotion runs through January 22nd.

P.P.S. Already have a Silhouette SD but need more vinyl – if you are like me, you can never have enough! Go here and use the code LINDSAY to purchase the premium vinyl (the indoor/outdoor stuff) for 25% off. This promotion runs through January 22nd.

« Previous Page
Next Page »
  • Email
  • Facebook
  • Instagram
  • Pinterest
  • Twitter

About Makely

Lindsay Ballard is a former college mascot turned political geek turned roller derby playing, DIY fanatic.

Lindsay chronicles her projects, design ideas, and lifestyle tips here at Makely, where she shares tutorials and inspiration. Her DIY designs are bold and graphic, while her spirit is fun and full of color.


Archives

Categories

PRIVACY POLICY
Copyright © 2009-2019 Makely School for Girls | All Rights Reserved | Posts may contain advertising content or affiliate links