Makely

Let's Make Life Awesome

  • Home
  • Decorating/DIY
    • Create Your Decor
    • Decorate Your Home
    • Paint Your Walls
    • Transform Your Furniture
  • Healthy Living
    • Essential Oils
    • Family Wellness
    • Household Care
  • Project Gallery
  • Contact
You are visiting: Home » Project Gallery » Page 78

The Fall Wreath Makes a Comeback

by Lindsay Ballard on April 15, 2010 103 Comments

Do you want to learn to create this wreath?  Find the tutorial here! 

Remember this wreath that I showed you back in the Fall?
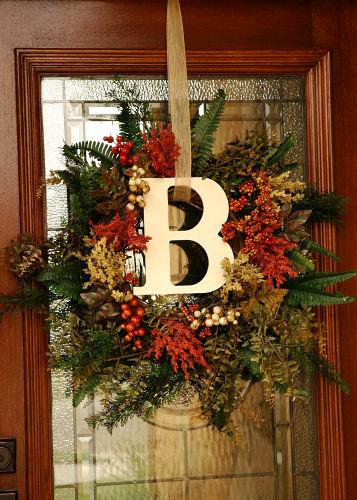
It was fluffy and hearty and just the bee’s knees.

I loved that wreath so much that it got to make a comeback earlier this week.
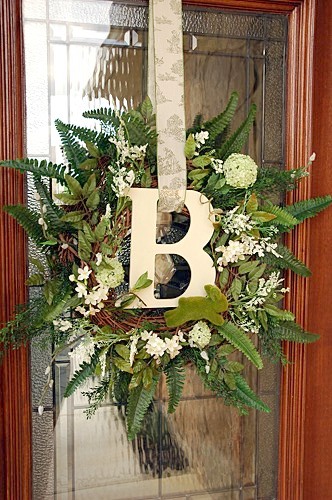
With her Fall berries and florals replaced, she now welcomes my favorite season of the year.
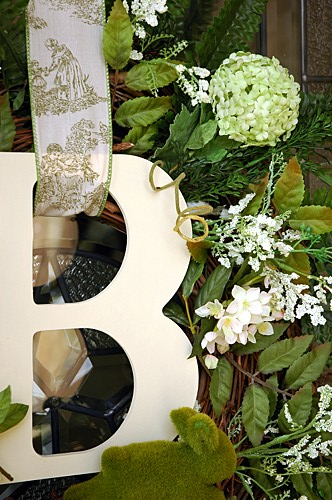
If you’ll recall, I made the Fall wreath by just sticking greenery and floral stems into the grapevine wreath.  Now that she was ready for a change, I just pulled out all of the Fall stuff and crammed some Spring stuff in.  Easy, huh?  I even added one of last year’s must-have Spring accessories, a Pier One moss bunny.
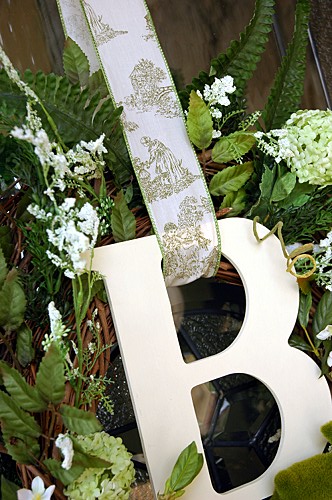
I was really moved by green and white when I was putting this wreath together, but it will gain more color as Summer approaches.

Do you want to learn to create this wreath?  Find the tutorial here! 
DIY “Real-ish” Handcut Silhouettes

by Lindsay Ballard on January 28, 2010 934 Comments

In my on-going effort to re-do my powder bath, I have been trying to collect handcut silhouettes to display on my crazy stenciled wall (oh, yeah – I have decided to stencil!). I search antique and vintage stores quite often, but “real” silhouettes are actually pretty hard to come by. In fact, I have only found 3 in all of my looking, and only one of those was unique enough for me to purchase. I know that I can find them on Ebay and Etsy, but I really like to get a close look at them before I purchase.

So, as I continue my silhouette search, I knew that I had to take matters into my own DIY hands. I have decided to mix a collection of “real” and “real-ish” silhouettes on my wall. All of my family members will be represented. Won’t my in-laws be so excited and surprised to sit for their portraits when they come to visit this weekend?

Although not as special as the real thing that are cut by an artist simply looking at your profile in about one minute, DIY silhouettes are incredibly easy to make. Let me show you!

DIY “Real-ish” Handcut Silhouettes

Supplies

  • Profile picture of your subject
  • Black cardstock paper
  • Off-white cardstock paper
  • Pen that will write on the black paper
  • Sharp scissors (like embroidery or manicure scissors)
  • Picture frame

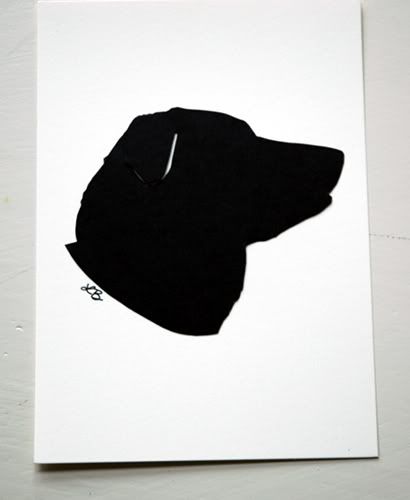
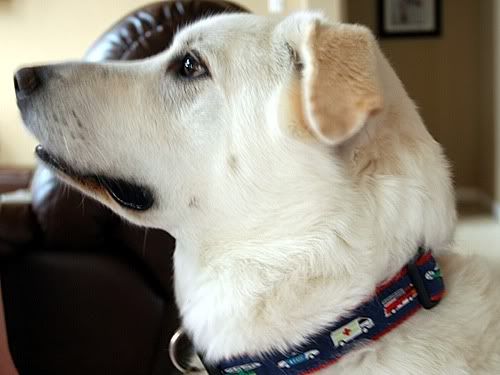
I began with this picture of Jackson.

I said I was doing silhouettes of all my family members, right? Meet Jackson, better known as Jack, BaBa Jack, and Bubba. He was our first baby, and is totally a member of the family. We also have another dog and a cat who are going to have their silhouettes cut. I do draw the line at cutting the fish.

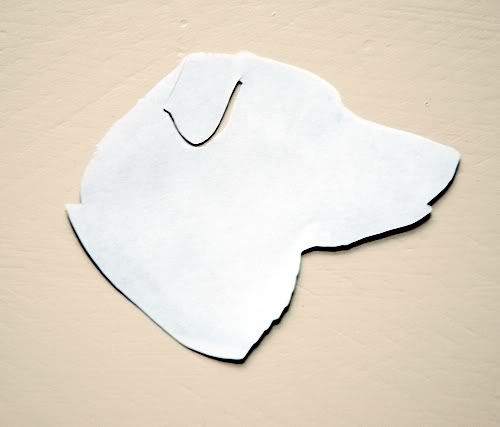
I resized this photo so that Jack’s head would fit within my 5×7 frame. Traditionally, most silhouettes fit into a 5×7 oval frame, but all I had on hand was a rectangular shape. Once it was sized correctly, I printed the photo and cut out the shape of his head.

The reverse of the photo is shown above. It may be hard to tell on the photo, but I tried to make his ruff a little wavy since he’s a fluffy dog. You’ll also see that I cut his neckline in a gently curved line. This gives it a better look than a harsh angle. I also cut out an outline of his ear. If you have an outline you want to highlight, just cut a small snip into that location and then cut away. One of my “real” silhouettes is a woman with an earring, and this is the way the artist cut into her silhouette to show the earring.

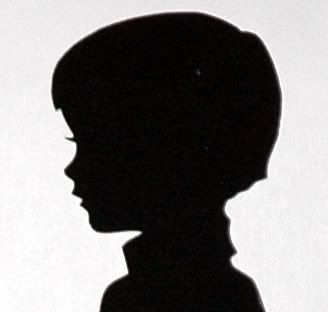
Also, people look better with an eyelash cut, like this one of my husband from when he was a child:

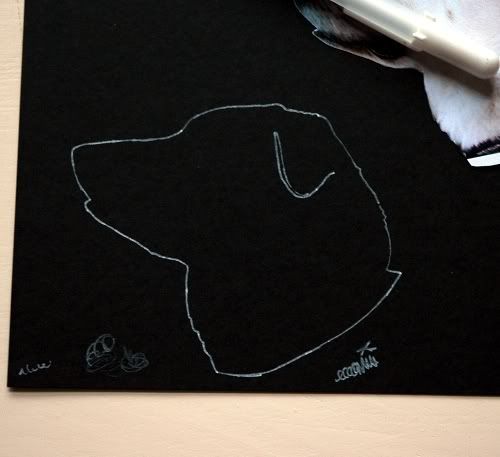
Next, turn your print out to face the side OPPOSITE of the way you want the final version to face. Trace the print out onto the black paper with the pen. I used one of those white gel ink pens here.

A note about the black paper: Make sure you use the blackest black you can find. There are so many variations in black paper – some look modeled, some are more brown, some are too gray. Once you start looking at black paper, you’ll see what I mean.

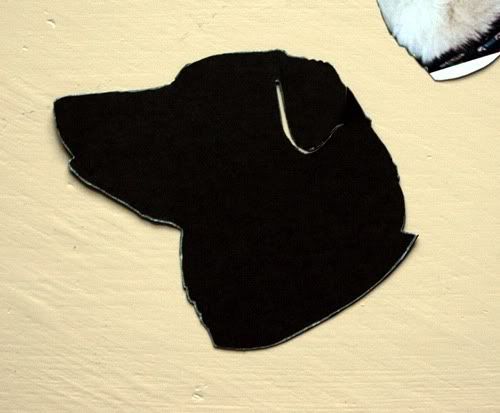
Cut your outline out of the black paper. When finished, flip it over and see if there are any stray pieces that need to be trimmed.

Then, use a glue stick to glue your silhouette onto a piece of off-white cardstock (the side with the left-over pen marks goes down). Generally, the paper these silhouettes are mounted on is not bright white and not ivory…it’s sort of in between. My paper here was called “Soft White” and was pre-cut into the 5×7 size I needed for my frame (It’s actually a flat note card for card making). If you want to do something really modern, I think using a patterned paper – like a stripe or damask – under the silhouette would look really interesting.

To give your silhouette a realistic feel, use a fine tip black pen to add your initials like the artists do.

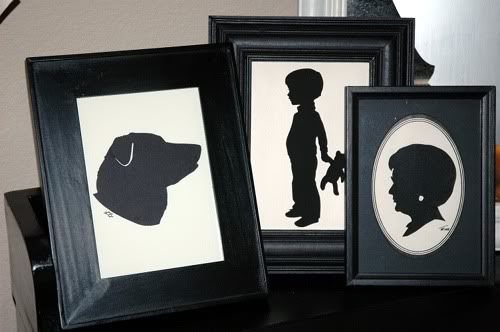
Add your silhouette to the frame and you are ready to go. Here’s Jack with some of my “real” silhouettes. You can barely tell the difference, huh?

Cute and easy! I still want to get my son’s portrait professionally cut, but I love my DIY version, too. How about you?

« Previous Page
Next Page »
  • Email
  • Facebook
  • Instagram
  • Pinterest
  • Twitter

About Makely

Lindsay Ballard is a former college mascot turned political geek turned roller derby playing, DIY fanatic.

Lindsay chronicles her projects, design ideas, and lifestyle tips here at Makely, where she shares tutorials and inspiration. Her DIY designs are bold and graphic, while her spirit is fun and full of color.


Archives

Categories

PRIVACY POLICY
Copyright © 2009-2019 Makely School for Girls | All Rights Reserved | Posts may contain advertising content or affiliate links