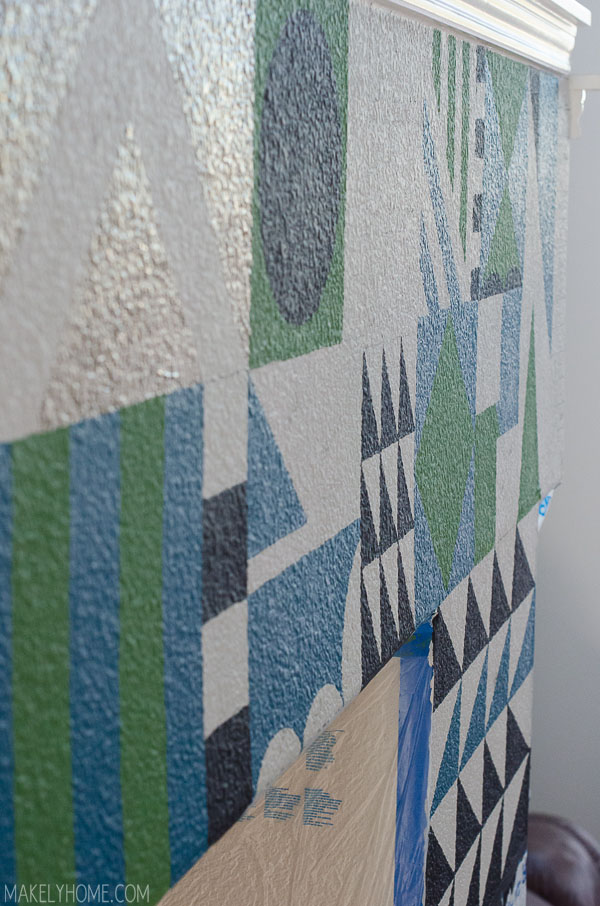
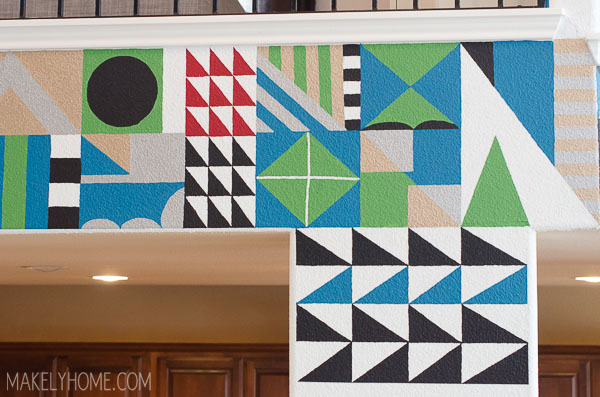
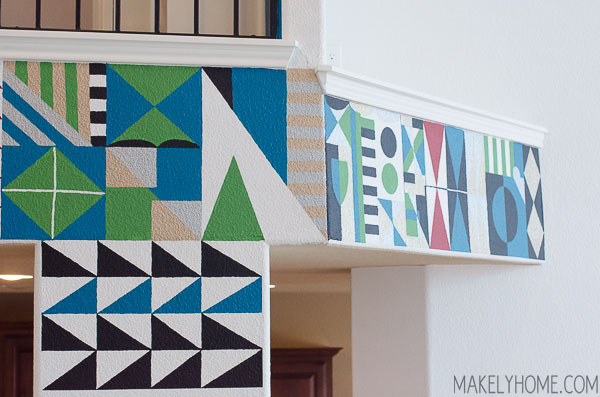
Friends, the longest single project I have ever attempted has reached completion. My hand-painted and incredibly detailed Mary Blair inspired walls are finished. It may be a Small World, but it turned into a huge project.
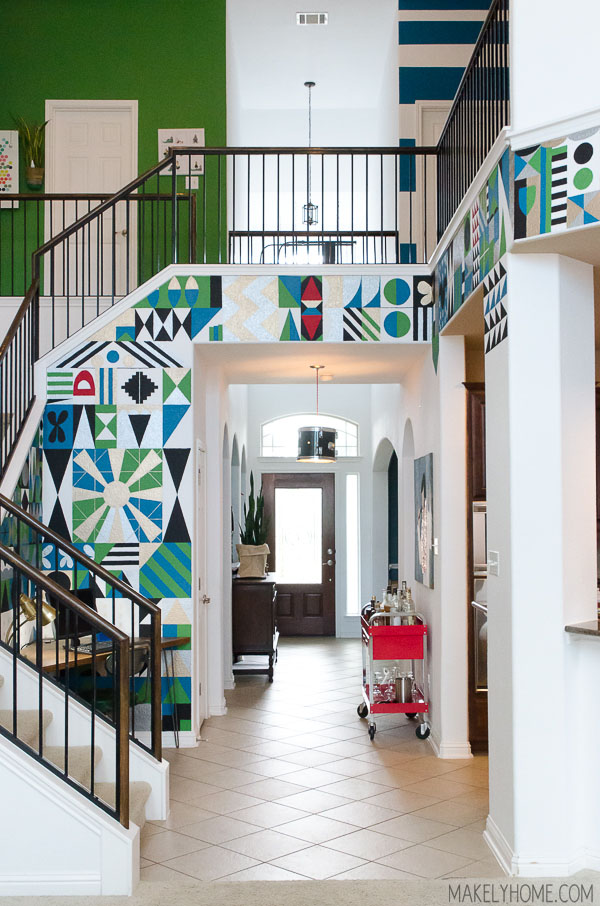
I couldn’t be more thrilled with the way it turned out. However, I will admit that this single project almost broke me and my blog. I spent months (8 months, off and on) on these sections of wall. When I wasn’t feeling inspired, I simply ignored the project. The last few years, I’ve lived by a one-project-at-a-time policy, so I wouldn’t let myself start something new even when my brain needed a break. I’ve admittedly been down in the decorating dumps for a while, and I’m sorry that I haven’t had more to share with you. I really thought I was going through blogger fatigue, but now that this project is finished, I know that it was really just project fatigue.
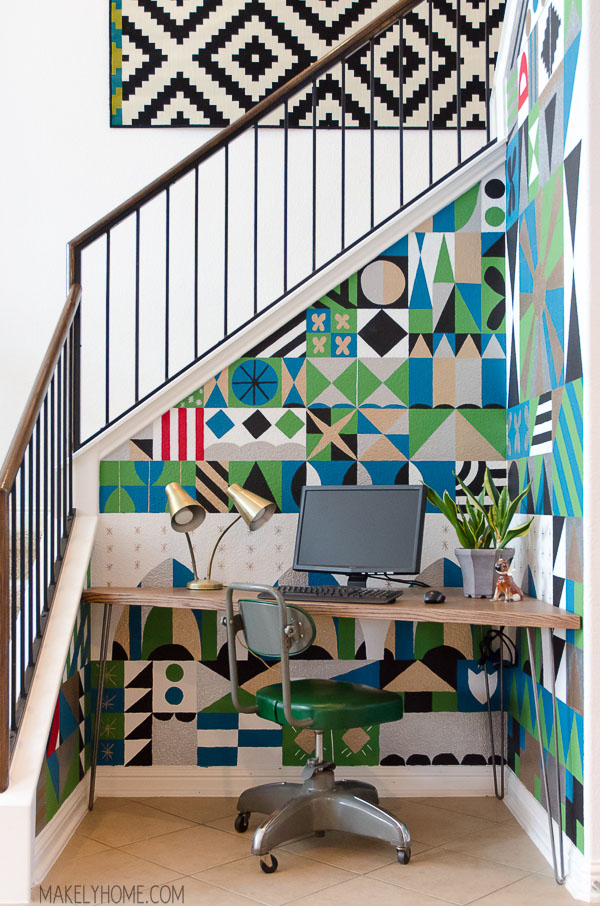
But on the occasion when I was feeling inspired, I’d draw out the designs and paint them with my tiny, ¼” paint brushes. The section on the left – around the desk that my husband built (more on that later!) – wasn’t too bad to complete. I put a drop cloth down on the floor and just started painting.
But once I got to the other sections, I had a lot more prep-work to do. I was terrified that I’d drip or sling paint on my plain white walls or on my kitchen counters/cabinets. I’m a fairly messy painter, so that fear was real, y’all. I was starting to think I had bitten off more than I could chew.
About the time I was getting ready to a) throw in the towel and repaint the whole wall white or b) burn the house down, I got an email from ScotchBlue™ asking if I had any use for ScotchBlue™ Pre-taped Painter’s Plastic. I swear, the painting gods were looking down upon me that day! This plastic sheeting comes in rolls and is pre-taped with ScotchBlue™ Painter’s Tape Multi-Surface with Advanced Edge-Lock™ Paint Line Protector 2093EL on the top – perfect for my project!
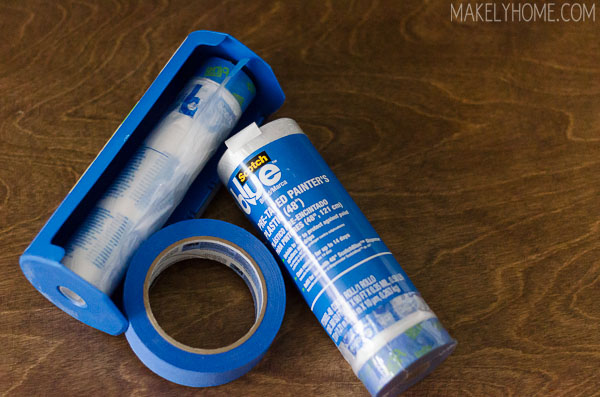
The painter’s plastic ended up being a great way for me to mask off my white walls, kitchen counters and cabinets. I used a combination of the pre-taped painter’s plastic and ScotchBlue™ Painter’s Tape Original Multi-Use 2090.
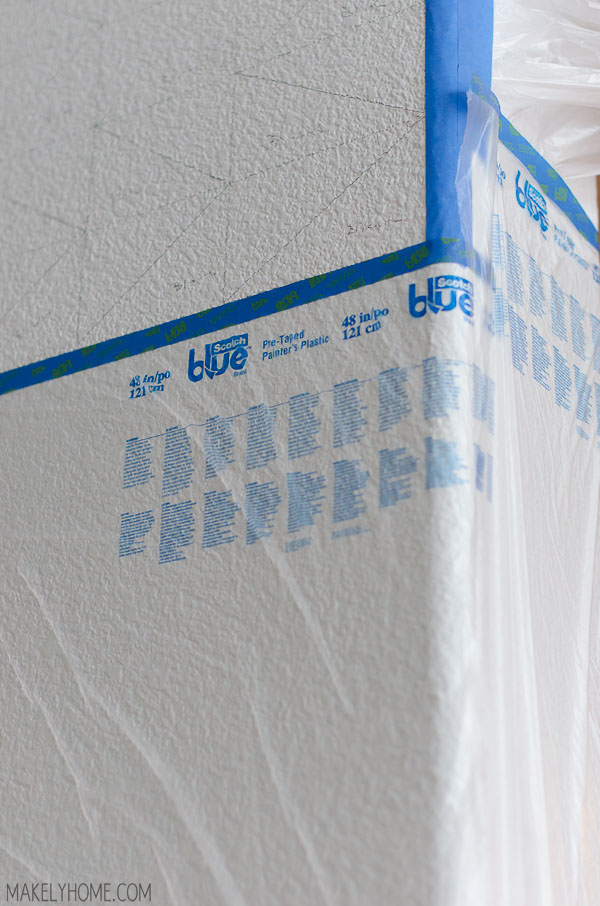
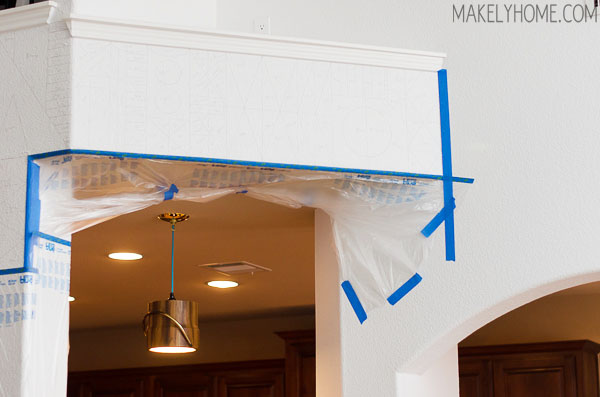
When I first started using the ScotchBlue™ Pre-taped Painter’s Plastic, I was concerned that it would be awkward to use and that the tape would fall over on the plastic and get stuck. In reality, it wasn’t awkward and if the tape did fall over, it was easy to peel off the plastic. It went up very quickly which made my prep time nice and short, and I love that the plastic clings to the walls so you don’t have to tape all around. This stuff made me feel like I was Big Pimpin’!
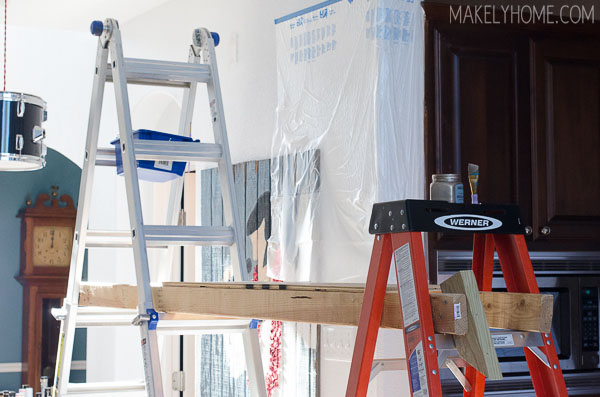
Once everything was taped, I didn’t have much of an excuse to not keep painting my walls – and I wanted to do it quickly since my husband kept calling me Dexter. After spending a few days on an uncomfortable ladder that was just barely tall enough to reach the top of the wall, Tom quit joking around and built me a DIY scaffolding to stand on.
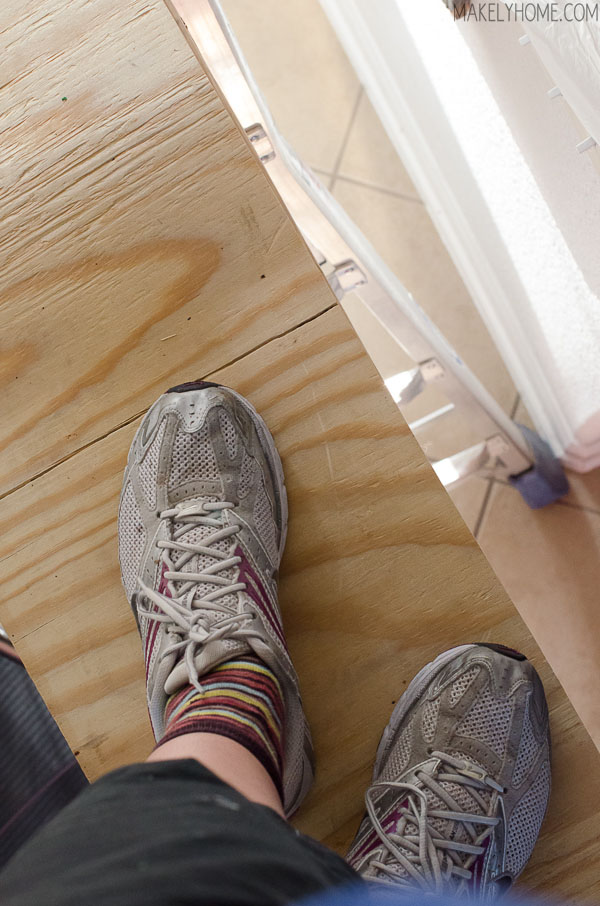
Yep, I always look crazy when I paint. Just be glad I didn’t show you my hair! I’m pretty sure that the more scattered I look, the better I paint. It’s the artist in me or something.
As I had with the previous portions of this project, I worked with sections of wall at a time. I drew out my design, labeled the colors that I wanted each piece to be, and then got to work painting. After months of doing this, I perfected my workflow – I painted all of one color in a section before I moved on to the next color.
And just like that, one day it was finished. Note: My kitchen ceiling will one day be Lindsay White and my walls a color that I haven’t picked yet. My one-project-at-a-time policy is quite visible in my house.
As I said, this was the longest project I have ever undertaken. I questioned my sanity more than a few times. But now, my heart just sings every time I look at it.
The paint colors use in this project are: Peacock Blue (Glidden®), Onyx Black (Glidden®), Garden Party (Glidden®), “Lindsay White” (Glidden®), Polished Silver (Martha Stewart Living™ – discontinued) and Vintage Gold (Martha Stewart Living™ – discontinued).
I am proud to be a 3M sponsored blogger, and, as part of my responsibilities, I get the opportunity to evaluate ScotchBlue™ Painter’s Tape. Opinions are my own and additional products used in the project were selected by me.

Find ScotchBlue™ on their Pinterest page, Twitter page, and Facebook page.
Looks awesome!
Was this wall mural really more work than your son’s toddler room murals? Four walls, floor to ceiling of artwork definitely seemed like the biggest painting job I’d ever seen on the internet! I guess because I’m not an artist, both projects seem literally impossible to accomplish.
Awesome.
Loved watching the real time progress of this project!!! It’s good for us to see it not happen overnight. Your philosophy on one project at a time is priceless!!!
This looks so so good. I love how light and bright your house still is while having all of those beautiful blues and greens. It seems to tie all the rooms together.
You are truly my favorite blogger, your quirky decorating style is the closest match to my own I’ve found, but you make me stretch my mind, please don’t stop blogging!
And I’m so glad to see the bed frame is still hanging! One of my favorite things you have done.
WOW! Just wow. You are so adventurous! I doubt I would have painted on scaffolding. I hate heights. It was worth the wait though for sure!
Looks FANTASTIC!!!! I love it!!! Good job!!
Danna
Dude. You ARE big pimpin’. And I can’t even imagine your house without this now 🙂 It was totally worth it!
You are a wild woman!!!
This is so spectacular!! Mary Blair is one of my all time favorite artists/illustrators and I am obsessed with your idea! I’m totally going to be undertaking this once my husband and I buy a house. AMAZING!!
Wow! Very impressive! Hats off to you— I don’t think I could’ve committed to such a large project!
Hi! I saw your post about how you made the drum light. I am an electrician and my boyfriend is a drummer so this is the perfect gift idea! I do have a question…. How exactly does the pendant hold the weight of the drum? It looks to me like the whole thing is hanging from the cord with the lightbulb… But wouldnt the weight be too much for that cord? Please email me back! Thanks
andee26@hotmail.com
Wow! It’s stunning and no wonder it took you so long, looking at the details. Definitely not something I would have had the patience to do, just using three colors for mu family/kitchen was enough to make me never want to paint again. This is gorgeous.
The project was absolutely worth it (though I also look forward to more projects)! Totally stunning and amazing!
I know it’s been a while since this was posted, but DAMN. You did SUCH a great job. I just happened to be scrolling through Pinterest for some Mary Blair artwork (love the woman) and saw a thumbnail of your wall. It’s literally impeccable. You’re line control is phenomenal, so clean and sharp! Ugh, I can’t get over it.
Amazing.
Thank you SO much, Alex!