This is a Sponsored post written by me on behalf of Moen, Incorporated. All opinions are 100% mine.
Although I’ve considered my kids’ bathroom finished for a while now, there really was one other thing I wanted to replace – the bathroom faucets. I didn’t replace them while I was redoing the room because there wasn’t necessarily anything “wrong” with them. I just didn’t love them, and since they were builders grade faucets, the handle of the one that my son used most often was feeling a little loose and there wasn’t a good way to fix it.
Plus, bathroom fixtures aren’t exactly inexpensive, so I didn’t want to spend the money on new faucets at the time.
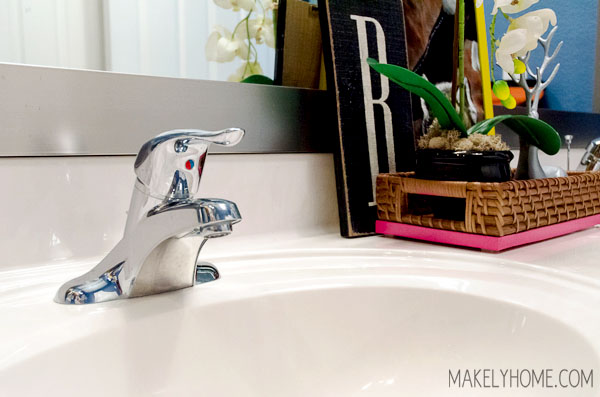
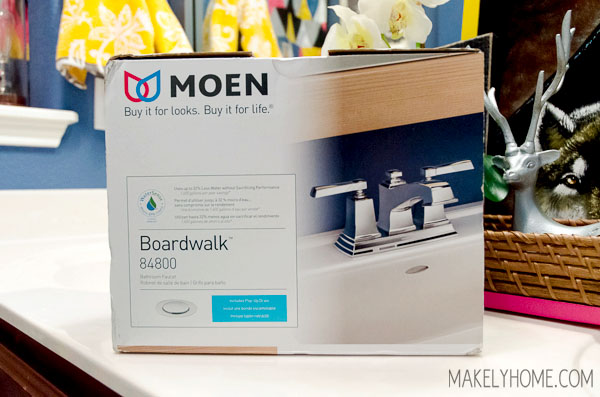
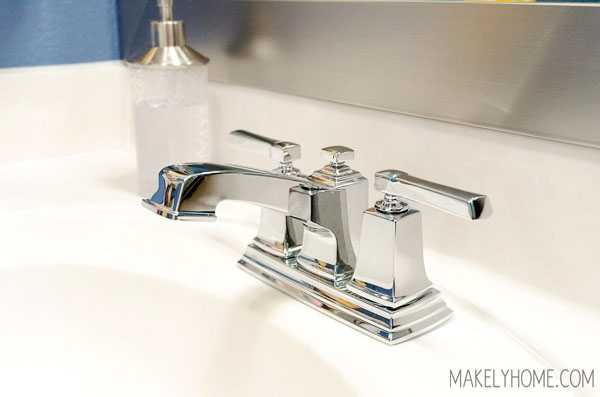
A few weeks ago, I got an email asking if I would like to receive a Moen Boardwalk Centerset bathroom faucet in Chrome to review, I thought that the Blog Gods were smiling down upon me. That was actually one of the faucets I had spied at Lowe’s!
It was all fun and games until I realized I had to remove the old faucet and install the new one. I decided I was going to give it a go sans Tom (who usually does these things around the house), Instagrammed this picture, and got started.
I started by clearing out the junk under the sink, finding my son’s missing hairbrush in the process. Score one for Mama!
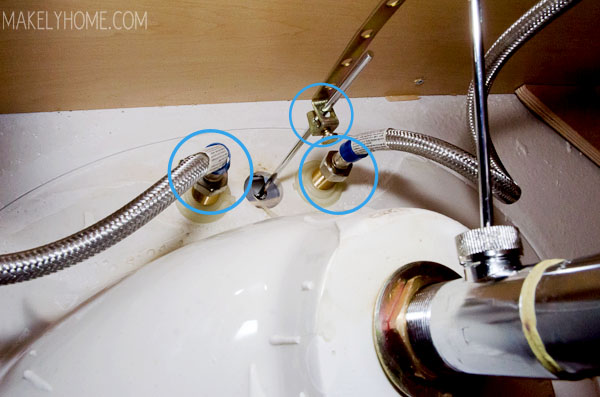
Being as that I had never removed a faucet before, I didn’t really know what to do. But y’all, I figured it out myself by laying under the sink and looking at how it all connected. Here’s what I did:
- Turned off the water underneath the sink;
- Turned on the faucet so that any water that was in it would drain;
- Laid a towel down in the cabinet under the sink to soak up any drips;
- Unscrewed the hoses (with the help of a wrench) that connected to the faucet;
- Unscrewed the finger bolt that held the lift rod (the part you pull up to close the drain);
- Unscrewed the nuts that were holding the faucet onto the sink and lifted the faucet out.
Here’s the lazy thing, y’all. If you are removing a faucet and your new one comes with a drain, you don’t necessarily have to use it. My old faucet had a sink drain that was the same color and finish as the new one, so I just left it in place. That meant that I didn’t have to take apart pipes or use sealant. Nice! Obviously, if you are installing a faucet to a new sink, you’ll need to add the drain.
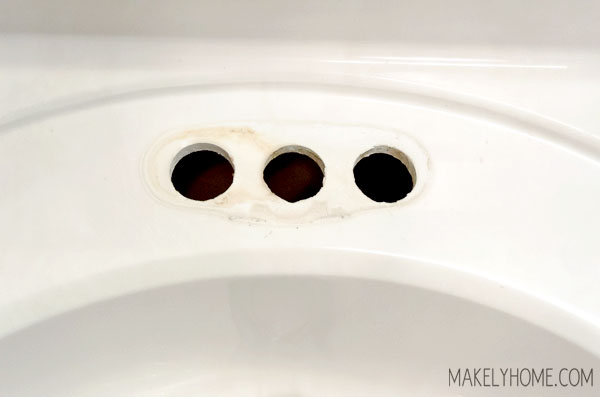
So, with the old faucet removed, the top of my sink looked like this. Yuck!
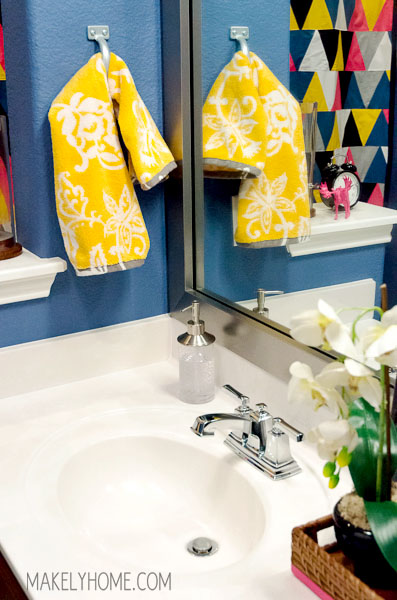
I cleaned it up and installed the new faucet to the sink.
To do so, I essentially worked backwards from my removal directions.
- Placed the new faucet on the sink and used the included nuts to screw it to the sink from underneath;
- Put the lift rod into the faucet, pushed it down flush while keeping the drain open and tightened the finger bolt to hold it in place;
- Screwed the hoses onto the faucet;
- Held my breath;
- Turned on the water underneath the sink;
- Opened the faucet handles to see the magic of water pouring out the faucet.

In less than an hour, I had removed and installed a bathroom faucet. And I Instagrammed this beauty.
I think this is a really great looking faucet. It feels classic without being outdated in my quirky bathroom. The finish is really nice too. At this point, it doesn’t seem to show finger prints or water spotting. And the installation couldn’t have been easier.
Now, I need to do the other faucet! I’m going to go to Lowe’s and buy a 2nd one for the other sink in the bathroom. I’m excited to know that it won’t take me all day to get it installed. I never really realized how much of a difference that something like bathroom faucets could make, but they certainly do!
Want to see more Moen faucets? Like Moen on Facebook
That is beautiful! And good to know it can be fairly easy! I’ve had a new bathroom faucet for over a year and haven’t installed it just because I’m intimidated by the process but my old ones are those 70s post ones that are kind of hard to work. Especially by my grandparents who have arthritis. I should just suck it up and give it a go.
Thanks for the push!
Yours may be a little more difficult to replace since your faucets are old. But, I bet that you could find some great videos on YouTube walking you through the process for something like that. You can do it!
Love the faucet. Job well done!
Thanks, Julia! I love it, too! It’s a good looking faucet.
The new faucet looks great, thanks for sharing your steps on how to easily change it!
Your review about bathroom faucets is thorough and informative. I love how you highlight the design elements and the ease of installation. The comparison to other faucets is also helpful for readers looking to make an informed decision. Thanks for sharing your insights on these faucets!