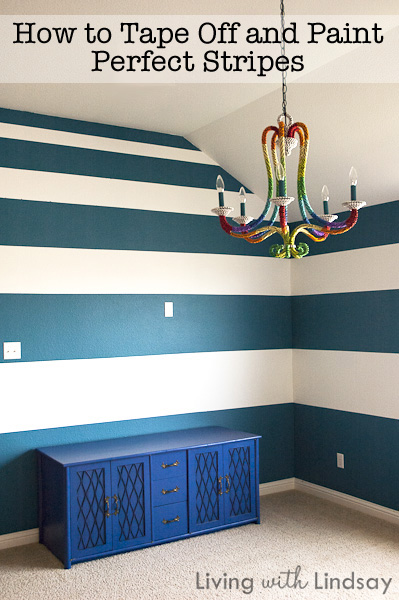
Painting stripes on a wall or two is a cheap way to create some drama in a room. Tone on tone color gives a classic feel to a room while contrasting colors provide bold visual interest. Regardless of your color choices, there are two vital elements to pulling off a perfectly striped room: 1) level stripes and 2) crisp paint lines. Today, I’m going to help you learn to do both. Yeehaw!
Last week, I tackled the stripes in my kids’ playroom. I started with a blank slate of a clean white wall (what I call “Lindsay White” – a gallon of Glidden white base flat paint that I ask the paint guys at Home Depot to add 1 oz of white to). If you aren’t going to have a white stripe, you can just prime the wall and then paint the entire wall the lightest of the colors that you will be using.
How to Tape Off and Paint Perfect Stripes
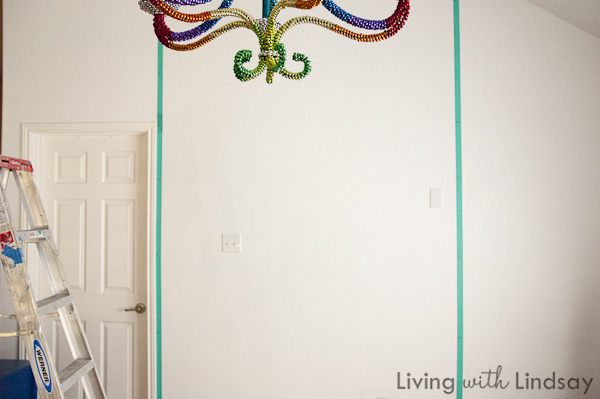
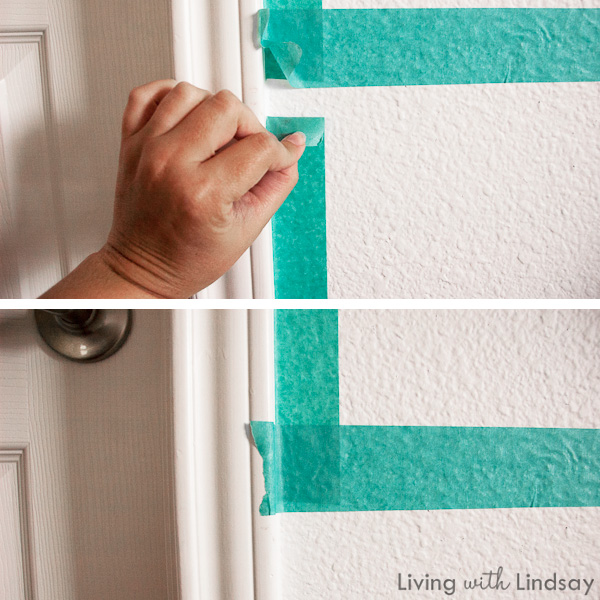
1. When your base coat is dry, tape a strip of painters tape in a straight line from where the wall meets the ceiling down to where the wall means the baseboard trim at the floor (if your final stripes are going to run horizontally). You can either line the tape up against a corner or against a window or door frame as I have done. Lining it up on a vertically straight section keeps your tape line straight.
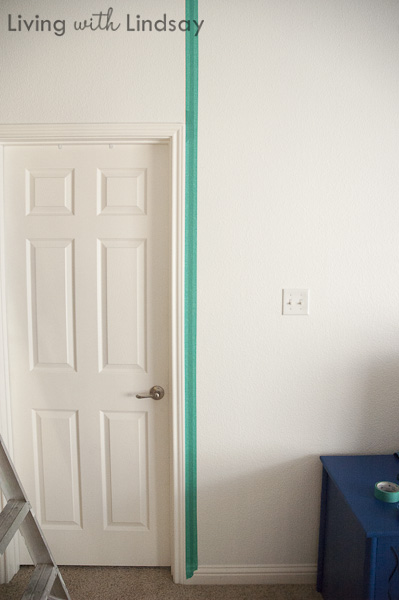
If you are going to paint vertical stripes, run your tape line horizontally along the straight edge along the ceiling or baseboard trim.
Overlap a few strips of tape over the first line that you’ve created (I have 2 tape lines in the above photo). I recommend at least two lines, but three will give you even more precise results.
2. Measure out where you want your stripes to be and make even marks across the strips of tape. I used a ruler with the long edge pressed as a straight edge against my door frame to make sure that my marks were level. Also, mark the location of the ceiling and baseboard.
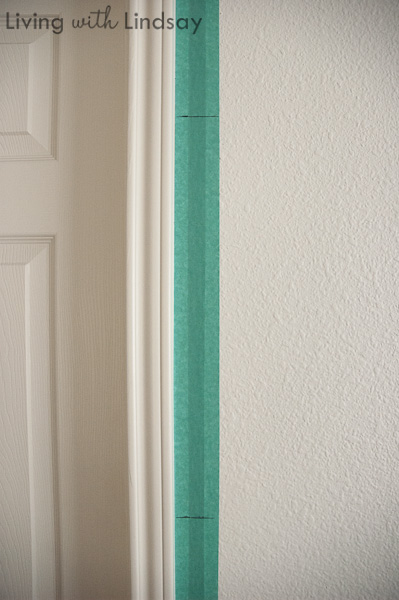
3. Next, carefully peel off the top layers of tape and reapply them on other parts of your wall. I moved mine to the corner, using the corner as my straight edge. Line up the ceiling mark and baseboard mark with your ceiling and baseboard, and your marks will be essentially in the same place (possibly give or take a few centimeters if your walls aren’t “square”). As you can see, I also went ahead and re-taped over the line next to my door so I could have a third line down the center of my wall.
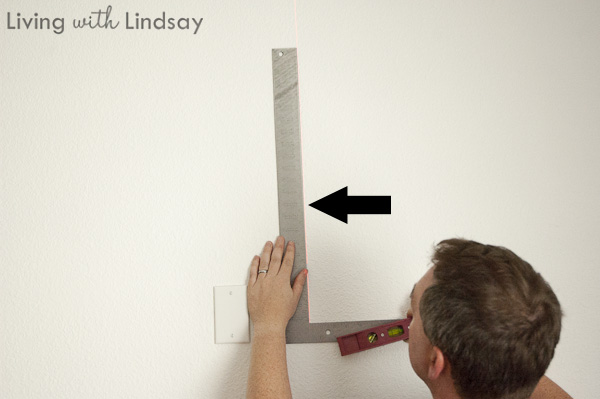
To apply the tape line in the center, Tom shot a vertical line with the laser level. To make sure the laser line was actually level (you really can’t judge from the bubble levels on the laser level itself), he used a square and another level to line it up. If you tilt your computer screen back, you can see the laser line in the photo (it’s hard to photograph in bright light).
If you are painting vertical lines, you’ll be running these tape lines horizontally.
4. Now it’s time to start taping off your paint lines. I put my laser level on a tripod and shot the lines directly on the wall (instead of using the suction or pins that come with the unit). The tripod makes the laser level much easier to work with. Because you have marks on your tape lines, you will be able to line up your laser lines with those marks. Again, tilt your monitor or screen back to see the laser line in the below photo.
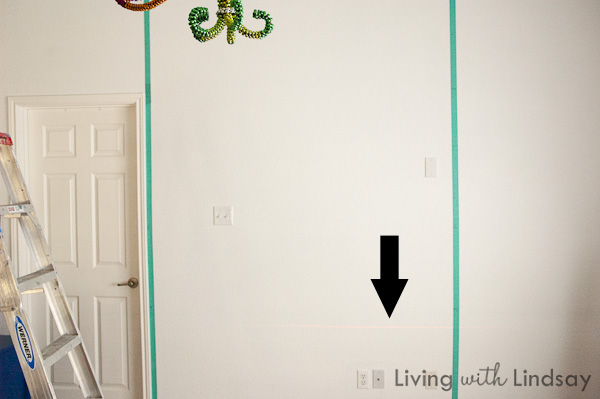
Apply the tape in such a way that you are fully exposing the stripe to be painted. You need to think about which color stripe you are taping. If you are taping the bottom of a stripe to be painted, you’ll need to tape BELOW the laser line. If you are taping the top of a strip to be painted, you’ll need to tape ABOVE the laser. This ensures that you are masking off the stripe that will not be painted. I think it doesn’t make much sense in words, but it will make sense when you are doing it. It always works best for me if I draw the stripes on a sheet of paper and label them blue, white, blue, white, etc.
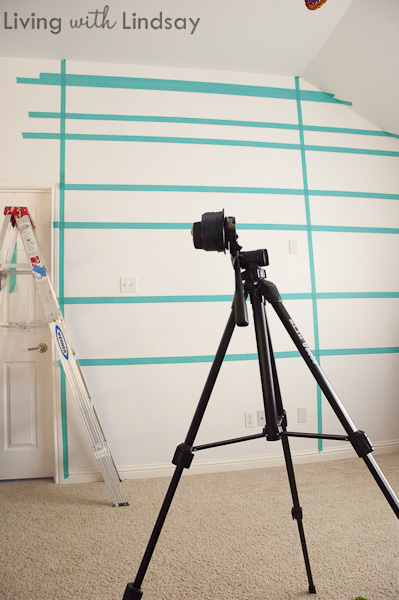
5. Once the stripes are taped off, you’ll have to remove your original tape lines (the ones with the marks). Because my horizontal lines are taped over them, I carefully lift the horizontal tape and use an X-Acto knife to cut the tape to cut along the vertical stripe. I only remove the tape on the stripes that I’m painting and leave the tape in the areas I’m not supposed to paint as a signal to myself not to paint there.
6. Get your paint on! Following the instructions I detailed in a previous post, seal your tape with the base color. When it’s dry, paint your stripe color. I always do two coats of color.
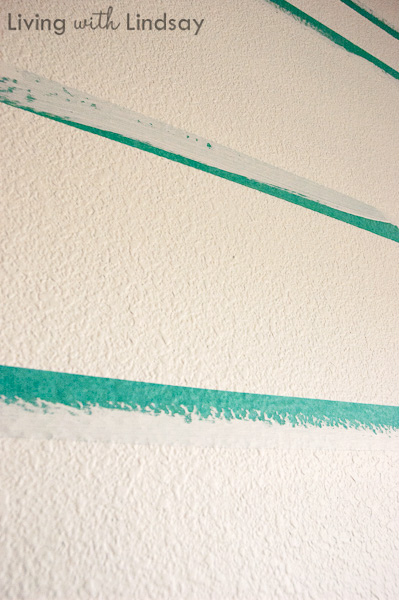
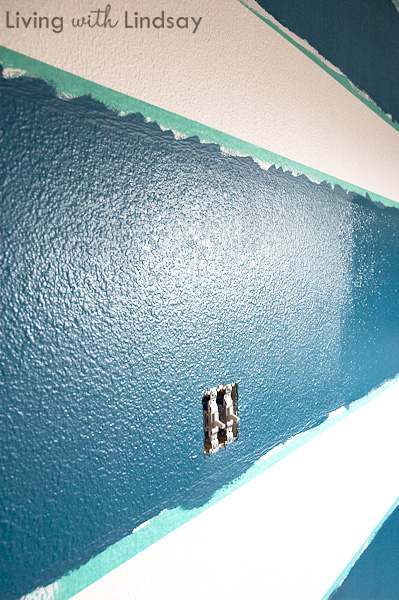
I normally peel off the tape when the 2nd coat of color is still wet. This paint color I used for my stripes is Peacock Blue by Glidden.
At this point you should have nearly perfect stripes! You may have a little bit of bleed in a few places where the tape didn’t get sealed well, but that touch up is much easier to tackle than a whole room of bleeding lines.
I also only stripe one wall at a time. I completely finish one wall and then use it as a guide for marking and taping the adjacent wall.
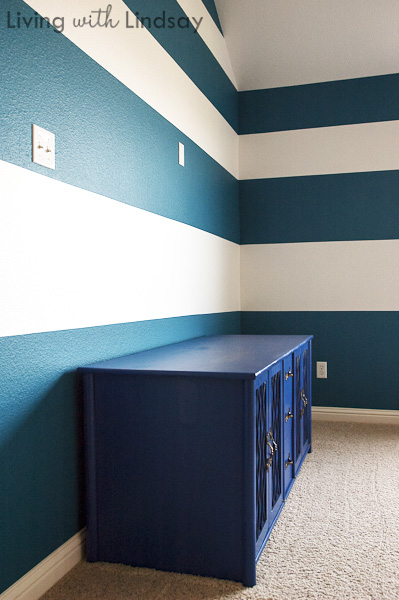
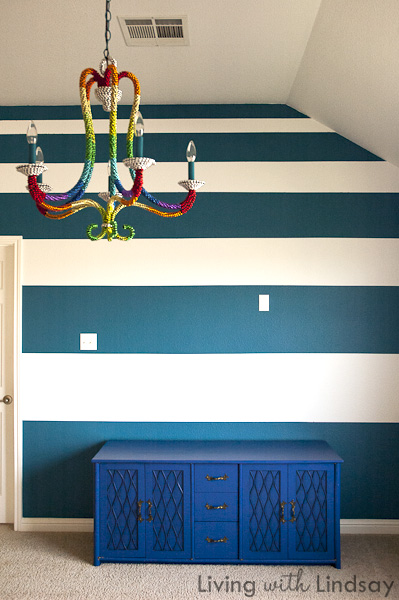
And here’s a peek at where I am in the playroom. That crazy chandelier and cobalt blue stereo cabinet are starting to look more at home, aren’t they?
Have you painted stripes in a room before? Do you think you’ll try my marking/taping technique if you attempt it again?
P.S. A note about the tape I’m using – this is a newer painter’s tape on the market called Bloc-It. It’s almost teal in color. The company sent me some rolls to try, and I have to say that it performed beautifully for me. It’s thinner than the other tapes on the market so it tears easier. It’s also not as sticky, so you don’t have to worry about it peeling the paint off or your walls. I haven’t been too happy with the new formulation of the 3M Blue Painter’s Tape with Edge Lock and Frog Tape has never met my expectations. In my experience, no painter’s tape is going to perform without bleeds on textured walls without using the painting method I detailed. Block-It is currently only sold at HomeDepot.com and on Amazon.com, but I hope to see it in physical stores soon.
P.P.S. Ever wonder how I get it all done? Well, the kids are normally playing in the space I’m working in. Here’s how my house really looks. I say, “Don’t touch the paint!” about hundred times an hour. 🙂