Makely

Let's Make Life Awesome

  • Home
  • Decorating/DIY
    • Create Your Decor
    • Decorate Your Home
    • Paint Your Walls
    • Transform Your Furniture
  • Healthy Living
    • Essential Oils
    • Family Wellness
    • Household Care
  • Project Gallery
  • Contact

“Next” Up in Google Reader

by Lindsay Ballard on August 28, 2009 591 Comments

Just for today, I’m interrupting this little decorating blog to bring you a little computer geek. Don’t run away scared! I’ll be back to my regularly scheduled revamps, spray paint, and glue gun burns on Monday.

As a lover of decorating and DIY blogs, I am always excited when I discover a new one. The tips and tricks and gorgeous rooms I see out there make my heart skip a beat and inspire my weekly Teach Me Tuesday series. The list of blogs I read (okay, covet) grows every single day.

However, with all that excitement comes a lot of time. I like to read each blog entry and comment leave a comment for the author. I have learned so much from other bloggers and want to support them to keep up the good work. I used to just bookmark all of the blogs I liked and would click through my bookmarks one by one to see if any of them had been updated.

Then, I discovered Google Reader. I could simply subscribe to each blog’s feed and all the new posts would show up in my reader (most blogs have “Subscribe” buttons you can click that deliver each new blog post into your reader). Hooray! No more clicking through a ton of links to find brand new posts.

The problem, I soon realized, was that the new posts showed up in my reader and I could read them all there, but I’d have to click an additional link to be taken to the actual blog to leave a comment. And well, I’m lazy. My commenting dropped way off because clicking that 2nd link was too much for me to handle. I’m not saying it makes sense, but that’s just how it was for me.
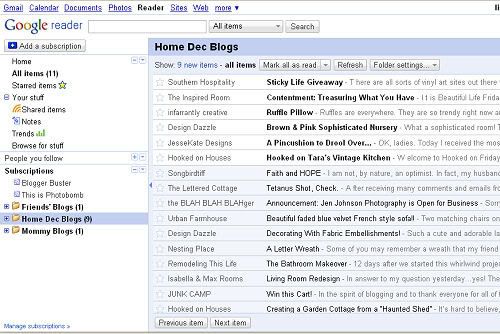

Here’s just a sample of what my Google Reader looks like.

Last week, I found a super special secret about Google Reader. It’s published on Google’s blog, so I guess it’s not so secret. Anyhow, it totally rocks. Did you know that you can put a “Next” button on your browser? Clicking the “Next” button will bring up the next unread post from your reader in it’s original format (i.e. in the actual blog)? Now, I can quickly go through and read brand new posts by my favorite bloggers and easily leave a comment!

Want to try it out? Log into your Google Reader (or sign up – It’s FREE and so easy to use!) and go into Settings. Click the Goodies tab. Then, click and drag the “Next” button to your bookmarks toolbar.
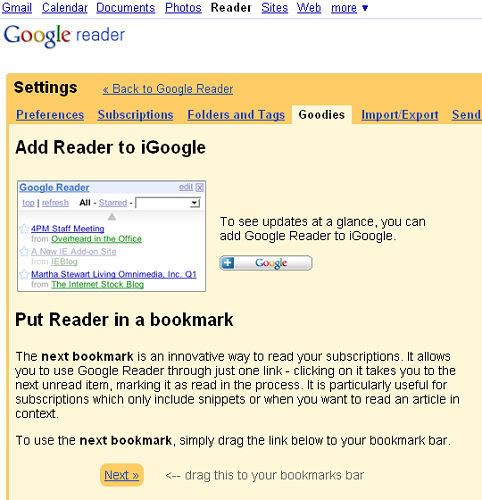

Directions from Google Reader.

You can click “Next” and go through each blog at your leisure, not missing a single post, Goodwill redo or room reveal from your favorite bloggers. In the week that I’ve been using this, it has changed the way I read blogs tremendously. I thought you might like to know this little trick, too!

If you have any questions about feeds, subscriptions, or feed readers, please let me know. I’m not an expert, but I’d be happy to help you try to figure out how to make your blog reading or writing experience more enjoyable.

UPDATE: If you are using Internet Explorer, this is what you need to do to get your Next button to appear:

In Internet Explorer, right click on the upper gray part of your browser. A little box should pop up that shows your different menu bars. Make sure the “links” one is checked. Once it is, checked, just drag and drop the Next link in Google Reader to the gray area called “Links,” right below the File/Edit/View/Favorites/Tools/Help menu bar. That should be all you need to do!

P.S. I’ve linked some technical terms in this post to sites I think do a good job explaining them. I’m certainly not trying to offend those of you who are extremely computer savvy, but I thought it might help some of us who don’t really understand all that geek speak very well.

P.P.S. I’m totally Hooked on my Next button. I’m adding this to Julia’s “Hooked On” party at Hooked on Houses.
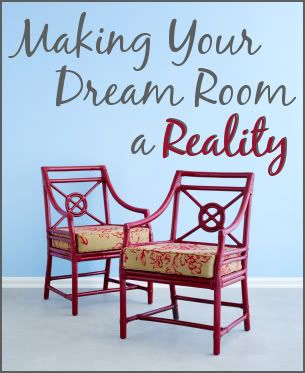
Making Your Dream Room a Reality – Part Four

by Lindsay Ballard on August 24, 2009 11 Comments

If you’ve been playing along with my Making Your Dream Room a Reality series, I’m sure you’re ready to move on to the next step of your planning, right?

Though this series, we have:

  1. Identified our decorating inspiration;
  2. Decided why we think each photo is inspiring; and
  3. Determined what won’t work in our households

Now’s it’s finally time to get those creative juices flowing!

Part Four – Determining How You Can Work With What You Have

You hear this mantra a lot in the blogger/decorator world, but you should always try to work with what you have before you spend a single penny. Move furniture around, shop other rooms in your house, think of new uses for unused items.

Even though it’s more fun, this part of the process is actually more difficult than the previous steps. It’s always hard (for me at least) to envision how items I currently have in my home will work in a different space. This is a process that you just have to let go a little bit and trust yourself, which is a hard thing to do.


Hang a mirror on a bookcase to completely change the look – from Pottery Barn.

When working with what you have, it’s perfectly acceptable to change the look of an item or use it for a new purpose. Some things to consider:

  • Can it be painted? You can even paint that cheap laminate bookcase.
  • Can it be restained? Sometimes, all you need to do is repair a few surface scratches and give a piece of furniture a fresh new coat of stain. Kimba says that the gel stains are super easy to use.
  • Can you add fabric? New window treatments and throw pillows can make a huge difference in changing the look of a room. Have you seen the Nester’s 30-minute pillow makeovers?
  • Can it be repurposed? Find new uses for common items. Emily has even used chairs and stools as nighstands!
  • Don’t like your flooring? Cover it with a rug, a much cheaper (and quicker) alternative to hardwoods, tile, and new carpeting.
  • Need new-to-you furniture? If your family’s sofa has seen better days craft a simple slipcover, check CraigsList, garage sales and thrift shops before you hit the furniture store. Be patient and the right piece will almost certainly fall into your lap.
  • Accessories aren’t the right match? Does your current Southwestern style accessories not match your Beach Cottage dream room? No worries! Think about how you can transform them (think spray paint!), and if that doesn’t work, hit the CL, garage sale and thrift shop trifecta again. You could always sell your old accessories to make some cash for new ones, too!

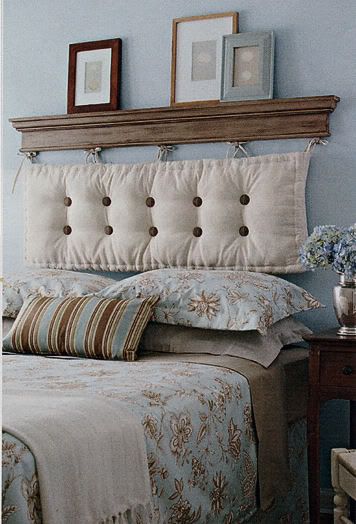
Use a scrap piece of moulding to hang an outdoor bench cushion to create a unique headboard – from Better Homes and Gardens.

So, this week, make a list of the things you already have or can repurpose to fit into your new new dream room. You will be amazed and how close you are to your dream room without even knowing it!

Have questions about how you can reuse or repurpose an something? Email me or leave a question in the comments! I’d be happy to offer you some suggestions.

« Previous Page
Next Page »
  • Email
  • Facebook
  • Instagram
  • Pinterest
  • Twitter

About Makely

Lindsay Ballard is a former college mascot turned political geek turned roller derby playing, DIY fanatic.

Lindsay chronicles her projects, design ideas, and lifestyle tips here at Makely, where she shares tutorials and inspiration. Her DIY designs are bold and graphic, while her spirit is fun and full of color.


Archives

Categories

PRIVACY POLICY
Copyright © 2009-2019 Makely School for Girls | All Rights Reserved | Posts may contain advertising content or affiliate links