Makely

Let's Make Life Awesome

  • Home
  • Decorating/DIY
    • Create Your Decor
    • Decorate Your Home
    • Paint Your Walls
    • Transform Your Furniture
  • Healthy Living
    • Essential Oils
    • Family Wellness
    • Household Care
  • Project Gallery
  • Contact

Easiest Design Transfer Method You’ll Ever Find

by Lindsay Ballard on July 15, 2009 4,286 Comments

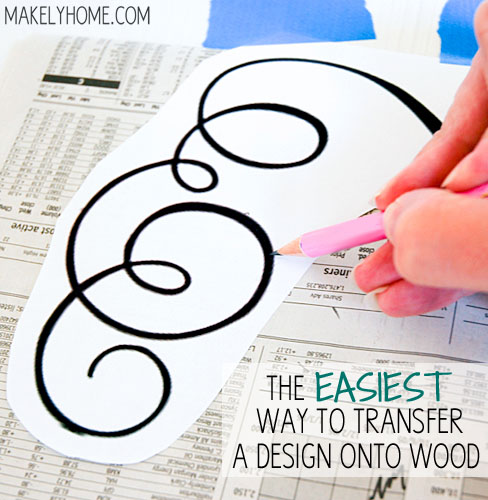
Easiest Way to Transfer a Design onto Wood via MakelyHome.com

In the middle of a new project that I was working on, I realized that I had a problem. I needed to transfer a very large design (think 4 feet by 4 feet!) than I want to paint onto a primed piece of wood, and I couldn’t figure out how to do it.

I laid the printed design out on the wood and thought I could just trace the design on the paper with firm pressure and a little impression line would be left on the wood that I could just go back and trace. Um, nope.

Then, I tried a ballpoint pen. Nada. How about the tip of a butter knife? Nah. A bamboo skewer? No way.

I was getting pretty desperate at this point. I knew I could run out to the store to buy transfer paper, but my son was napping and that’s prime crafting time as any of you other moms know. I had to use something I had on hand.

Then a light bulb went off in my head: Newsprint! It always rubs off on my hands, so maybe it would rub off on the primed wood. Egads! I was right!

This technique will be especially helpful if you have a very intricate design, a very large design, or you just don’t want to take the time to cut out your design and trace like a stencil. I think this is going to be my go-to tracing technique from now on. It is so easy.

The Easiest Way to Transfer a Design Onto Wood

1. Print out your design and cut away the excess white space. Tape the top of your design to the painted or primed wood in the location you want to transfer the design.
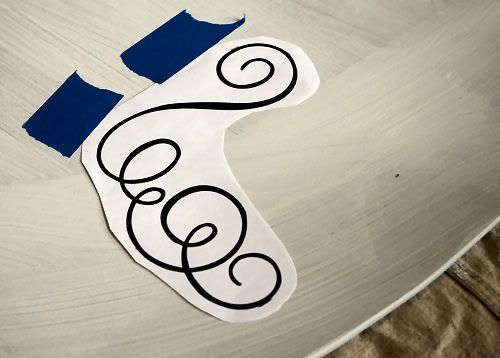
2. Lift up the design and slide a page of newsprint underneath it. The classified pages and stock market pages work best, as there is a lot of small newsprint all over the page. Make sure that the entire design is underneath the newsprint.

3. With a pen or pencil (preferably a pink one with your name on it like you are 6 years old) , trace the outline of your design directly onto the paper. Press firmly, but you don’t have to go overboard with the pressure.
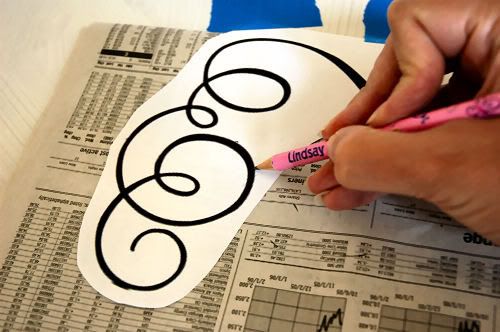
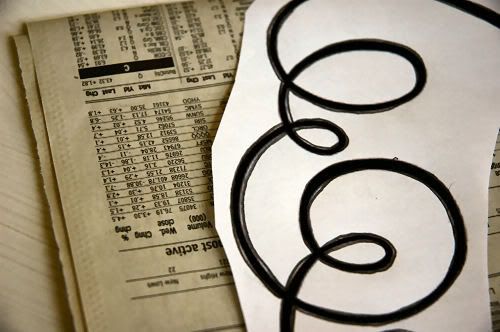
 

4. Remove the taped design and newsprint to reveal a light transfer underneath! I have turned up the contrast on this photo so that you will be able to see the transfer.
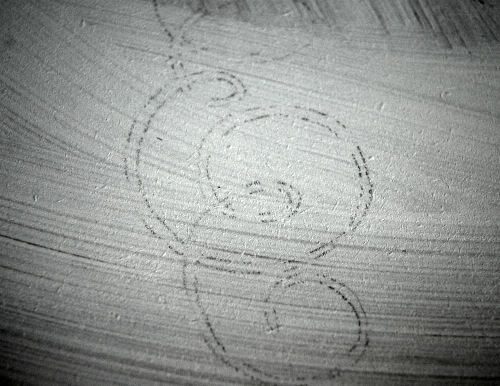
5. With your pencil (or with a paintbrush if you are way more talented than me), trace the transfer directly onto the wood.
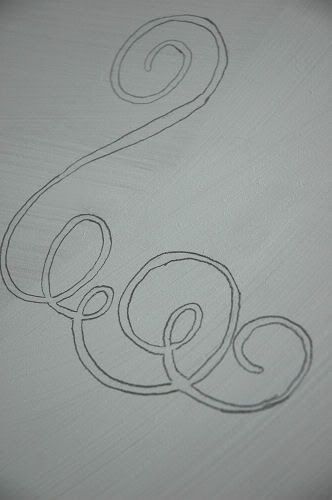
6. Admire the beauty of your transfer, and then get busy painting!
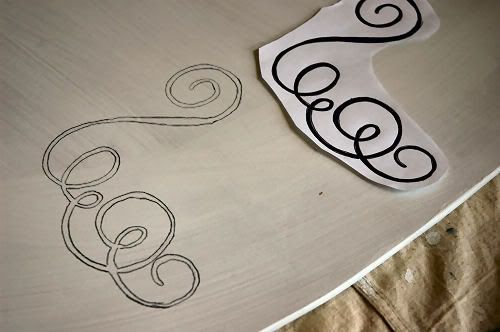
Try this technique the next time you want to transfer a pattern or stencil a word onto a piece of wood. I’m pretty sure this would work on your walls, too. You’ll be amazed at how quickly and easily you can transfer that design. I’d love to know how it works out for you!

A Little of This and A Lot of That

by Lindsay Ballard on July 13, 2009 61 Comments

At the end of last week, I had BIG plans for today’s post. My plan was to spend all weekend working on some of the DADD projects I’ve had lined up and then would have some great ideas to share with you this week.

The universe had different plans for today’s post. What is it that John Steinbeck wrote? “The best-laid plans of mice and men go oft awry.” Truer words have never been spoken.

Instead of toiling away in the garage on my projects, I spent my weekend holding my family close. We received some sad news about the health of a close friend’s daughter (who is my son’s age), and all I wanted to do was spend quality time with my son and my husband. I hate how it takes near-devastation to refocus my attention on what is important in my life, but I think it happens to the best of us.

So, instead of having some fun new projects for you today, I’ll have to wait a couple more days to share them. Luckily, I have some other super happy fun-ness to share with you today.

1. Guest Post at Remodeling This Life – Emily at Remodeling This Life asked me to share some thoughts with her readers about decorating and frugal living, and I was over the moon with giddiness to oblige. Emily inspires me daily with her photos (oh, her photos! {swoon}) and her beautifully written posts about leading a more simple life. I know you are a reader of hers, right? If not, you are really missing out!

Please head on over there so you can see what I had to say about learning to love what you already have.

2. New Blog Design – This may only be exciting to me, but I’m in the process of designing a new look for my blog! I’m very excited, as the new design feels very crisp and fresh (which, in turn, makes this current design feel very heavy to me). As a little preview of what’s coming soon (hopefully sometime this week!), I wanted to share with you my new blog button. You are more than welcome to grab it if your blog needs a little “bling!”

Isn’t that glue gun so fun? It totally fits me…and my multiple glue gun burns.

3. Affordable Advertising Space Available – With the new blog design comes some new excitement! I will be offering some advertising spots on the blog starting at $10/month for a 125×125 ad. If you are looking to promote your blog, Etsy store, or web business and would be interested in advertising on Living With Lindsay, please send me an email to LivingWithLindsay AT gmail DOT com and I’ll send you more information about my site and readership. I’ll even give you a sneak peak of the new blog design if you ask nicely.

4. Blog Sponsorship by UPrinting.com – Lastly, I’m finally going to get around to ordering some business cards for my blog. I’ve been in the situation lately where I’ve run into people around town who want to check out my blog, and I never have anything with my blog address to hand them – other than a scrap piece of paper where I scrawled out the website! Instead of digging around in my purse for a spare receipt, I figured I’d just order some cards.

One of my wonderful sponsors, UPrinting.com, has offered me 500 free business cards to help me promote my blog. My first experience with them was a few months ago when I won a 16×20 poster print, and I was extremely pleased with their service. Shortly after that, I was happy to welcome them as a blog sponsor.

If you have a blog and are looking for a sponsorship, I’d encourage you to check them out. They sent me some information to pass along to you about their company.

Why UPrinting.com isn’t your average printing company:

Blog Sponsorships:
If you are looking to find a sponsor for your blog, UPrinting.com is definitely interested. We offer giveaways, advertising and more for qualified bloggers.

Non-Profit Sponsorships:
The U-Community Program sponsors hundreds of non-profits and education to improve our local communities.

Social Justice Projects:
The UPrinting Kiva account promotes small business growth in developing countries.

Green Printing:
UPrinting supports a sustainable future by recycling, using non-toxic inks, and offering eco-friendly recycled paper stocks for business cards and postcard printing.

Gosh, that was a whole lot of information for someone who didn’t actually have a post planned until I sat down to write. I try not to stray too far off topic, but I definitely did today. I promise that we will return to our regularly scheduled DIY home dec projects tomorrow!

« Previous Page
Next Page »
  • Email
  • Facebook
  • Instagram
  • Pinterest
  • Twitter

About Makely

Lindsay Ballard is a former college mascot turned political geek turned roller derby playing, DIY fanatic.

Lindsay chronicles her projects, design ideas, and lifestyle tips here at Makely, where she shares tutorials and inspiration. Her DIY designs are bold and graphic, while her spirit is fun and full of color.


Archives

Categories

PRIVACY POLICY
Copyright © 2009-2019 Makely School for Girls | All Rights Reserved | Posts may contain advertising content or affiliate links