I woke up the other morning and realized that I had a crazy dream. I dreamt that we moved to another house, one that I chose solely on the fact that it had smooth, plaster walls and big trees in the backyard. I guess it was a way for my subconscious to let me know the things about our home that I really don’t like.
As hard as I try, I can’t make our trees grow faster than they were destined to grow. And until I have the energy and stamina of my friend Sandra, I’m not going to retexture my walls to make them smooth like she did. I’ll just have to keep fertilizing my trees and painting my walls with flat paint so that the shine doesn’t highlight the knockdown texture.
I am working on my kids’ bathroom right now, and I had quite a few holes to repair since I removed the PLASTIC fixtures that the builder installed. GAH! I now not only have to buy a towel bar, toilet paper holder and hand towel rings, but I had to patch all of those ugly drywall anchor holes before I could paint the walls. It’s a bit more difficult to repair drywall when you have textured walls, but it can be done.
I’m going to use this section of wall where a hand towel ring used to hang as an example of how to patch holes in textured drywall. Why on earth did the builder use the world’s larget drywall anchors? Super annoying. But, after I got the anchors pulled out, I thought the damaged wall looked like it had a face with a sideways grin. What do you think?
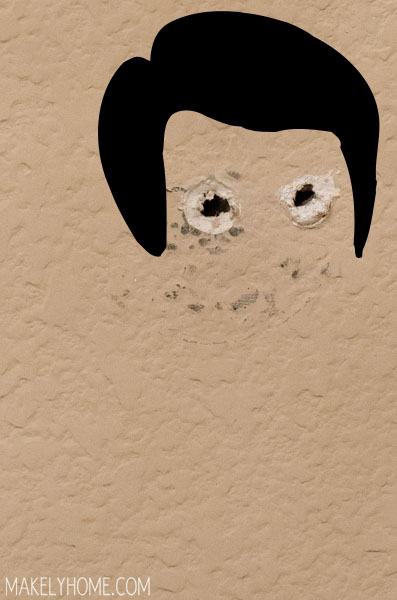
This is how I entertain myself, y’all. I obviously need to get out more.
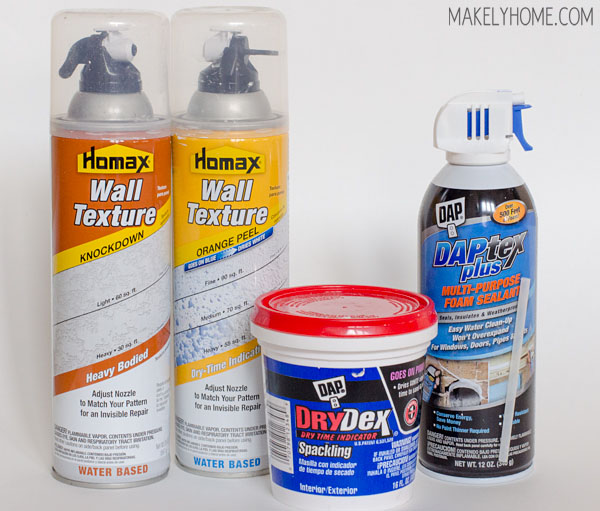
Okay, back to how to repair textured drywall. First, you need to assemble your cast of characters. You’ll definitely need some spackling and wall texture, which we’ll talk about in greater detail below. The foam sealant is good to have if you have holes up to about the size of a quarter. You’ll also need a putty knife, but mine grew legs and walked off when I needed to take this picture. I still can’t find it. I also lost a giant box of raisins in my kitchen back in 1997, so perhaps they are together now.
Let’s get started, shall we? If you have a hole that’s between about a dime to a quarter in size, you’re going to want to foam sealant of some sort. I’m partial to the DAPtex Plus sealant, but any brand will probably do. If your hole is smaller than a dime, you can move right on to the spackling step. If it’s larger than a quarter, you’ll need to grab a drywall patch from the hardware store and cut it down to a smaller size.
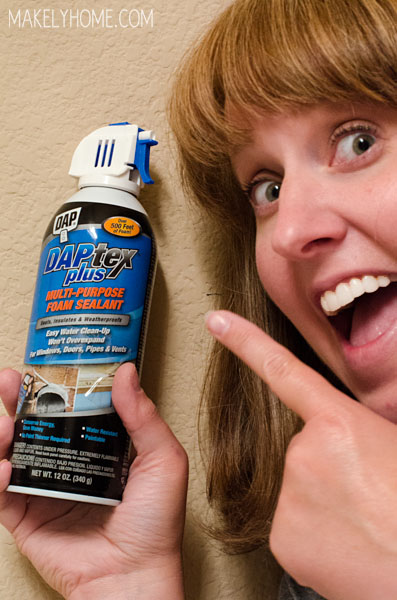
It’s really easy to use. Simply spray some with the included straw about halfway into your hole, and then give it a few seconds to expand. With your putty knife (RIP to my Yellow Buddy), wipe down the excess sealant so that it’s flat on the wall. Let it dry for a few hours.
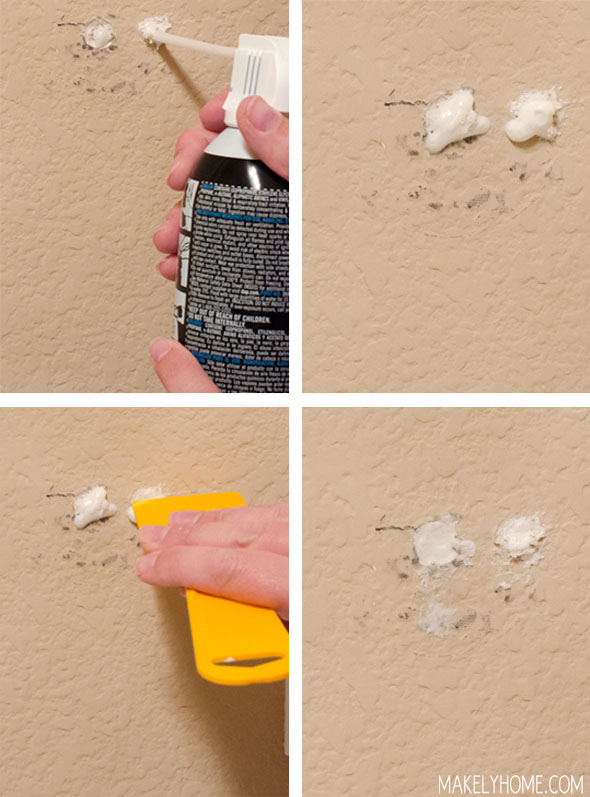
Next, you’ll grab some wall spackle and cover the hole that you filled. I love the kind that turns from pink to white when it’s dry. You’ll put a bit on the corner of your putty knife and press it over the hole.
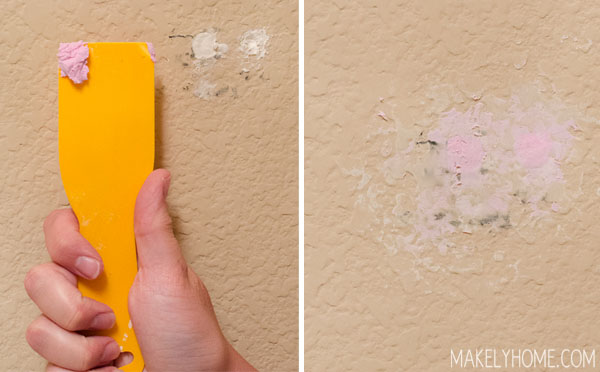
Make sure that you get the spackle nice and flat on the wall, and try to just only cover the hole. After you smooth it on, you can take a wet paper towel and wipe of any spackle that’s on the wall but not covering the hole (the above image was taken before I wiped off the extra). It will help you to have less area that you have to retexture.
Let the spackle dry for a few hours – or just wait until it turns white if you have the color-changing kind.
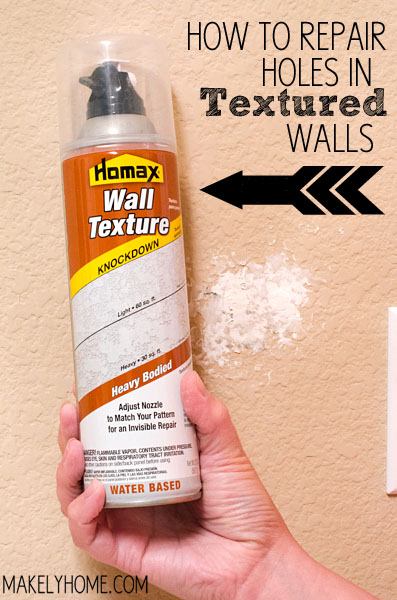
Now, grab a can of spray-on texture at the home improvement store. As you’ll see in the image at the top of this post, there are two main types you can buy – one for “orange peel” texture and one of “knockdown” texture. Buy the one that more closely matches your wall. My wall has a knockdown texture, so that’s what I used here.
Shake the can of texture really well for a minute or two and then test the spray on a scrap piece of cardboard or newspaper. You will want to adjust the dial on the can to get the spray as heavy or as light as it is on your wall. The spray always comes out a bit watery at first, too, so even if you know where you want the dial to be, always test it first.
Spray the texture on the wall VERY LIGHTLY in a circular pattern. The texture spray runs very easily, so it’s better to build up a bunch of coats instead of just trying to spray it all on in one pass. Do your best to cover your spackle as well as possible, but remember that it’s never going to be a perfect match since the builder used a big machine to spray the texture on your walls.
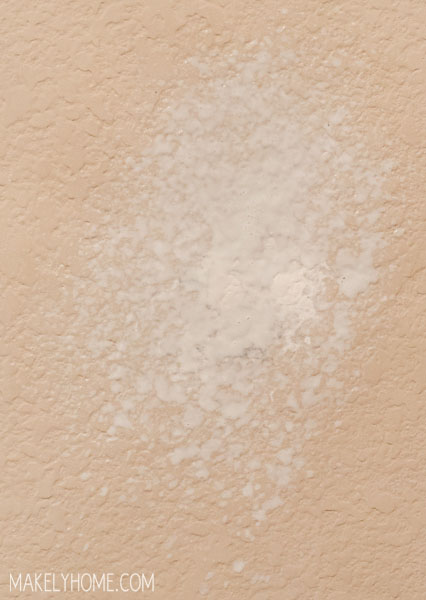
With knockdown texture, you use a wet putty knife to drag the texture down flatter. With orange peel, you dont’ have do to that, so just make sure that you read the instructions on the can.
Once the texture is dry, you can paint your wall. And if all the stars aligned, you will hardly be able to see the patched area.
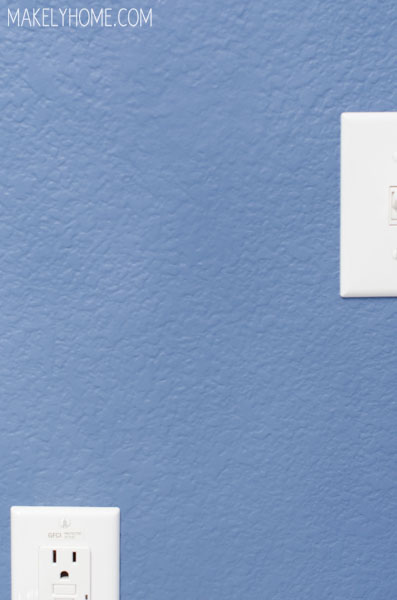
If after you paint you find that you are unhappy with your patch job, that’s okay. You can always spray some more texture on the wall and paint again.
Do you have textured walls? Do you have any of your own tips for patching them?
Very helpful. I’m linking it up on my Facebook Group page for my readers. Thanks for a good post.
Ok, wow! This awesome tip is just what I need right now! My girls decided to pretend to be flying from tree to tree on their dress-up clothes hooks and pulled the hooks right out of the wall leaving ginormous holes in its place. Thank you for posting this!!! I am so going to tell hubby to grab this stuff to repair the holes! Thank you thank you!
Very clearly and entertainingly explained. I just moved into my first house with textured wallboard and I’m saving this page for my first repair job.
Hopefully, you have another putty knife by now. Need to show this to a few people I work with.
http://vk.com/id370235746
Love the step by step – I also have textured walls and was dreading how to repair a small hole. Your blog was great!
Hey Lindsay, Great article! The information you have shared about how you repair a hole in textured drywall is very impressive content. Thanks for the post.
This was very helpful, especially for me who is a beginner diyer. And as with any diy project humor can be one of the greatest tools!