Makely

Let's Make Life Awesome

  • Home
  • Decorating/DIY
    • Create Your Decor
    • Decorate Your Home
    • Paint Your Walls
    • Transform Your Furniture
  • Healthy Living
    • Essential Oils
    • Family Wellness
    • Household Care
  • Project Gallery
  • Contact
You are visiting: Home » furniture makeovers » Page 12

Mastering the Master Bedroom {the Thrift Store Cast-Off Dresser}

by Lindsay Ballard on June 16, 2011 127 Comments

If I can impart only one piece of knowledge today, I want it to be this:  When you find a piece in a thrift store that is exactly what you are looking for and the price is right, purchase it immediately. Should you give yourself time to “sleep on it,” you will obsess about it and then run the possibility of it not being there when you go back bright and early the next morning.  This very scenario has happened to me on numerous occasions.

Luckily, this is not the story of one of those times.  Instead, I obsessed about this thrift store dresser for about 29 hours before I called my husband at work and asked if he’d go buy it if it was still there when he got of off work.  It was.
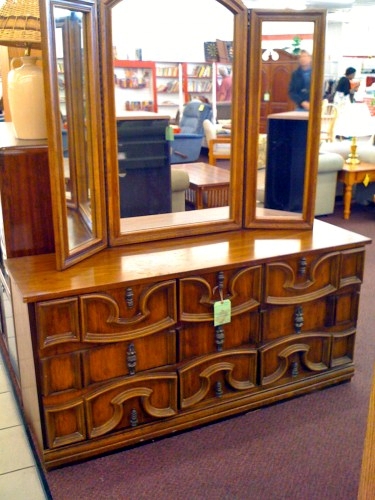
 

When we went to pick it up, we promptly donated the mirror back to the thrift store (I did not feel like I could repurpose it because of the way it was made) and brought the dresser back to our garage.  There it sat while I finished this dresser and these walls.

I would normally hand roll a huge piece of furniture like this, but for the sake of time (and laziness), I decided to spray paint it.  I used Kilz spray primer on a whim (which I learned I do not prefer over my beloved Zinsser spray primer), and then painted it with Krylon Classic Gray.  After it dried, I glazed it with my Ralph Lauren glaze tinted in Black Silk and applied 2 coats of wipe-on polyurethane.  I spray painted the original brass handles, lined the drawers with Contact paper, and moved the wavy dresser into the master bedroom.
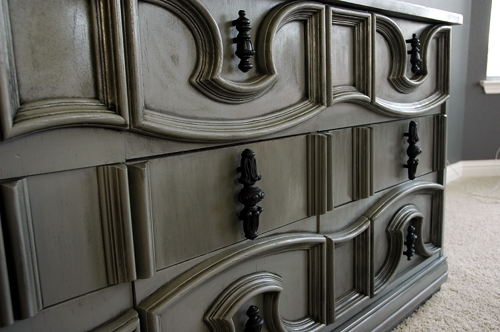
I get the greatest pleasure from seeing a thrift store cast-off become my new favorite piece of furniture.  I can’t believe I didn’t immediately claim it in the store by licking it or something.  That would have been pretty gross, huh?  Anyway, I’m glad no one else in those 29 hours we were apart saw it for the jewel that it was to become.
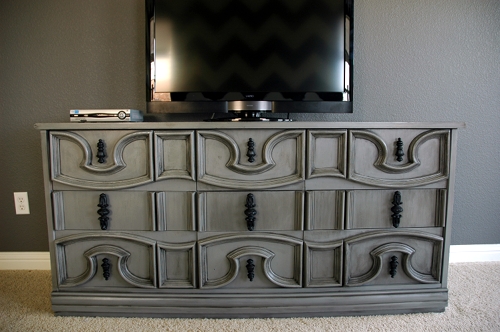
If you would have seen this dresser at the thrift store, would you have tried to fight me for it?

Joining Motivated Monday at Be Colorful.
Mastering the Master Bedroom {the Miss Matched Dresser}

by Lindsay Ballard on April 13, 2011 11,634 Comments

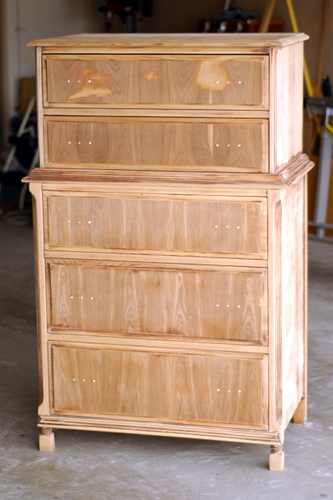
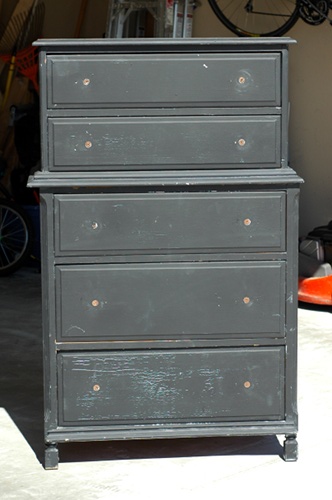
Once upon a time, there was a well-loved dresser who was destined for a new home.  My friend had gotten it from her mother, who had purchased it second hand.  The dresser was headed to a thrift store, but my friend asked if I would like it instead to practice some different refinishing techniques.  But, of course I would!

Once I had the dresser in my garage, I realized that she would be a beaut if my husband and I tightened it up.  Experiment?  No way!  This practice piece was going to find a new home in my master bedroom redo.

I sanded, and sanded, and sanded.  There were probably 3 different shades of paint, a few coats of primer, and the original varnish.  I spent about three days over different weekends trying to get down to the bare wood, since the paint was in such bad condition.  Luckily, I had a sweet little helper.

The paint eventually began peeling off in sheets – which was great for me, but is a testament as to why it’s so important to do the grunt work to properly prepare any furniture piece you are refinishing – you don’t want that to be YOUR hard work peeling off!  Once it began peeling, I was able to scrape it with a paint scraper and then run my sander over it with a medium grade sandpaper.

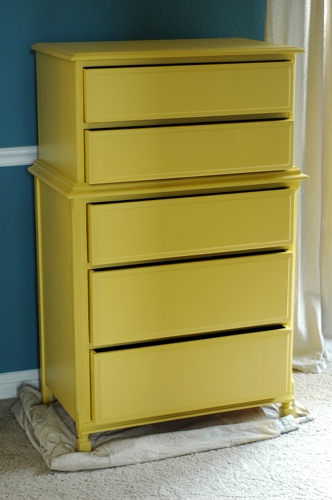
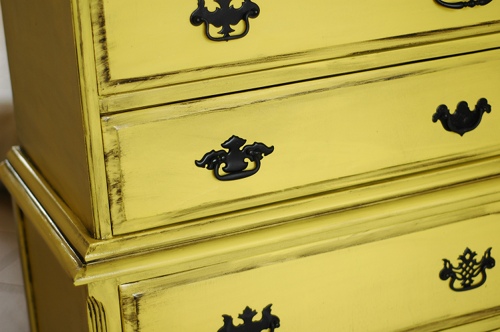
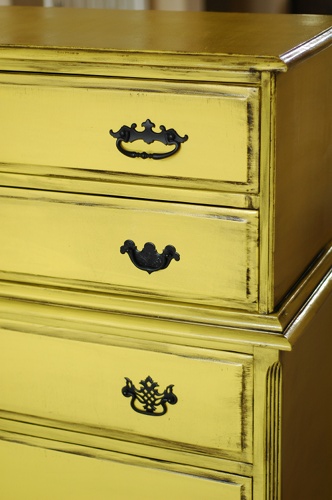
Using the techniques detailed in Mandie’s fantastic e-books on refinishing furniture, I primed and painted the dresser in (Behr paint tinted to) the Sherwin-Williams Decisive Yellow I previously shared with you as part of my inspiration.

I did try to use the Behr Ultra Plus paint and primer in one, but I had horrible results with it on bare wood.  I have heard great things about it, but after three coats, the wood was still sucking up the paint.  I would try it again on walls or previously painted wood, but never again on completely bare wood.  After priming it with Kilz and painting it with regular Behr paint, I couldn’t believe the difference in the results.

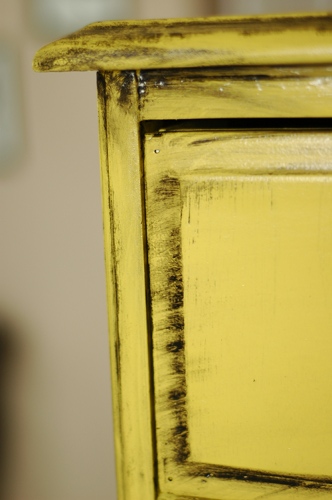
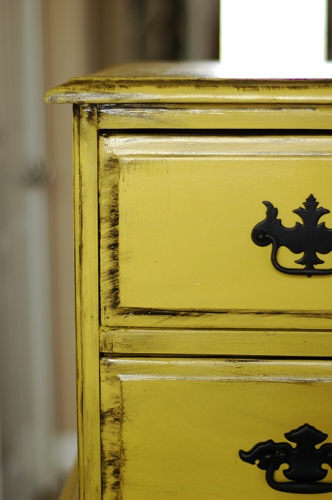
After the yellow paint was dry, I glazed it with Ralph Lauren glaze tinted to RL Black Silk.  This was my first attempt in glazing, and it went pretty well.  Again, I used Mandie’s glazing techniques from her e-book and also a little try and error myself.  As with any new technique, you should practice on a piece of wood before you work on your own piece.  I was a little heavy handed because I wanted it to look more “urban” and less “French-y”, but I’m very happy with the results.

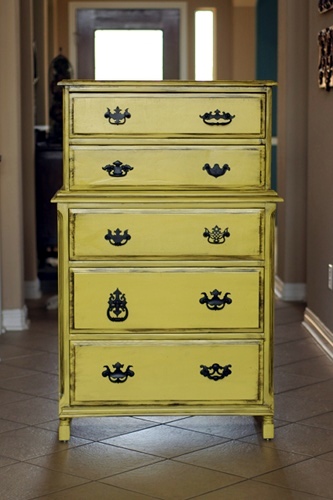
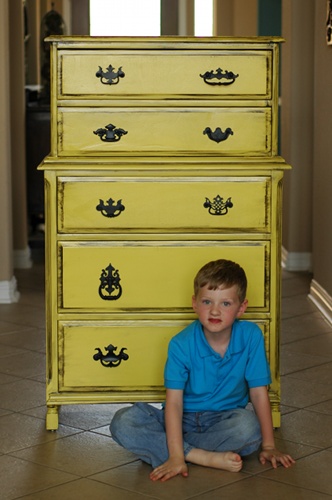
The last step was to add pulls to my dresser.  I bought an assortment of vintage pulls off of Etsy, cleaned of the tarnish with steel wool, and spray painted them flat black.  I love that every pull is different, and I have named her Miss Matched.

Sure, she’s the only part of my master bedroom redo actually completed, but you have to start somewhere!

And, now for a bunch of photos of my new beauty (which I know will drive my friend Emily crazy):

I would marry Miss Matched if I wasn’t already married.  Plus, I guess if I was married to a dresser, my first born wouldn’t be that darn cute.

P.S. I am an affiliate for Mandie’s e-books, so I get a couple of bucks when you buy one from my link.  In turn, I use those few bucks to buy more paint and glue sticks.  It’s a vicious cycle, but someone has to do it!

P.P.S. I linked this post up to Gina’s Transformation Thursday party over at The Shabby Chic Cottage.

« Previous Page
Next Page »
  • Email
  • Facebook
  • Instagram
  • Pinterest
  • Twitter

About Makely

Lindsay Ballard is a former college mascot turned political geek turned roller derby playing, DIY fanatic.

Lindsay chronicles her projects, design ideas, and lifestyle tips here at Makely, where she shares tutorials and inspiration. Her DIY designs are bold and graphic, while her spirit is fun and full of color.


Archives

Categories

PRIVACY POLICY
Copyright © 2009-2019 Makely School for Girls | All Rights Reserved | Posts may contain advertising content or affiliate links