Makely

Let's Make Life Awesome

  • Home
  • Decorating/DIY
    • Create Your Decor
    • Decorate Your Home
    • Paint Your Walls
    • Transform Your Furniture
  • Healthy Living
    • Essential Oils
    • Family Wellness
    • Household Care
  • Project Gallery
  • Contact
You are visiting: Home » Silhouette

Easy DIY Heat Embossed T-Shirt

by Lindsay Ballard on January 5, 2015 28 Comments

If it wasn’t evidenced enough by my post at the end of the year, I am currently in a state of obsession over heat embossing.  Until now, I had never embossed anything in my life.  I’m not a paper crafter, and I was under the impression that you could only use the fun embossing powders with stamps, ink and paper.  All I knew was that you saturated a rubber stamp using an embossing ink pad, stamped a piece of paper, sprinkled the embossing powder over the ink (much like glitter) and then used a heat source to make the powder stick and raise to the surface.

Once I discovered that you could use embossing powder without stamps, my brain went into overdrive. I literally lost sleep (See?  Obsession.) trying to figure out something different to emboss.  I decided that I really wanted to try it on a large scale on a t-shirt, but I couldn’t find any evidence through Google that you could use embossing powder on fabric.

I took that as a challenge.

Easy DIY Heat Embossed T-Shirt

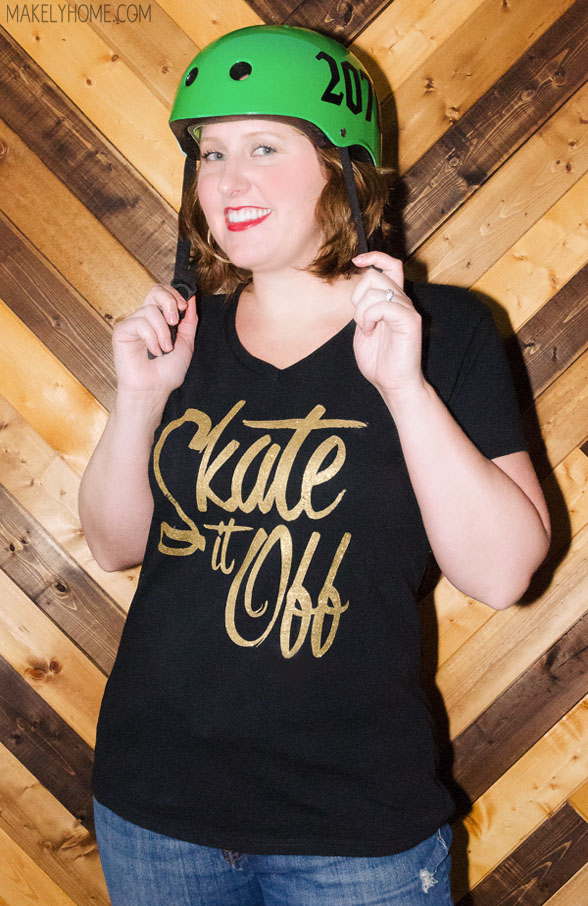
For my first project of the year, I am sharing with you how I came up with a method for heat embossing on fabric.  The result is incredible, and I am having a hard time shouting from the rooftops about how awesome this looks.  Since I’m equally obsessed (okay, slightly more obsessed) with roller derby than I am with heat embossing on fabric, I obviously had to meld the two into one project – a Skate It Off roller derby themed tee.  You can easily use this tutorial to make a shirt with any design on the front, though.  I may be making a few more with other messages or pictures.

…

Read More »

DIY Animal Crackers Bear Jar Planter

by Lindsay Ballard on June 10, 2014 1 Comment

My kids love animal crackers.  Don’t most kids?  When I was growing up, I always loved to eat the Barnum animal crackers that came in the zoo train box.  I mean, it had a string handle!  And do you remember when you could pop the perforated wheels out of the train so that it became a toy when you were finished with the cookies?  Memories, y’all.

Well, my kids don’t like that kind.  They prefer the Stauffer’s animal crackers, particularly the ones that come in the giant plastic bear jar (Amazon affiliate link).  I think they must like them because of the packaging – I still think that the Barnum crackers taste better than the Stauffer’s ones.  But, the jars are really cute, and I have been threatening to use them in a project for a while now.

Inspiration finally struck.

DIY Bear Planter from Plastic Animal Cracker Jar

Ha!  Isn’t he cute?  Super quirky. And he was so easy to put together.

…

Read More »

Next Page »
  • Email
  • Facebook
  • Instagram
  • Pinterest
  • Twitter

About Makely

Lindsay Ballard is a former college mascot turned political geek turned roller derby playing, DIY fanatic.

Lindsay chronicles her projects, design ideas, and lifestyle tips here at Makely, where she shares tutorials and inspiration. Her DIY designs are bold and graphic, while her spirit is fun and full of color.

Lindsay lives outside of Austin, Texas with her husband (Tom), children (Zack and Emma), and dogs (Duke and Jill). She plays roller derby for the Rockin' City Rollergirls out of Round Rock, Texas.


Archives

Categories

PRIVACY POLICY
Copyright © 2009-2019 Makely School for Girls | All Rights Reserved | Posts may contain advertising content or affiliate links