A few weeks ago, Kari of UCreate asked me to create a little project for her readers. Of course, I jumped at the chance. I mean, who wouldn’t?
With her permission, I’m sharing that project with you guys. I think (or hope!) you are going to like it, as it’s one of my favorite projects ever. EVER.
Enjoy! And be sure to visit UCreate for lots of great projects each day.
Hi, Guys! It’s Lindsay from Living With Lindsay! Kari has allowed me to take over her blog today to show a little project I created just for you. I sure hope I don’t break anything while I’m here. ::looks around sheepishly::
Anyway, just minutes before it was time to put my 3 year old down for his nap a few weeks ago, I came up with the idea of an etched glass silhouette mirror. Believe it or not, the entire project was finished before he woke up. Folks, you can do this one very quickly!
I’m really obsessed with silhouettes right now. In fact, as I was working on my new project, I realized that Jill’s adorable silhouette pillow from right here at U create may be the original source for my new obsession. I’m totally blaming her. No one’s profile is safe in my home – my dogs and cat have even sat for their profile photo session. I kid you not, but that’s a blog post for another time.
Supplies:
Mirror
Waxed paper
Contact paper (sticky shelf liner)
Etching cream and foam brush
Tape
Pencil
1. I began with a cheap framed mirror I found at a local thrift store. I was originally going to use it for another project but had a change of direction, so this mirror was just sitting in my craft room screaming to be used.

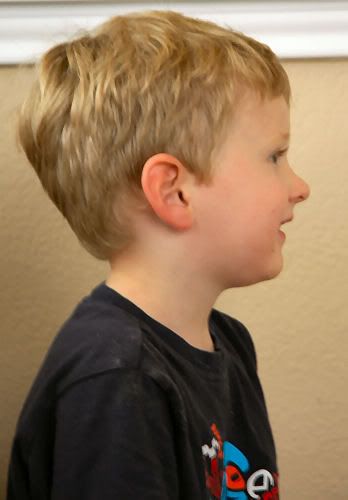
2. I took a photo of my son’s profile. It must have taken me 50 pictures to get this one. Little, wiggly 3 year-old boys don’t sit still for very long.
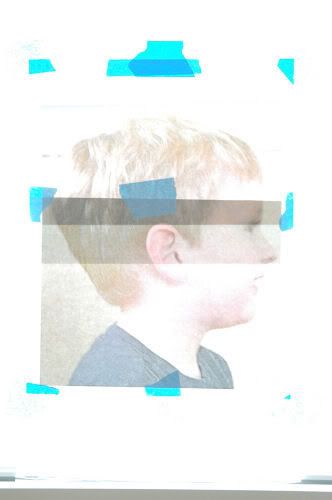
3. I printed out his photo so that it was the size I wanted on my mirror. It took a few attempts to make sure it was just the right size to fit in the mirror. Once printed, I taped it to a window and then taped a layer of waxed paper on top of it. Then, I traced the outline of his silhouette. I took the artistic liberty of smoothing over the cowlick on the back of his head so that it wouldn’t look like I didn’t comb his hair (Well, I didn’t comb it, or change his dirty shirt, but still).
4. I cut the shape out of the waxed paper and traced it onto the contact paper. Then, I cut out the negative of the image.

5. After removing the mirror’s frame, I applied the contact paper directly to the mirror, placing the cut out exactly where I wanted it to be etched, and smoothed the bubbles from the paper. I transferred some etching creme into a plastic bowl and used it to paint the cut out area with the foam brush.
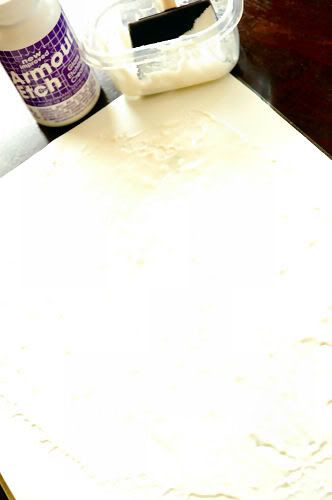
Make sure to apply the cream thickly and evenly. Allow it to sit for five minutes and then rinse the mirror off under running water. It’s hard not to think of the etched glass as painted glass, but don’t worry, it won’t run or smear. You can dry it with a towel and even use glass cleaner.
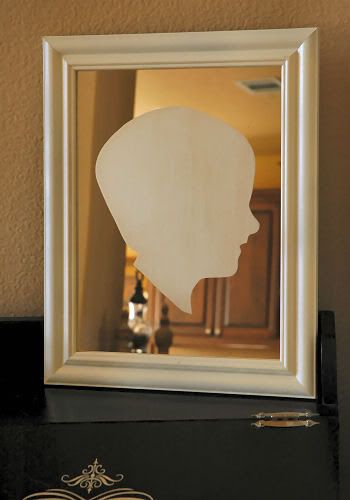
6. I spray painted the frame an antique white and put the mirror back in the frame.
P.S. I’m adding this to the “Get Your Craft On” party over at Today’s Creative Blog. Stop by and visit!

I have the PERFECT photo from my wedding to try this with. Thank you! Featuring you again…
http://tearinguphouses.blogspot.com
Kelly
This is such a cute project! Thanks again Lindsay with all of your wonderful help with me blog issues. Monica
Wow, I didn't even know they made etching cream! Now a flood of new projects are pouring into my head, thanks!
WOW!!! Neat project, Lindsay. 🙂 Love that sweet silhouette. 🙂
Great project!! Looking for old mirror now!!!
Great idea!!
Ruth
Adorable…another idea to file in an ever expanding file!!
Janell
Too funny. I just went out to get supplies to do the same thing this weekend! I saw somwthing similar on an old re-run of Martha and thought it would be good to try out.
Thanks for sharing the project! It came out great!
Very unique! Thanks for sharing a very personalized project – this would be a great gift.
Chelsea
What a cool way to personalize a mirror. Thanks for sharing it with us.
You are too smart! How very very lovely this is and I agree with Chelsea, a great gift idea. Hmmmmm, do I have a photo I can use? ~Martha
This is so cute! I love the silhouette trend, but combine it with mirrors and wow! Love this!
AH! I Love it! Thanks so much for sharing. I just found your blog recently and I think you are very inspiring!
What a great idea! I think this is one that I might try. Thanks!
debbie
You are so creative girl! It looks great!
~Kim
I've just awarded your blog the Honest Scrap award, check out my latest post for details!
Janell
Be sure to come by tonight around 9pm (Eastern time) for the announcement so you don't miss out. I promise-it good-really really good.
Cheri
Its So Very Cheri
Hi its stephanie from http://thewhisperingcreekhouse.blogspot.com/ I really love this idea because it could end up being an heirloom peice! thank you for sharing it with us and I think I will try this out some time!
You are crazy clever… fabulous tutorial !
Kate
This is so sweet!!
This is great!!!! I am going to try it.
Damn. This is almost as cool as our new beer glasses. And I'm beyond jealous of Zack's blackout curtains. You continue to impress me lady! (and thanks again for an awesome wedding present).
Hello! I stumbled upon this post from Tip Junkie. All I can say is “WOW!” This is such a great idea! I have decided to make my mother, mother in law, and sister in law these for Christmas. All together I will be making 8 of these! Can you tell me how much etching cream costs and if Wal-Mart perhaps has it? I am not close to a Hobby Lobby or crafts store unfortunatly. Can I find the contact paper there too? Thanks so much! I LOOOVE your blog!
thoughts on using this technique to personalize glasses/beer steins?
It works great! I actually made some beer steins for a wedding gift.
are they dishwasher safe? or would that make the etching come off?
Completely dishwasher safe – the etching won’t come off. It essentially scratches the glass where you put the etching cream, so there are no worries about the design getting messed up. It’s permanent.
WOW! this is even better than i thought!