Makely

Let's Make Life Awesome

  • Home
  • Decorating/DIY
    • Create Your Decor
    • Decorate Your Home
    • Paint Your Walls
    • Transform Your Furniture
  • Healthy Living
    • Essential Oils
    • Family Wellness
    • Household Care
  • Project Gallery
  • Contact
You are visiting: Home » Archives for Lindsay Ballard » Page 231

How to Create a Real Drum Shade Pendant Light

by Lindsay Ballard on September 22, 2011 1,918 Comments

What do you think of when you hear the word ‘drum’?  I’d assume that most people think of their kids loudly playing a drum kit in the garage, high school football halftime shows, or their favorite rock and roll band.

But, most people aren’t us, are they?  We DIYers and home decor obsessed people probably have a drum shade spring to mind instead.  Or, at least I do.

I’ve been rolling around the idea in my head for the past few months on combining the best of both versions of drums.  I’m glad that I let my mind wander down that path – it’s a lot of fun when I can dream up something pretty farfetched that ends up becoming reality.
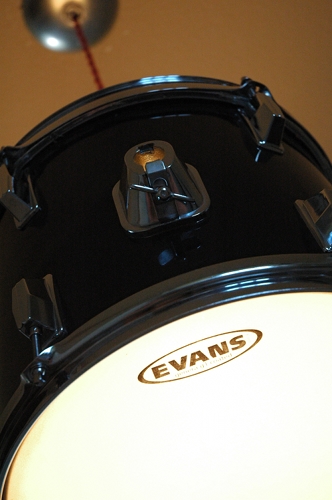
Creating this fixture was actually a pretty simple process once I figured out what to do.  I put together a tutorial so that you could do it, too.

DIY Drum Pendant Light

Materials Needed:

  • Used Tom drum
  • Short piece of scrap wood
  • 4 finishing nails
  • Drill
  • Jigsaw
  • Pendant light kit (I HIGHLY recommend the cloth cord kits from Shanell’s)
  • Scissors or X-Acto knife, if needed
  • Canopy

1.  I bought a used Tom drum off of Ebay for under $30 shipped. I’m sure I could have found a better deal at a thrift store or pawn shop around town, but I knew what I wanted and was willing to pay a little extra so that I didn’t have to drag the kids all over town. This Tom is 12 inches tall and 10 inches wide.  Any size will likely do – you’ll just want to make sure it will fit in your space.

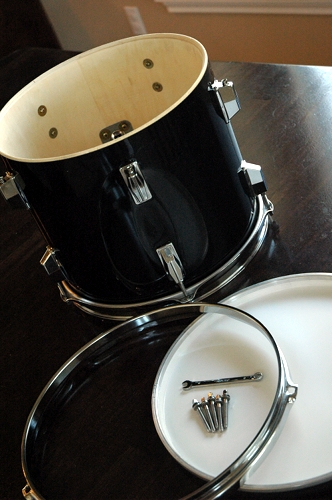
2.  I removed the top and bottom of the drum by unscrewing the screws that hold it together.  I was able to unscrew it with my fingers, but you may need a really small socket or “drum key.”  Please note, I know not one single thing about drums, and I’m sure the top, bottom and little screws have a name.  I’m going to just call them my own terms so that other non-musician DIYers, such as myself, can more easily understand the instructions. The top and bottom will separate from the chrome ring.
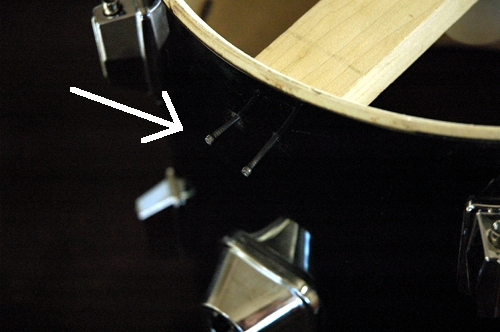
3.  I cut a piece of scrap wood so that it would fit tightly inside the drum without distorting its shape.  I didn’t curve the edges; I just cut it straight across.  On either side, I hammered in 2 finishing nails to hold it in place (drill small holes first to make it easier).  In the below photo, I hadn’t hammered them in all the way so that you could see them more easily in the photo.  Obviously, hammer them all the way in.  I colored the nail heads black with a Sharpie marker since my drum is black, but they are pretty well hidden by the chrome rings once you put the drum back together, so you might not have to worry about that.
4.  Once the strip of wood was in place, I needed to create a slot for my light fixture to thread through.  I drilled three holes that were roughly the diameter of the the piece I needed to thread.

I used my jigsaw to connect all three holes into one long slot.  The reason you need to do this is to be able to balance the drum.  There is a clamp on the side of a Tom that attaches it to a drum kit, and it creates more weight on one side of the drum.  The drum doesn’t hang straight from the center, so a slot gives you the ability to slide the fixture around to figure out its balance point.
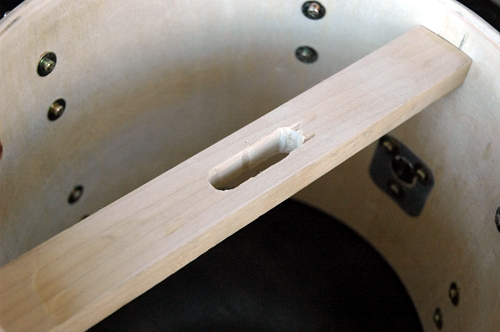
5.  Thread your fixture through the slot.  You can pick up a light kit at a home improvement store, which you will hang by a wire and chain.  OR, you can do what I did and use one of the Pendant Light Kits from Shandell’s.  Instead of having the ugly chain, these kits are made from cloth cord.  They come in several colors – red, gold, brown and putty – and in either nickel or brass finishes.  These kits are $29 each and I couldn’t speak more highly of them.  They definitely give a much more finished and vintage look to a fixture.
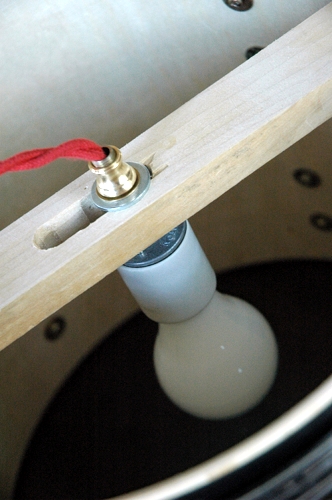
I have a 60-watt blub in the fixture, but that could vary by project.  You will need to test it on your own drum, but mine does not get warm to the touch at all, even when left on for many hours.

6.  Replace only the chrome rim on the top of your drum (where the light fixture is).  You may find that you need to cut (with scissors or an X-Acto knife) the little silver ring off of the what was then the bottom head (they part you don’t play) and put that under the chrome rim.  You’ll see what I mean when you start to put it back together – you want the top to be open, but you may need that silver ring as a spacer in between the drum and the rim.

Flip your drum over and attach the head (the part you actually drum) and rim to what is now the bottom of the drum.  You can just screw the screws back in with your fingers.

7.  Hardwire your new fixture to the ceiling.  You’ll want to buy a light canopy  to hide the wires.  I got mine at Home Depot and spray painted it chrome.

I hung my new drum pendant light in a small area of our entry way.  I could not possibly be more in love with its quirkiness and originality.  I bet you will be the only one in your neighborhood with this light fixture!
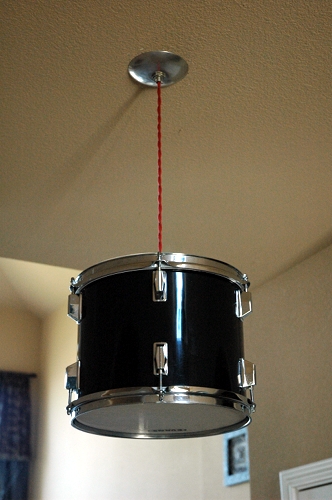
My favorite part about it is the amazing light it throws off at night.  There is an almost ethereal glow that comes through the drum head, and the light that shines on the ceiling really highlights the fixture.
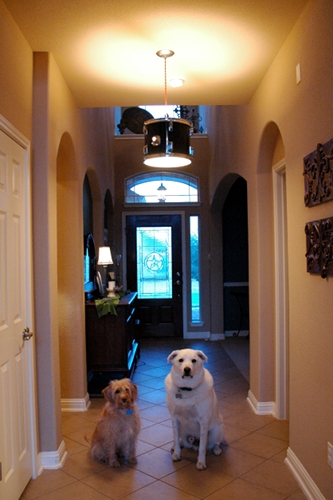
And yes, I totally bribed my dog boys with treats to sit right there.  I sure love those crazy mutts, even if their constant barking makes my head feel like I’m actually living in a drum!

So, what do you think?  Does the term drum shade have a whole new meaning for you now?

How to Stain Bare Wood

by Lindsay Ballard on September 19, 2011 3,277 Comments

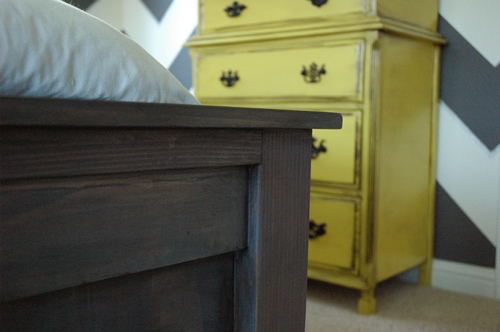
Until we built the new bed for our master bedroom, I had never stained a piece of furniture.  Between my dislike of most stain colors and my fear that I wouldn’t be able to correctly apply the stain, I just decided that paint had to be much easier.  After staining the entire bed, I still hold my belief that paint IS much easier to apply, but stain isn’t as scary as I had imagined.

I worked with the folks at my local Sherwin-Williams store to come up with a custom formula for gray stain.  Yes, they have a pre-formulated gray stain, but it is too blue for my liking.  It took the better part of a day for the SW gals to come up with the formula – I left them a sample piece of wood and I could tell that they mixed and re-mixed the stain about five times.  Eventually, we came up with the below custom formula.

Just for the record, a gallon was far too much for my bed.  I have enough stain left over to last me until the end of time.  I feel confident that one quart would have been more than sufficient.

I sanded our bed very well and used a tack cloth to remove any left over sawdust.  When using a soft wood, such as pine, you need to apply a wood conditioner before staining.  I applied Mixwax Pre-Stain Wood Conditioner with a white cloth in the direction of the wood grain.  I let it sit for just a few minutes, and then wiped off any excess with a dry cloth.  You have to apply your stain in about an hour after you’ve applied the wood conditioner, so you don’t want to do this step and then save the staining for another day.

There are a few ways to apply stain, and I feel like I practiced them all on scraps before starting on the bed.  You can apply it with a rag or a brush.  You can also let it sit for varying amounts of time – the longer it sits, the darker your wood will become (up to a point).

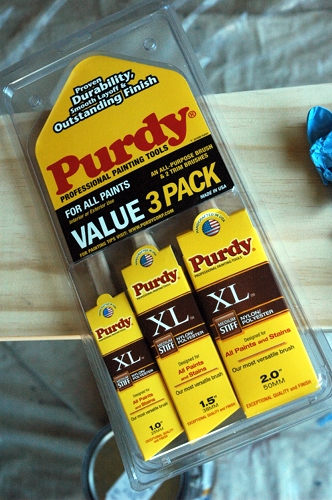
What worked best for me and this project was applying the stain with an excellent paint brush.  The folks at Purdy sent me a package of paint brushes to test out, and I decided that using them in a way I’ve never used a brush before (i.e. applying stain instead of paint) would be a great test of their ability.

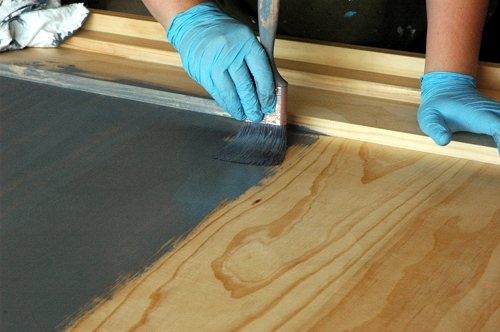
I dipped the 2-inch brush into the can of stain and just “painted” a section of the bed at a time.  I started with the back of the side rails and worked my way to the front of the headboard, so that I could make sure I was happy with my technique.  I just worked a small section at a time, and the Purdy brush worked flawlessly.  There were no dropped bristles or brush marks.  I always use Purdy brushes for my painting projects, and I’m glad to know they worked equally as well in stain.  The few dollars extra that the Purdy brushes cost are well worth it – just clean them well after each use and store them in the cardboard holders so the bristles don’t get damaged in between uses.

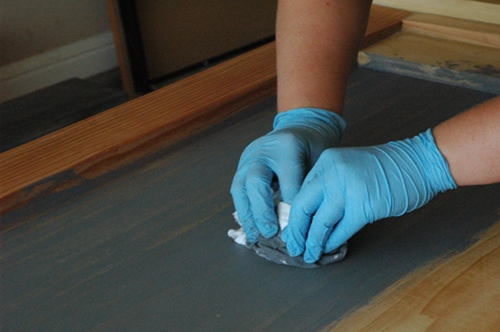
Now, here is where all your practicing really comes in handy.  This particular stain can instructed to let the stain sit on the wood for up to 30 minutes before wiping off.  In my climate (HOT and HUMID), that was far, far too long.  In fact, I decided that I would stain a section 3 x 3 foot section with my brush and then I’d wipe it off immediately with a soft cloth. I had to wipe pretty hard at that point to get enough stain off.   When I let the stain stand longer on my practice boards, it was far too opaque and I couldn’t see the wood grain.  If I wanted that look, I would have just painted!

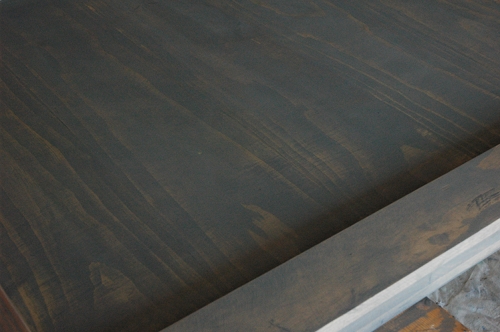
After hours of brushing and wiping, I finished staining the bed.  I was happy with the way the stain turned out, but I still felt it had a slight bluish tint.  I wanted a really neutral gray to coordinate with my dresser and walls.

To solve this problem, I turned to my best friend – Ralph Lauren glaze tinted to Black Silk.  I swear, this stuff solves all problems.  I painted it on in small sections with a cheapo brush (NOT a Purdy, because you basically ruin your brush trying to get the glaze into the imperfections in the wood) and wiped it with a soft cloth.  When the glaze dried, I applied 2 coats of Minwax Wipe On Poly.  The end result is just perfect for my room.

Do you have any questions about brushes, painting, staining, or color?  Ask my friend, Lisa!  😀  HGTV designer extraordinaire, Lisa LaPorta, is answering reader questions at Purdy’s You Can Save the Walls website.  If you ask a question, you can win dinner with her.  I promise, it would be the best dinner you’ve ever attended.

Have you ever stained a piece of furniture?

« Previous Page
Next Page »
  • Email
  • Facebook
  • Instagram
  • Pinterest
  • Twitter

About Makely

Lindsay Ballard is a former college mascot turned political geek turned roller derby playing, DIY fanatic.

Lindsay chronicles her projects, design ideas, and lifestyle tips here at Makely, where she shares tutorials and inspiration. Her DIY designs are bold and graphic, while her spirit is fun and full of color.


Archives

Categories

PRIVACY POLICY
Copyright © 2009-2019 Makely School for Girls | All Rights Reserved | Posts may contain advertising content or affiliate links