Sometimes when you hit the thrift stores, you really have to check out every inch of the place to score a great find. On a recent trip to Goodwill, I found this chair tucked underneath an old dining table.
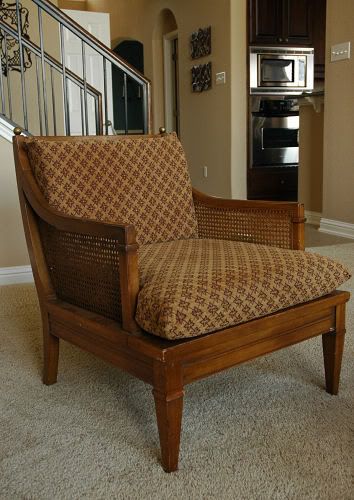
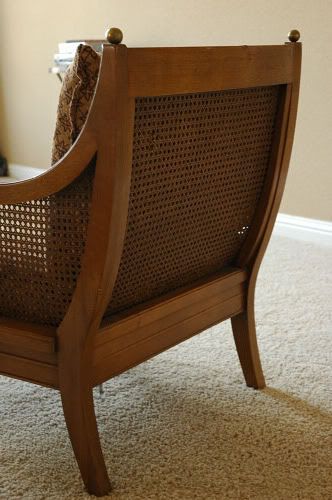
It was hidden out of sight, yet it was the treasure of the store. I immediately carried it to the checkout and paid for it just so no one else had the opportunity to touch it. Surprisingly enough, it was only $19.99. I was going to make it look like a million bucks.
I was lucky that this Drexel piece was in nearly perfect condition. I think it was manufactured in at least the mid-1960s (according to the label), so I wanted to replace the batting and fabric in the frame of the chair. I knew that all I would need to do was replace what was already there, so as I took it apart, I photographed each layer so I could remember exactly how it all went together. I’ll explain these steps in a bit.
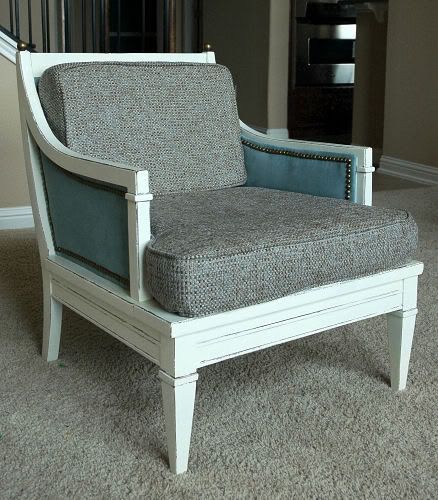
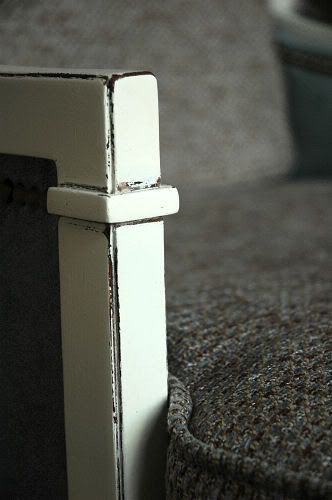
Next, I sanded the chair with 220 grit sandpaper and sprayed it with Dove White spray paint (I used the Krylon Fusion line, only because it was the only line that carried the color I wanted to use). I was so excited about the chair that I totally forgot to use primer (Um, yes. I’m that easily excitable.), so I had to use about 3 cans of spray paint. Dork.
After the paint was dry, I distressed the edges with a sanding block and applied two coats of rub-on poly. The poly really gave it a nice sheen and will protect my paint job.
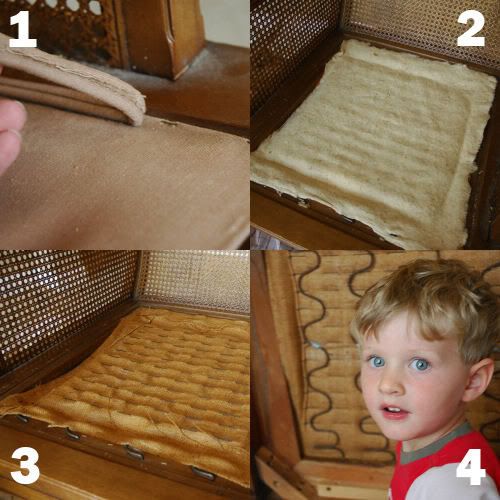
When the poly was dry, I replaced the pieces of the chair that I removed for painting. The bottom layer (3 in picture above) is a new layer of canvas with 18 gauge wire woven in it (to make it more sturdy when pressed against the springs). The middle layer (2) was a new layer of batting. The top layer (1) was a new layer of duck cloth. I simply stapled each layer in place with a staple gun and cleaned the springs on the bottom of the chair (4). Please, don’t shy away from doing tasks such as this when rehabbing furniture. It was very easy to do, and it made sure that years of dust and filth weren’t trapped in the chair.
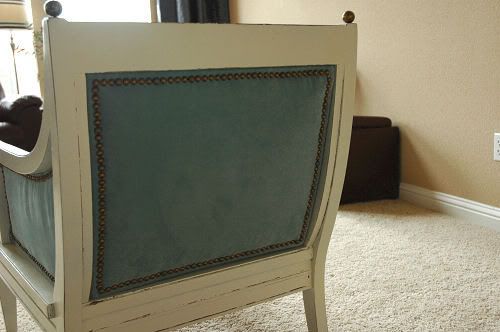
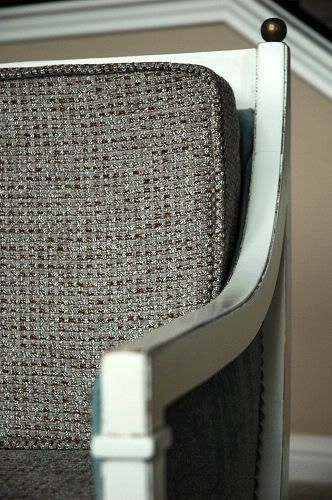
I wanted to cover the caning to make the chair look more upholstered, so I followed Kate’s excellent tutorial on the process over at Centsational Girl. I used matting board purchased at a craft store for the “bones” of the inserts (it’s pretty stiff, yet flexible enough to bend if you need to fit something like a curved chair back). I attached a thin layer of batting and a layer of light blue faux suede over the board with my glue gun and then hot glued them over the caning. I lined each section with the nailhead trim Kate recommended, and it worked great.
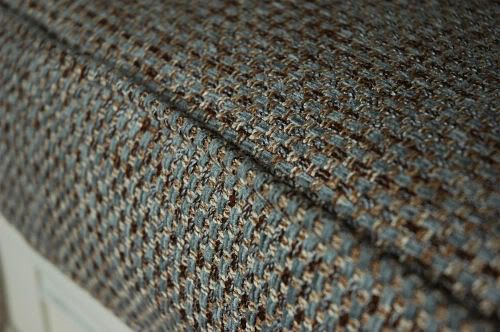
Now that the chair itself was finished, I turned my attention to the cushions. Luckily, the original cushion cover on the bottom cushion was underneath the fabric the previous owner used to (very lazily) recover the cushions, so I simply pulled it apart and used the pieces as a pattern to cut out my new fabric. I had to wing it on the back cushion since the original cover wasn’t there, but I think it turned out okay. Not perfect, but good enough. I won’t explain how I did it since both pieces have hidden zippers and piping covered in self-fabric. I’ll just say that 1): I totally rock for teaching myself how to insert the piping without instructions and 2:) if you ever need to insert a zipper in a cushion, follow this tutorial from Curbly (as it’s way easier than the other methods I’ve learned).
So now, my chair and the cushions were ready for their big reveal.
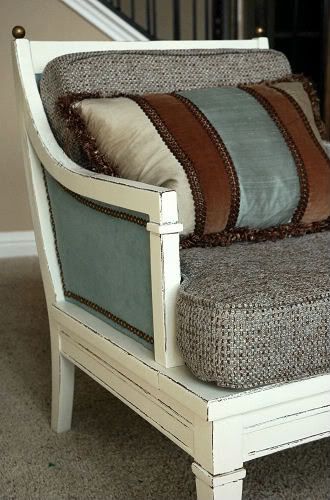
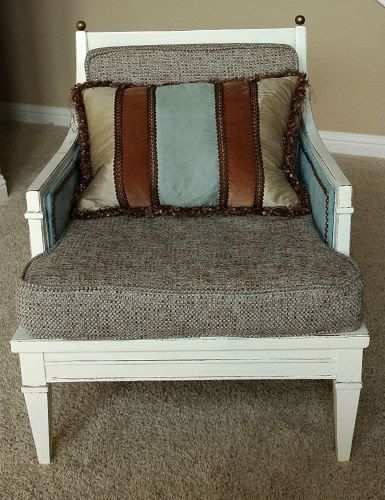
Not only did I like the shape of the pillow, but I loved that pillow itself on the chair. The colors are perfect. Score one for the home team! This is an example why it’s so important to try to use what you have before you make or buy something new.
I couldn’t be happier with my chair. It looks so elegant in my living room and adds much needed seating to the room where we spend most of our time. Here’s a little before and after, just because I pink puffy {heart} before and after shots.
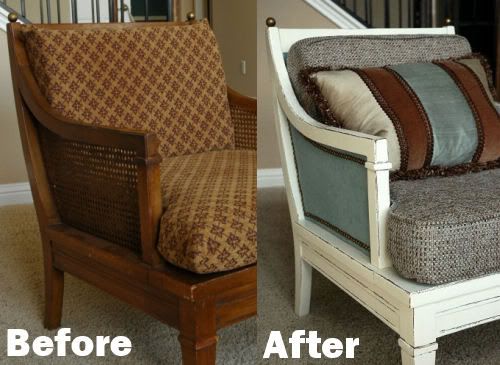
Don’t be afraid to try something new with an old piece of furniture. You just never know what kind of new life you may be able to breathe into it.
I’m adding this post to Kimba’s DIY Day Party at A Soft Place to Land. Visit ASPTL to see all of the projects!

